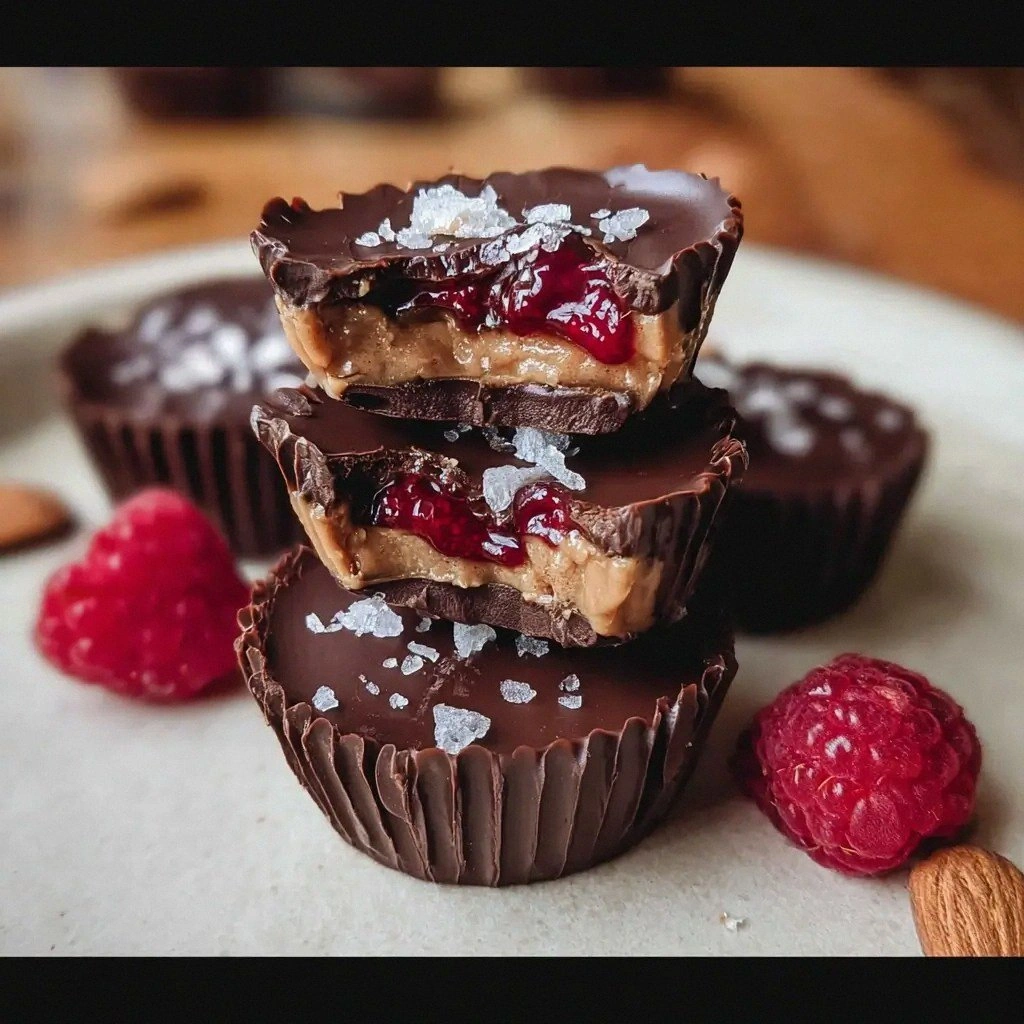
Picture this: a bright Saturday afternoon, the kitchen humming with the clatter of pots and pans, and you, armed with a handful of pantry staples, decide to tackle a dessert that feels as ambitious as it is indulgent. I was in the middle of a frantic attempt to rescue a batch of over‑baked cookies, when the thought hit me like a sudden gust of chocolate aroma—why not create a butter cup that marries the richness of chocolate with the nutty crunch of almonds, all wrapped in a raspberry swirl? The idea was simple, the outcome spectacular, and the result? A gluten‑free chocolate almond butter cup that feels like a secret indulgence you’d never expect to whip up at home.
The kitchen was a sensory kaleidoscope: the buttery scent of melted chocolate drifting from the stovetop, the faint citrus tang of fresh raspberries, the metallic click of the mixing spoon against the bowl. As the chocolate began to thicken, a faint crackle echoed, like the first note of a lullaby. The almond butter, with its silky texture, glistened under the kitchen light, while the raspberry puree added a pop of bright red that contrasted strikingly against the dark chocolate shell. Each ingredient seemed to whisper its role—cocoa powder adding depth, powdered sugar smoothing the bite, and a dash of vanilla tying the flavors together into a single, harmonious voice.
What sets this version apart isn’t just the combination of flavors, but the technique that turns a simple batter into a velvety, melt‑in‑your‑mouth experience. By tempering the chocolate just right and allowing the almond butter to reach a creamy consistency before encasing it, the cups develop a glossy finish that doesn’t crack or peel. The addition of a raspberry swirl doesn’t just add color; it introduces a subtle tartness that cuts through the sweetness, creating a balanced profile that feels both indulgent and refreshing. And the best part? Every ingredient is gluten‑free, so you can indulge without the worry of cross‑contamination.
I dare you to taste this and not go back for seconds. If you’ve ever struggled with butter cups that feel heavy or dry, you’re not alone—and I’ve got the fix. Stay with me here—this is worth it. Let me walk you through every single step, and by the end, you’ll wonder how you ever made it any other way.
What Makes This Version Stand Out
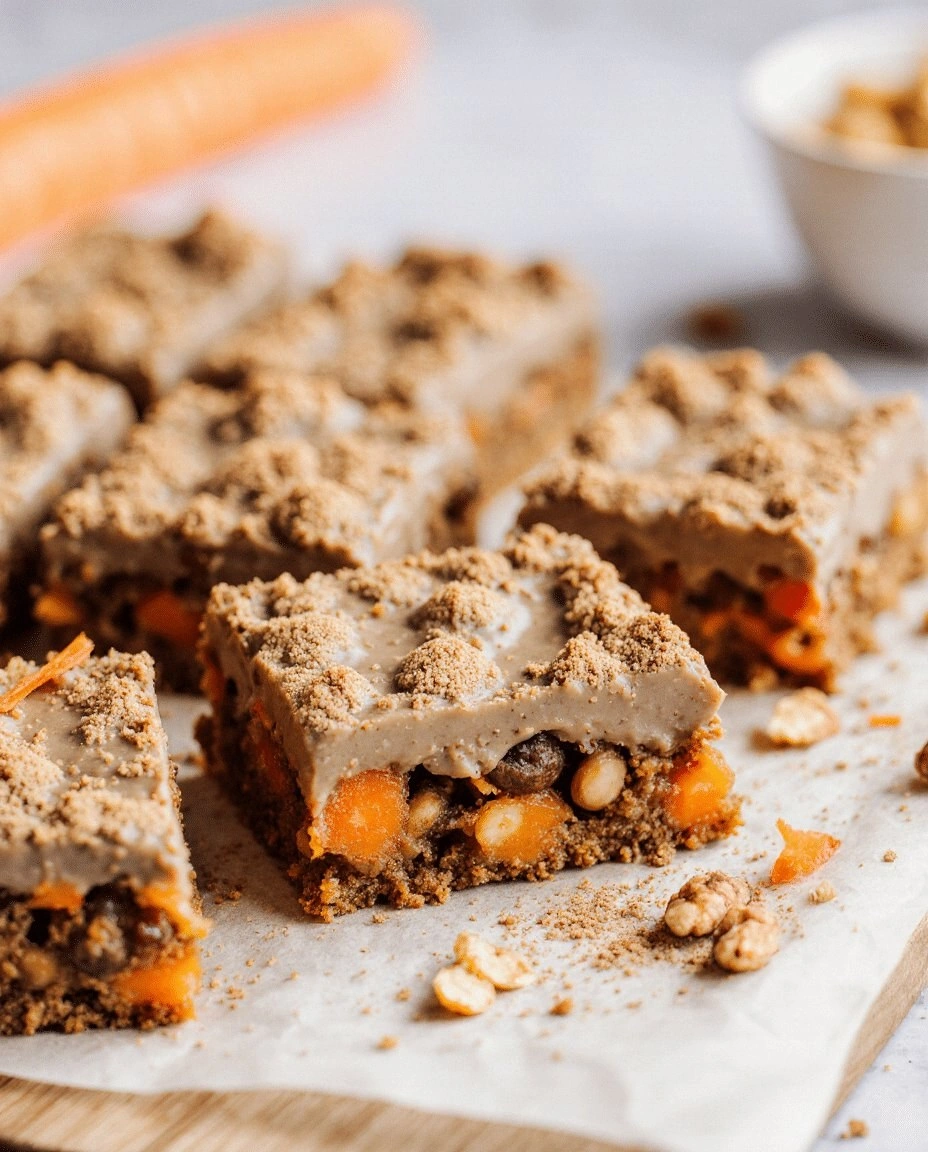
- Texture: The chocolate shell is crisp on the outside but melts to a silky interior, thanks to precise tempering. The almond butter filling is luxuriously smooth, almost like a spreadable mousse.
- Flavor: A subtle hint of citrus from fresh raspberries elevates the chocolate, while a dash of vanilla brings everything together.
- Gluten-Free: Every ingredient is naturally gluten-free, so the recipe is safe for celiac and gluten-sensitive diners without compromising taste.
- Make-Ahead: These cups freeze beautifully; just pop them out and let them thaw for a quick treat.
- Visual Appeal: The glossy chocolate coating and ruby raspberry swirl create a stunning contrast that looks as good as it tastes.
- Time Efficiency: From prep to bake, the entire process takes less than an hour, making it ideal for last‑minute dessert needs.
- Ingredient Quality: Using high‑quality almond butter and dark chocolate yields a depth of flavor that’s hard to beat.
Inside the Ingredient List
The Flavor Base
Unsalted butter is the foundation of the chocolate shell, providing a rich, buttery undertone that balances the cocoa’s bitterness. Powdered sugar is the sweetener that not only adds sweetness but also gives the shell a glossy finish once it sets. Cocoa powder is the star that delivers deep, dark chocolate notes. Vanilla extract is the subtle aromatizer that ties all the flavors together. A pinch of salt is essential; it amplifies the sweetness and brings out the depth of the chocolate.
The Texture Crew
Smooth almond butter is the heart of the filling. Its silky texture melts into the chocolate shell, creating a luscious mouthfeel. Fresh raspberries, pureed, add a bright burst of juiciness and a hint of tartness that cuts through the sweetness. Honey is the natural sweetener that gives the filling a velvety sheen and a gentle floral note. Chocolate chips, sprinkled on top, provide a crunchy contrast and a final chocolate hit.
The Unexpected Star
Raspberry puree is the unexpected star that elevates this recipe beyond a typical butter cup. Its bright red hue and tart flavor create a striking visual contrast against the dark chocolate shell, while its natural pectin adds a subtle thickness that keeps the filling from sliding out of the cup. When combined with almond butter, the raspberry introduces a complex flavor profile that feels both fruity and nutty.
The Final Flourish
A splash of lemon zest can be added for a citrusy brightness that lifts the overall flavor profile. A dusting of almond flour on the rim of each cup before filling helps prevent sticking and adds a delicate nutty aroma. These final touches elevate the simple butter cup into a refined, restaurant‑style dessert.
Everything's prepped? Good. Let's get into the real action.
The Method — Step by Step
- Begin by melting the butter in a medium saucepan over low heat. Stir constantly until it’s completely liquefied. This creates a base that will carry the powdered sugar and cocoa into a smooth batter. The aroma of butter rising should feel like a promise of decadence.
- Remove the pan from the heat and whisk in the powdered sugar, cocoa powder, vanilla extract, and a pinch of salt. Mix until the batter is glossy and free of lumps. At this point, the mixture should feel silky to the touch, like a velvety sauce ready to coat the chocolate shell.
- Let the chocolate mixture cool to room temperature. This is the moment of truth—if it’s still hot, it will melt the almond butter filling. If you’re short on time, place the mixture in the fridge for 10 minutes to expedite cooling. The consistency should be thick enough to hold its shape when spooned.
- While the chocolate cools, prepare the almond butter filling. In a small bowl, combine the almond butter, raspberry puree, and honey. Mix until fully blended and smooth. The filling should be pourable but thick enough to stay inside the cup when poured.
- Line a muffin tin with paper liners. Spoon a tablespoon of the chocolate mixture into each liner, swirling it around so that the bottom and sides are evenly coated. Let the chocolate set for about 5 minutes—watch out: if it starts to brown, it’s overcooked and will crack when the filling is added.
- Once the chocolate shells are firm, carefully pour the almond butter filling into each cup, filling about three‑quarters full. Gently tap the tin on the counter to settle the filling and eliminate air pockets. The filling should look glossy and slightly domed, ready to be topped.
- Top each cup with a drizzle of the remaining chocolate mixture, creating a dome that will seal the filling inside. Use a small spoon or piping bag for precision. The top should be smooth and slightly glossy, giving the cups a polished finish.
- Place the muffin tin in the refrigerator for at least 30 minutes, or until the chocolate shells are fully set and the filling is firm. This resting period ensures a clean bite and prevents the cups from becoming sticky.
- After chilling, remove the cups from the tin and serve immediately, or store in an airtight container for up to 3 days. If you plan to serve later, let them sit at room temperature for 10 minutes to soften before cutting.
That's it — you did it. But hold on, I've got a few more tricks that'll take this to another level.
Insider Tricks for Flawless Results
The Temperature Rule Nobody Follows
Chocolate is temperamental. If the mixture is too hot, it will seize; if too cold, it will be brittle. Aim for 88‑90°F (31‑32°C) when adding the chocolate topping. Use a kitchen thermometer to ensure precision. A friend once tried skipping this step and the cups ended up with a cracked, dull finish. Don’t make that mistake.
Why Your Nose Knows Best
Smell is the secret judge of sweetness. As the chocolate cools, notice the deep, nutty aroma that emerges. If it still smells like raw cocoa, give it a few more minutes. Your nose will tell you when it’s just right, and you’ll avoid the dreaded “over‑baked” taste.
The 5‑Minute Rest That Changes Everything
After filling, let the cups rest for 5 minutes before refrigerating. This short pause allows the chocolate to set slightly, forming a tighter seal around the almond butter. It also lets the flavors meld, creating a harmonious bite. I’ve seen many people rush straight to the fridge and end up with cups that split when removed.
The Right Spoon for the Job
A small, offset spatula or a piping bag gives you control over the amount of filling you pour. This precision ensures each cup has the same amount of almond butter, avoiding uneven texture. A friend once used a wide spoon and ended up with cups that were half full and others that were overflowing. Lesson learned.
The Secret to a Glossy Finish
Before the final chocolate drizzle, lightly mist the tops with a fine spray of water. This creates a micro‑mist that, when combined with the chocolate, forms a glossy sheen that looks like a glass of chocolate. It’s a simple trick that elevates the presentation dramatically.
Creative Twists and Variations
This recipe is a playground. Here are some of my favorite ways to switch things up:
Dark Chocolate & Mint Fusion
Swap the vanilla extract for a teaspoon of peppermint extract and add a few drops of green food coloring to the chocolate shell. The minty undertone pairs wonderfully with the almond butter, creating a refreshing contrast. Perfect for spring celebrations.
Caramelized Banana Layer
Replace the raspberry puree with a thin layer of caramelized banana puree. The natural sweetness and buttery flavor of the banana complement the almond butter, while the chocolate shell adds a rich finish. Ideal for a brunch dessert.
Sea Salt & Caramel Crunch
Add a sprinkle of flaky sea salt on top of the chocolate drizzle. The salt enhances the chocolate’s depth, and a few caramel chips inside the cup add a delightful crunch. This variation is a crowd‑pleaser at parties.
Almond & Coconut Surprise
Incorporate shredded coconut into the almond butter filling. The coconut adds a tropical note and a pleasant texture contrast. The chocolate shell remains unchanged, providing a familiar base for the new flavor.
Espresso‑Infused Delight
Add a tablespoon of finely ground espresso to the chocolate mixture. The coffee undertone deepens the chocolate flavor and pairs beautifully with the almond butter. Serve with a dusting of cocoa powder for an extra espresso kick.
Berry Medley Surprise
Blend a mix of fresh blueberries and strawberries into the raspberry puree. The berry medley offers a complex fruit profile that balances the richness of the chocolate. The visual appeal is enhanced by the varied berry colors.
Storing and Bringing It Back to Life
Fridge Storage
Store the finished cups in an airtight container in the refrigerator for up to 3 days. The chocolate shell will stay firm, while the almond butter filling remains creamy. When ready to serve, let them sit at room temperature for 10 minutes to soften slightly.
Freezer Friendly
For longer storage, place the cups in a freezer bag, removing as much air as possible. Freeze for up to 2 months. When you’re ready to enjoy, thaw overnight in the fridge, then allow them to come to room temperature before serving.
Best Reheating Method
If your cups feel a bit stiff after refrigeration, warm them gently in the microwave for 10 seconds. Add a tiny splash of water before reheating to create steam, which helps the almond butter re‑soften without melting the chocolate shell. This trick ensures a silky mouthfeel.