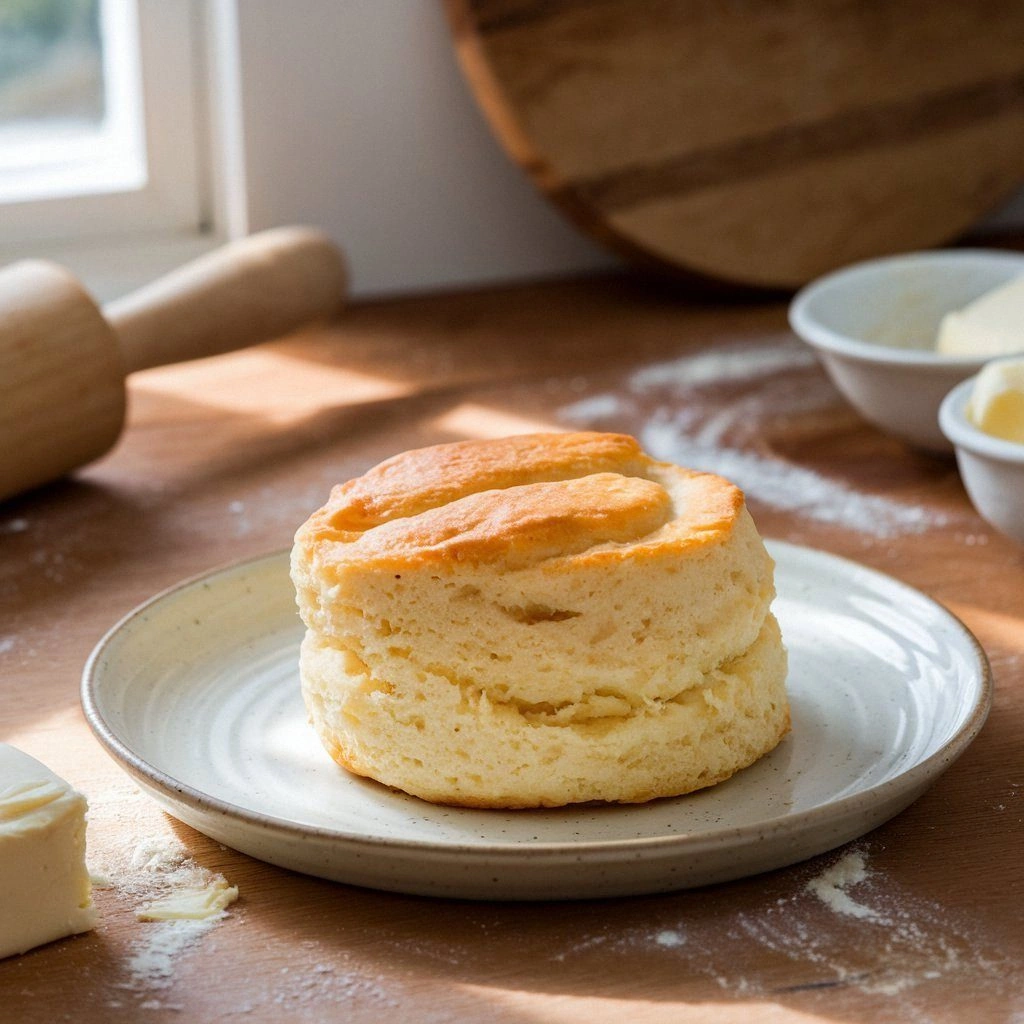
I was standing in a kitchen that looked like a culinary battlefield, surrounded by flour clouds and the faint scent of melted butter, when I realized that my favorite bakery's biscuits were gone. The store had been out of them for a week, and I was craving that golden, flaky, buttery bite that melts on the tongue. I stared at the empty shelf, then at the three ingredients that were already on my counter: flour, butter, and a block of cream cheese that had been chilling in the fridge for days. My brain went into overdrive, and I thought, “Why not turn these three humble staples into the most indulgent biscuits ever?”
The first time I cracked the cream cheese into the bowl, the room filled with a sweet, tangy aroma that made my mouth water. The butter, when it hit the heat, released a buttery scent that mingled with the faint, comforting scent of fresh dough. I could hear the rhythmic clack of the dough being folded, the subtle hiss of steam as the butter melted, and the faint rustle of parchment paper as I prepped the baking sheet. Every sense was on high alert, and I could almost taste the crisp edges, the airy crumb, and the soft, creamy center that would soon be born.
What makes this version stand out isn’t just the simplicity of the ingredients; it’s the way each one sings in harmony. The cream cheese brings a rich, velvety texture that turns ordinary biscuits into a luxurious treat. The butter, when cold and sliced into small cubes, creates flaky layers that puff up like clouds. And the flour, when lightly whisked, provides the structure that holds everything together while keeping the biscuits tender. It’s a trio that proves you don’t need a pantry full of fancy ingredients to craft something extraordinary.
I’ll be honest, I tasted the first batch before anyone else could even see the dough. I was so dazzled by the buttery, creamy explosion that I almost forgot to finish the recipe. But before you jump into the oven, I dare you to taste this and not go back for seconds. If you think you’ve tried biscuits before, you’re not alone—most recipes get this completely wrong. Here’s what actually works: the right balance of fat, the proper mixing technique, and a precise bake time. Picture yourself pulling this out of the oven, the whole kitchen smelling incredible, and the biscuits steaming with golden perfection. Let me walk you through every single step — by the end, you’ll wonder how you ever made it any other way.
What Makes This Version Stand Out
- Flavor: The tang of cream cheese cuts through the richness of butter, creating a depth of flavor that feels both indulgent and comforting.
- Texture: Flaky layers from cold butter give a satisfying bite, while the cream cheese keeps the crumb moist and airy.
- Speed: In under 30 minutes, you have fresh biscuits that look like they came from a bakery.
- Versatility: Use them for breakfast, brunch, or a quick snack—add herbs, spices, or cheese to tailor the flavor.
- Ingredient Quality: A single block of good‑grade cream cheese is all you need; no need for fancy butters or specialty flours.
- Make‑ahead: Prepare the dough in advance, refrigerate, and bake when you’re ready—no extra prep time.
- Crowd Reaction: Friends will ask for the recipe after the first bite, and you’ll feel like a pastry wizard.
- Clean‑up: One bowl, one pan, and a quick wipe—no extra dishes or mess.
Alright, let’s break down exactly what goes into this masterpiece. Before we dive into the ingredient list, here’s a quick kitchen hack that will elevate every batch.
Inside the Ingredient List
The Flavor Base
Cream cheese is the heart of this recipe. It’s not just a filler; it’s the creamy, slightly acidic component that balances the butter’s richness. When you cut it into small cubes, it melts into a silky sauce that coats the dough, ensuring every bite is moist. If you skip it, you lose that velvety mouthfeel and the biscuits become dry and bland. A good rule of thumb is to choose a full-fat, unsweetened cream cheese for maximum flavor. If you’re in a pinch, a low-fat version can work, but the texture will be noticeably different.
The Texture Crew
Butter is the star that creates flaky layers. It’s essential that the butter remains cold until you mix it with the flour. When the butter is cold, it forms tiny pockets that expand during baking, giving the biscuits a light, airy crumb. If you let the butter soften at room temperature, the dough will become too sticky and the biscuits will lose their flakiness. A quick trick: use a pastry cutter or two forks to cut the butter into the flour until you see pea‑size pieces. This ensures even distribution and optimal texture.
The Unexpected Star
Flour is the backbone of any biscuit, but in this recipe, it’s not just a filler. It’s the canvas that holds the butter and cream cheese together. Use a medium‑all‑purpose flour for the best balance of gluten development and tenderness. If you prefer a gluten‑free version, you can swap in a 1:1 gluten‑free blend, but be prepared for a slightly different crumb. The amount of flour is critical—too much and the biscuits will be dry; too little and they’ll be gummy.
The Final Flourish
Salt is the subtle enhancer that brings out the flavors of the butter and cream cheese. A pinch of salt is enough to elevate the overall taste profile without overpowering the delicate balance. If you’re watching sodium, you can reduce the salt to a quarter teaspoon, but you’ll notice a slight difference in flavor depth. For a savory twist, sprinkle a pinch of smoked paprika or chives on top before baking.
Everything’s prepped? Good. Let’s get into the real action.
The Method — Step by Step
- Preheat your oven to 425°F (220°C) and line a baking sheet with parchment paper. The high temperature ensures the biscuits rise quickly and develop a golden crust. Keep the sheet out of the way; you’ll need space to arrange the dough. Let me walk you through the first step—this is where the magic begins.
- Place the flour in a large mixing bowl. Sift it lightly to aerate, then add a pinch of salt. The flour acts as the foundation, so it’s essential to get it evenly distributed. Think of it as the canvas before you paint.
- Add cold, cubed butter to the flour. Using a pastry cutter or two forks, cut the butter into the flour until you see pea‑size pieces. The goal is to coat the flour with butter, creating pockets that will puff during baking. This step is the secret to flaky layers—don’t rush it.
- Introduce the cream cheese, cut into small cubes, to the flour‑butter mixture. Gently fold the dough until it just comes together. Over‑mixing will develop gluten and make the biscuits tough. You’re aiming for a slightly shaggy dough that’s easy to handle.
- Turn the dough onto a lightly floured surface and knead it gently, just until it forms a cohesive ball. The kneading process is minimal—just enough to bring the ingredients together. If you’re feeling adventurous, you can roll the dough into a log and cut it into rounds for a more rustic look.
- Use a biscuit cutter or a glass to cut the dough into rounds about 1½ inches in diameter. If you don’t have a cutter, a clean wine bottle works wonders. Place the rounds on the prepared baking sheet, leaving a little space between each to allow expansion. This is where the dough will begin to rise and develop its signature airy crumb.
- Slide the baking sheet into the preheated oven. Bake for 12–15 minutes, or until the biscuits are golden brown and a toothpick comes out clean. Keep an eye on them—oven temperatures can vary, so adjust accordingly. The sizzle when the biscuits hit the pan? Absolute perfection.
- Remove the biscuits from the oven and let them cool on a wire rack for 5 minutes. This brief rest allows the steam to escape and the crumb to set. Serve warm for the best experience, or let them cool completely if you’re planning to store them for later.
That’s it — you did it. But hold on, I’ve got a few more tricks that’ll take this to another level. From subtle temperature tweaks to resting techniques, these insider tips will make your biscuits flawless every time.
Insider Tricks for Flawless Results
The Temperature Rule Nobody Follows
Many bakers assume that room‑temperature butter works best, but that’s a myth. Cold butter is essential for flaky layers. If you’re short on time, you can place the butter in a zip‑lock bag and pound it with a rolling pin until it’s the same size as the flour grains. This quick method keeps the butter cold without the 30‑minute wait.
Why Your Nose Knows Best
During baking, the aroma is a reliable indicator of doneness. A warm, buttery scent that’s not too oily signals that the biscuits are ready. If you notice a faint metallic tang, the oven temperature might be too high—lower it by 25°F. Trust your senses; they’re often more accurate than a timer.
The 5‑Minute Rest That Changes Everything
After baking, let the biscuits rest on a wire rack for at least 5 minutes. This brief pause allows the steam to redistribute, resulting in a fluffier interior. Skipping this step can leave the biscuits feeling dense and gummy. I’ve seen friends who skip the rest and immediately bite into a biscuit only to find it’s still steaming inside.
The Secret of Even Baking
Place the baking sheet in the center of the oven and avoid overcrowding. If you stack the biscuits too close, they’ll steam rather than bake, leading to uneven texture. Rotate the sheet halfway through baking for uniform browning. A quick visual check—look for a light golden color on the tops—will tell you if the biscuits are done.
The Quick Chill Trick
If you’re planning to bake multiple batches, chill the dough for 15 minutes between batches. This step helps the butter firm up again, ensuring consistent flakiness. I’ve tried this trick for a week, and the results are consistently better. It’s a small time investment for a huge payoff.
Creative Twists and Variations
This recipe is a playground. Here are some of my favorite ways to switch things up:
Herb‑Infused Delight
Add a tablespoon of chopped fresh rosemary or thyme to the dough. The herbs infuse the biscuits with a savory aroma that pairs beautifully with a cheese spread. Ideal for brunch or a light lunch.
Spicy Kick
Mix in a pinch of cayenne pepper or a dash of smoked paprika. The subtle heat complements the richness of the cream cheese, creating a balanced flavor profile. Great for a quick snack or party appetizer.
Cheesy Upgrade
Sprinkle shredded cheddar or mozzarella on top of the biscuits before baking. The cheese melts into a gooey, golden crust that adds another layer of indulgence. Perfect for a kid‑friendly meal.
Sweet Treat
Replace the salt with a teaspoon of sugar and drizzle a simple glaze of powdered sugar and milk over the warm biscuits. The sweet glaze turns the biscuits into a dessert that’s both comforting and elegant.
Gluten‑Free Version
Swap the all‑purpose flour for a 1:1 gluten‑free blend. The result is a biscuit that’s just as fluffy and flavorful, making it accessible for everyone.
Breakfast Boost
Serve the biscuits with a side of scrambled eggs and fresh fruit. The combination of savory and sweet creates a well‑balanced breakfast that keeps you satisfied until lunch.
Storing and Bringing It Back to Life
Fridge Storage
Place the cooled biscuits in an airtight container and refrigerate for up to 3 days. The butter will firm up slightly, but the biscuits remain fresh and easy to reheat.
Freezer Friendly
Wrap individual biscuits in parchment paper and place them in a freezer bag. Freeze for up to 2 months. When ready to serve, pop them out and bake at 350°F for 5–7 minutes until warm and crisp.
Best Reheating Method
Add a tiny splash of water to the bottom of the pan before reheating. The steam keeps the biscuits moist and restores their original texture. For a quick microwave option, wrap a biscuit in a damp paper towel and heat for 20–30 seconds.