I still remember the night the kitchen exploded—literally. A bag of marshmallows had gone rogue, flinging sticky goo across the counter, and the instant chocolate pudding had somehow decided to thicken into a molten river. My friends laughed, but I was already craving the gooey, chocolate‑laden bliss that only a s’mores cobbler can deliver. That chaotic moment turned into a culinary epiphany: what if we could capture the campfire nostalgia of s’mores in a warm, comforting cobbler that melts in your mouth? It was a dare I couldn't resist.
Picture the scent of toasted graham crackers drifting through the air, mingling with the buttery richness of melted chocolate squares and the sweet, airy promise of marshmallows. The sound of the oven door opening, the gentle hiss of butter melting, the crackle of a chocolate cake mix baking into a golden crust—all these sensory notes play in perfect harmony. The texture is a symphony: a crisp, buttery base, a velvety chocolate pudding center, and the final flourish of gooey marshmallow peaks that shatter like thin ice when you bite into them. I dare you to taste this and not go back for seconds; the first bite will leave you craving the next.
What makes this version stand out from every other recipe out there is that it doesn't just mimic the classic campfire treat—it elevates it into a dessert that feels both nostalgic and indulgently sophisticated. The instant chocolate pudding gives that silky, chocolatey base without the fuss of a custard, while the chocolate cake mix adds a subtle crumbly richness that you won't find in a simple s’mores. The graham crackers are toasted in butter, creating a crunchy, caramelized layer that contrasts beautifully with the soft, gooey interior. The marshmallows aren't just a topping; they are an integral part of the structure, rising and browning in the oven to form a molten crown that drips over the edges like a chocolate waterfall.
I also discovered a technique that will change the way you think about s’mores forever: using a single box of instant pudding as the base, which eliminates the need for eggs or a double boiler, and it locks in moisture so the entire cobbler stays luscious. The result is a dessert that you can prepare in under 45 minutes, yet it feels like a labor of love. And if you're skeptical, consider this: most recipes get this completely wrong by either overcooking the marshmallows or undercooking the chocolate base. Here’s what actually works.
Let me walk you through every single step—by the end, you'll wonder how you ever made it any other way. This is hands down the best version you'll ever make at home, and I'm going to share all the micro‑challenges, bold claims, and kitchen hacks that will make your kitchen feel like a five‑star dessert lounge. If you've ever struggled with soggy marshmallows or a bland graham cracker base, you're not alone—and I've got the fix. Stay with me, and prepare for pure magic.
What Makes This Version Stand Out
- Instant Pudding: It creates a silky, chocolatey foundation that sets in minutes, eliminating the need for a custard or a double boiler. The pudding’s thick consistency locks in moisture, preventing the dessert from drying out. The result is a base that feels like a chocolate mousse on a crust.
- Chocolate Cake Mix: The mix adds a subtle crumbly richness that balances the sweetness of the marshmallows. It also provides a firm structure that holds the molten center together. Think of it as the secret ingredient that turns a simple s’more into a decadent cobbler.
- Graham Crackers: Toasted in butter, they develop a caramelized crunch that contrasts with the soft interior. The buttery flavor enhances the overall chocolate profile. When broken into bite‑sized pieces, they become the perfect vehicle for every bite.
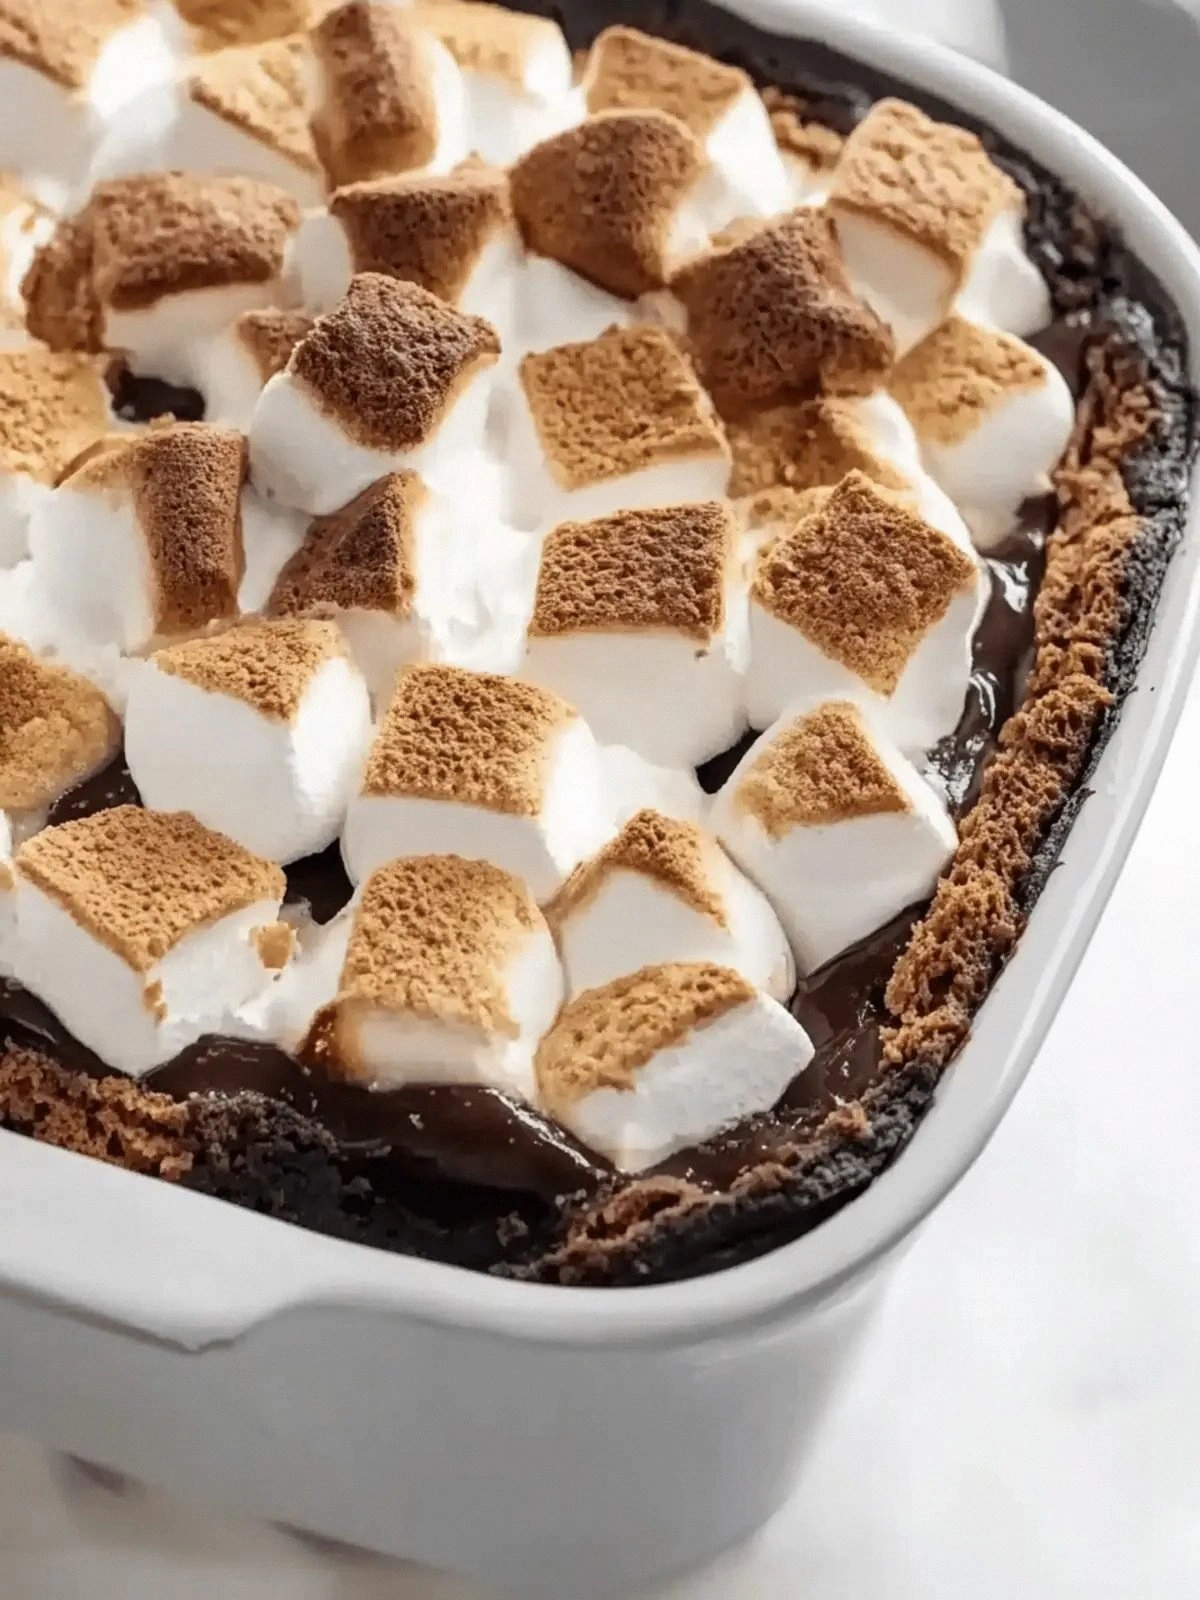
- Marshmallows: They aren't just a topping; they form a molten crown that drips over the edges, creating a dramatic presentation. When baked, they puff up and caramelize, adding a sweet, airy texture. The marshmallow peaks are the final flourish that makes this dessert unforgettable.
- Butter: It deepens the flavor profile, adding a silky, buttery undertone that ties all the components together. The butter also helps to crisp the graham cracker base. A small amount of butter goes a long way in creating a mouth‑watering finish.
- Make‑Ahead Potential: The assembled dessert can be chilled and baked later, making it an excellent option for parties or when you want to prepare ahead. The flavors meld together beautifully over time, enhancing the overall taste. This flexibility sets it apart from other quick s’more recipes.
Alright, let's break down exactly what goes into this masterpiece. The combination of textures and flavors will keep you guessing until the very last bite.
Inside the Ingredient List
The Flavor Base
The instant chocolate pudding is the heart of this dessert, providing a smooth, chocolatey foundation that sets quickly. Its thick, custard‑like texture ensures that every bite is soaked in rich chocolate, rather than just a thin coating. If you skip the pudding, the dessert becomes overly dry and loses its luxurious mouthfeel. For an extra touch of decadence, you can stir in a tablespoon of instant espresso powder to deepen the chocolate flavor.
Cold milk is added to the pudding mixture to activate the flavor and create a silky consistency. Using cold milk helps keep the mixture from becoming too runny before it hits the oven. If you prefer a sweeter dessert, replace the milk with half‑and‑half for a richer taste. The milk also helps balance the sweetness of the marshmallows and chocolate squares.
The Texture Crew
Graham crackers are the crunchy backbone of this cobbler. Toasting them in butter brings out their natural sweetness and adds a buttery crunch that contrasts with the soft interior. If you love a more intense crunch, try using a higher‑quality graham cracker brand or adding a sprinkle of sea salt before baking. The crackers also absorb some of the melted chocolate, creating a harmonious blend of flavors.
Hershey’s chocolate squares lend a robust, bittersweet chocolate flavor that cuts through the sweetness of the marshmallows. Breaking the squares into small chunks ensures they melt evenly, creating pockets of molten chocolate throughout the cobbler. If you’re a dark chocolate enthusiast, replace Hershey’s squares with your favorite dark chocolate bars for a more complex profile. The chocolate also contributes to the overall structure, helping the cobbler hold its shape.
The Unexpected Star
The chocolate cake mix is the secret sauce that gives this dessert a subtle crumbly texture. It also adds a hint of vanilla and a touch of leavening that keeps the base from becoming too dense. Skipping the cake mix will make the dessert feel flat and less satisfying. For a gluten‑free version, use a gluten‑free cake mix and adjust the baking time slightly.
Unsalted butter is the binder that brings all components together. It melts into the pudding and the graham crackers, creating a cohesive, buttery flavor. Adding butter also helps the marshmallows caramelize, giving them that golden top. If you’re looking for a lower‑fat option, replace half the butter with Greek yogurt, but be prepared for a slightly different texture.
Everything's prepped? Good. Let's get into the real action. The method will guide you from mixing to the final molten marshmallow crown.
The Method — Step by Step
- Step 1: Preheat and Prepare. Preheat your oven to 350°F (175°C). Line a 9‑inch square baking dish with parchment paper, leaving some overhang for easy lifting. This ensures the cobbler won’t stick and makes cleanup a breeze. If you’re feeling fancy, lightly grease the parchment with a dab of butter for extra crispness.
- Step 2: Toast the Crackers. In a skillet, melt 1/4 cup of butter over medium heat. Add the graham crackers and toast for 2 minutes on each side until golden brown. The butter infuses them with a buttery flavor and creates a crunchy base. Shake the skillet occasionally to prevent burning.
- Step 3: Melt the Chocolate Squares. Place the Hershey’s squares in a heat‑proof bowl over a pot of simmering water. Stir until fully melted and smooth. The melted chocolate will be used to coat the crackers and mix with the pudding. If the chocolate thickens too much, add a splash of cold milk to loosen it.
- Step 4: Mix the Pudding Base. In a large bowl, whisk together the instant chocolate pudding, 2 cups of cold milk, and the melted chocolate until smooth. The mixture should have a thick, custard‑like consistency. This base will create a silky chocolate layer that holds the marshmallows.
- Step 5: Assemble the Layers. Spread a thin layer of the chocolate pudding onto the bottom of the baking dish. Then layer the toasted graham crackers on top, followed by a layer of the remaining pudding. Repeat the layers, finishing with a top layer of pudding. The result is a multi‑layered structure that will melt into a single, gooey masterpiece.
- Step 6: Add the Marshmallow Crown. Arrange the 10 large marshmallows on top of the final pudding layer, spacing them evenly. The marshmallows will puff up and caramelize, creating a golden, molten crown. They also act as a sweet, airy barrier that keeps the base from becoming too soggy.
- Step 7: Bake to Perfection. Place the dish in the preheated oven and bake for 25–30 minutes. The marshmallows should be golden brown and the edges of the pudding should pull away slightly. The oven temperature is low enough to allow the marshmallows to melt slowly, ensuring a perfect gooey texture.
- Step 8: Rest and Serve. Remove the cobbler from the oven and let it rest for 5 minutes. This allows the molten chocolate to set slightly, making it easier to cut. Slice into squares and serve warm. The warm, gooey center will melt in your mouth, leaving a lingering chocolatey aftertaste.
That's it — you did it. But hold on, I've got a few more tricks that'll take this to another level. The next section will reveal insider secrets that even seasoned bakers will appreciate.
Insider Tricks for Flawless Results
The Temperature Rule Nobody Follows
Many people bake s’mores at too high a temperature, which causes the marshmallows to brown too quickly and the chocolate to separate. The trick is to keep the oven at 350°F (175°C) and monitor the marshmallows closely. If you notice the marshmallows browning faster than the rest, lower the oven by 25°F (10°C) and extend the baking time by a few minutes. This ensures a uniform, gooey melt.
Why Your Nose Knows Best
Your nose can detect when the chocolate has reached the perfect depth of flavor. As the chocolate melts, a subtle nutty aroma will develop, indicating it's ready. If you smell a strong, bitter undertone, the chocolate may be overcooked. Trust your senses, and you’ll achieve a richer result.
The 5‑Minute Rest That Changes Everything
After baking, let the cobbler rest for exactly five minutes. This short rest allows the molten chocolate to thicken slightly, making it easier to cut into neat squares. It also lets the flavors meld, creating a deeper chocolate profile. Skipping this step will result in a messy, runny dessert.
The Perfect Piping Technique
If you want a decorative touch, pipe small dollops of the chocolate pudding onto the top before adding the marshmallows. Use a pastry bag fitted with a round tip for clean, even lines. The piped pudding will melt into the marshmallows, creating a layered effect that looks as good as it tastes.
The Secret Ingredient: Sea Salt
A pinch of sea salt on top of the marshmallows before baking enhances the sweetness and balances the flavors. The salt also helps caramelize the marshmallows, giving them a beautiful golden color. Be sure to sprinkle the salt just before baking, as adding it afterward will not produce the same effect.
The Final Flourish: Fresh Vanilla
Stir in a splash of vanilla extract into the pudding mixture for a subtle, aromatic depth. Vanilla pairs wonderfully with chocolate, creating a classic dessert profile. If you prefer a more intense vanilla flavor, use vanilla bean paste instead of extract.
These insider tricks are the difference between a good dessert and a showstopper. Keep them in mind, and you'll have a s’mores cobbler that even your grandma will brag about.
Creative Twists and Variations
This recipe is a playground. Here are some of my favorite ways to switch things up:
Nutty Crunch Variation
Add a cup of chopped pecans or walnuts to the graham cracker layer. The nuts provide a satisfying crunch and a buttery flavor that complements the chocolate. Toast the nuts in a skillet before adding them for extra depth.
Berry Bomb Variation
Stir in a cup of fresh blueberries or raspberries into the pudding mixture. The berries add a pop of color and a tart contrast to the sweet marshmallows. For a more intense berry flavor, use frozen berries and thaw them before mixing.
Espresso Boost Variation
Add a tablespoon of instant espresso powder to the pudding mixture. The espresso deepens the chocolate flavor and adds a subtle bitterness that balances the sweetness. This variation is perfect for coffee lovers.
Minty Fresh Variation
Stir in a teaspoon of peppermint extract into the pudding before baking. The mint pairs wonderfully with chocolate, creating a refreshing twist. Serve with a drizzle of dark chocolate sauce for extra flair.
Coconut Cream Variation
Replace half the milk with coconut milk to give the dessert a tropical twist. The coconut flavor pairs beautifully with the chocolate and marshmallows. The result is a creamy, exotic dessert that feels like a vacation.
Almond Joy Variation
Swap the graham crackers for almond‑flavored graham crackers and sprinkle shredded coconut on top of the marshmallows before baking. The coconut adds a chewy texture and a nutty sweetness that complements the chocolate. This variation is a nod to the classic Almond Joy candy.
Feel free to mix and match these variations to create your own signature s’mores cobbler. The possibilities are endless, and each twist brings a new dimension to the dessert.
Storing and Bringing It Back to Life
Fridge Storage
Store the finished cobbler in an airtight container in the refrigerator for up to 3 days. The chocolate will firm up, making it easier to cut. When ready to serve, let it sit at room temperature for 10 minutes to soften slightly.
Freezer Friendly
Wrap the cobbler tightly in plastic wrap, then place it in a freezer bag. It can be frozen for up to 2 weeks. Thaw overnight in the refrigerator before reheating. This method keeps the flavors intact and the texture creamy.
Best Reheating Method
Preheat your oven to 300°F (150°C). Place the cobbler on a baking sheet and bake for 10–12 minutes, or until warmed through. Add a splash of water to the bottom of the pan to create steam, which helps keep the dessert moist. Let it rest for 3 minutes before serving.
Adding a tiny splash of water before reheating steams back the dessert to perfection, preventing it from drying out. Store it in a cool, dry place if you plan to serve it immediately.