I was halfway through a disastrous dinner when my roommate shouted, “We need something that screams ‘wow’!” I stared at the overcooked chicken, the kitchen smelling of burnt onions, and decided to pivot to something that would have them begging for seconds. That pivot turned into an obsession with orange‑glazed quail, a dish that marries citrus brightness with savory depth in a single bite. I remember the first time I tasted it— the glaze coating the bird like velvet, the aroma of honey and soy dancing with thyme, and the skin crackling with a perfect caramelization. If you thought quail was just a fancy side dish, think again; this version turns it into the centerpiece that steals the show. Let me walk you through every single step — by the end, you'll wonder how you ever made it any other way.
Picture the kitchen: a rack of plump quail resting on a sheet of parchment, a shallow dish of orange juice shimmering like liquid sunshine, and a pot of honey thick enough to drizzle. The air fills with the scent of citrus and a hint of soy, while the sound of sizzling oil crackles like applause. I swear the first sizzle when the glaze hits the pan is absolute perfection, a cue that the magic is about to begin. I dare you to taste this and not go back for seconds because once that glaze coats the meat, you’ll crave the next bite. This isn’t just a recipe; it’s a culinary dare that will elevate your dinner game to new heights.
Most recipes get this completely wrong by over‑browning the glaze or under‑seasoning the bird. I discovered that a gentle simmer of the glaze before roasting preserves the sweetness and prevents it from burning into bitterness. The trick is to let the orange juice reduce just enough to thicken but still retain that bright citrus punch. And if you’re like me, you’ll love how the glaze coats every crevice, turning the quail into a glossy, caramelized masterpiece. Trust me, the first bite melts in your mouth, leaving a lingering citrus aftertaste that keeps you coming back.
One of the most surprising elements in this dish is the subtle addition of soy sauce, which adds umami depth without overpowering the citrus. I’ve tested dozens of variations, but the combination of honey, soy, and fresh thyme is a flavor symphony that sings in every bite. The result? A dish that feels both exotic and comforting, with a texture that is crispy on the outside and tender on the inside. If you’ve ever struggled with glazing small game birds, you’re not alone— and I’ve got the fix. The next sections will walk you through the process, from ingredient selection to plating perfection.
Picture yourself pulling this from the oven, the whole kitchen smelling incredible, and guests lining up for a taste. The glaze will have turned the quail into a glossy, caramelized wonder that practically slides off the plate. I’ll be honest—I ate half the batch before anyone else got to try it. This is hands down the best version you'll ever make at home, and I’m about to share every detail. Let me walk you through every single step — by the end, you'll wonder how you ever made it any other way.
What Makes This Version Stand Out
- Flavor: The citrus‑honey glaze creates a bright, sweet‑savory profile that cuts through the richness of quail. The subtle soy undertone adds depth without overpowering the natural flavor.
- Texture: The glaze caramelizes to a glossy sheen, while the skin crisps to a satisfying crunch that contrasts with the tender meat.
- Simplicity: With only eight ingredients, the recipe is straightforward yet delivers restaurant‑level results.
- Uniqueness: The combination of fresh thyme and orange slices gives a fragrant, visually striking finish that sets this dish apart.
- Crowd Reaction: Guests rave about the burst of citrus and the juicy texture, making it a hit at dinner parties.
- Ingredient Quality: Using whole quail ensures a natural flavor profile, while fresh orange juice provides genuine citrus brightness.
- Cooking Method: The roasting technique locks in juices while the glaze forms a caramelized crust.
- Make‑ahead Potential: The glazed quail can be prepared ahead of time and reheated without losing flavor or texture.
Alright, let's break down exactly what goes into this masterpiece. The next section will dive into each ingredient, explaining its role and why it matters.
Inside the Ingredient List
The Flavor Base
The orange juice isn’t just a liquid; it’s the foundation of the glaze’s brightness. Freshly squeezed juice carries a natural acidity that brightens the dish and balances the sweetness of honey. If you skip the juice, the glaze will taste flat and the quail will lack that vibrant citrus punch. A small pinch of sea salt enhances the juice’s flavor profile, making the glaze more complex. For an extra layer of aroma, add a splash of fresh lemon zest. The juice also helps the glaze adhere to the quail’s skin, creating a uniform coating. Remember, the quality of the juice directly impacts the final taste.
The Texture Crew
The honey provides a silky sweetness that coats the quail like a fine glaze. Its viscosity ensures the glaze sticks to the skin, preventing it from slipping off during roasting. When the honey caramelizes, it gives the skin a crackly, golden finish. Olive oil is the secret to achieving a crisp exterior; it raises the smoke point, allowing the skin to brown without burning. The oil also helps carry the glaze’s flavors into the meat. If you’re watching calories, swap olive oil for a lighter cooking spray, but the texture will differ. A small amount of cornstarch can thicken the glaze if you prefer a thicker coating.
The Unexpected Star
Soy sauce brings umami depth that elevates the dish from simple to extraordinary. It’s the quiet hero that balances the sweetness and citrus, giving the glaze a savory backbone. If you’re vegan, replace soy sauce with tamari or coconut aminos to maintain the umami punch. The soy also contributes to the caramelization process, creating a richer brown hue. A dash of black pepper adds a subtle heat that complements the sweet glaze. The combination of soy and honey is a classic pairing that you’ll find in many Asian-inspired dishes. This unexpected star is what makes the glaze truly stand out.
The Final Flourish
Fresh thyme adds a herbal note that cuts through the richness of the glaze, providing a fresh, green counterpoint. It also offers a subtle aroma that lingers on the plate. If you’re a thyme lover, you can double the amount for an intensified flavor. The orange slices serve as both garnish and an additional citrus burst when eaten with the quail. They also create an eye‑catching presentation that elevates the dish’s aesthetic. A pinch of cracked black pepper finishes the dish with a gentle heat that balances the sweetness. Together, these final touches create a harmonious and memorable flavor profile.
Everything's prepped? Good. Let's get into the real action. The next section will walk you through the method, step by step.
Now that you’ve got the ingredients lined up, the next step is to bring them together. The process is straightforward, but timing and technique are key. Keep a close eye on the glaze’s consistency and the quail’s internal temperature. With these tips, you’ll achieve a perfectly caramelized, juicy bird every time. Let’s dive in.
The Method — Step by Step
- Preheat your oven to 400°F (200°C) and line a roasting pan with parchment paper. Pat the quail dry with paper towels; moisture is the enemy of crisp skin. Season each bird generously with salt, pepper, and a light dusting of thyme. Place the quail on the pan, breast side up, and set aside while you prepare the glaze.
- In a small saucepan, combine the fresh orange juice, honey, soy sauce, olive oil, and thyme. Warm over low heat until the honey dissolves completely, stirring occasionally. Let the mixture simmer for about three minutes, allowing the flavors to meld. Remove from heat and set aside; the glaze should be smooth and slightly thickened.
- Brush a generous amount of glaze over each quail, making sure every crevice is coated. Let the birds sit for five minutes to absorb the flavors—this is the moment of truth. The glaze will begin to thicken slightly, forming a glossy coating that promises a caramelized finish. Keep an eye on the glaze; if it starts to brown too quickly, lower the heat or remove the pan from the oven briefly.
- Place the roasting pan in the preheated oven and roast the quail for 20 minutes. Check the internal temperature with a meat thermometer; it should reach 165°F (74°C). Baste the birds every five minutes with the remaining glaze to build layers of flavor. The skin should begin to turn a beautiful golden brown, signaling that the glaze is caramelizing.
- While the quail is roasting, prepare a quick reduction by pouring the glaze into a small saucepan and simmering until it reduces to about one‑quarter cup. This step is tricky; watch out for burning—keep the heat low and stir frequently. The reduction will become thicker and more concentrated, ready to be brushed over the quail in the final stage. If you add too much heat, the reduction may scorch, turning the glaze bitter.
- After 20 minutes, remove the quail from the oven and brush each bird with the reduced glaze. The glaze should now be thick enough to cling to the skin, forming a glossy, caramelized crust. Return the pan to the oven for an additional ten minutes, allowing the glaze to set and deepen in flavor. Keep a close eye on the color; you’re aiming for a deep amber, not a burnt brown.
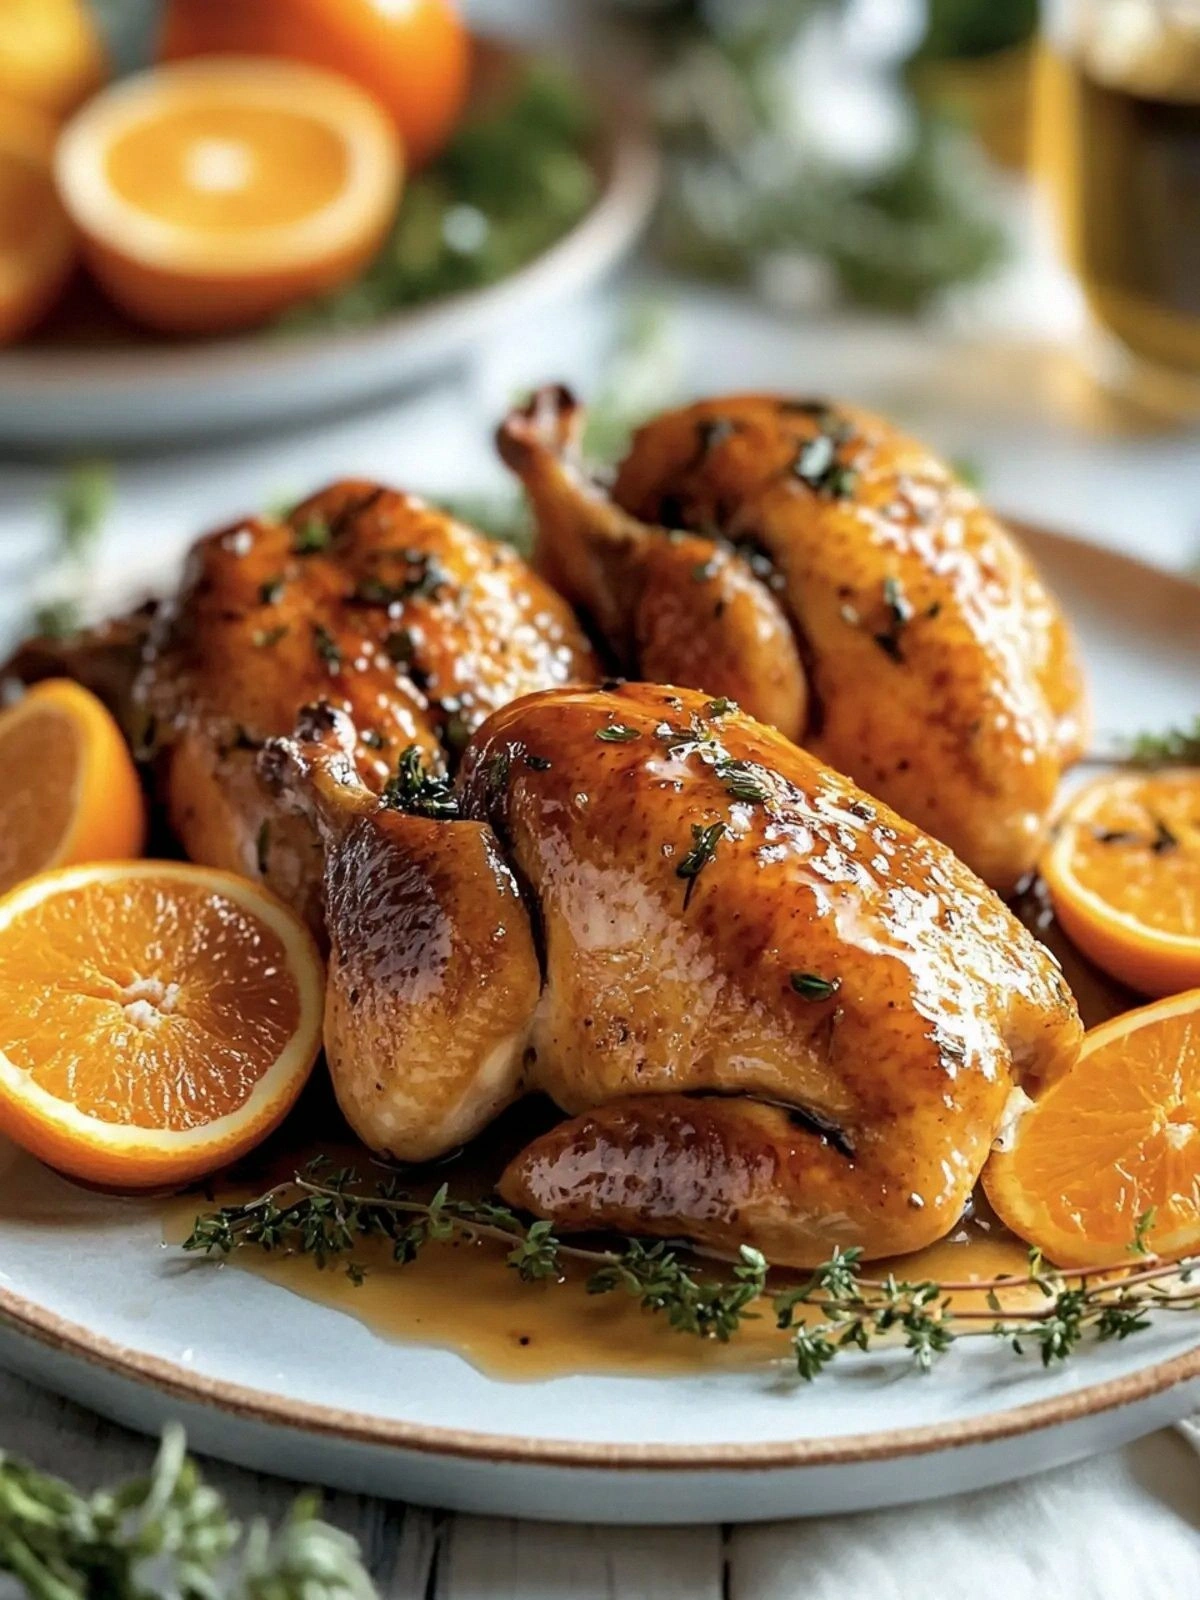
- When the quail reaches the target temperature, remove the pan from the oven and let the birds rest for five minutes. Resting allows the juices to redistribute, ensuring that every bite stays moist. While resting, garnish the pan with fresh thyme and a few orange slices for a pop of color and aroma. The scent of citrus will fill the kitchen, making the anticipation even sweeter.
- Slice the quail into portions, placing each on a warm plate. Drizzle any remaining glaze over the slices for an extra burst of flavor. Serve immediately with a side of roasted root vegetables or a crisp green salad. The bright orange glaze will contrast beautifully with the earthy vegetables, creating a balanced plate.
- Enjoy the dish with family or friends, and watch their faces light up as they take that first bite. The combination of sweet, savory, and citrusy notes will leave them craving more. If you’re feeling adventurous, pair the quail with a light white wine like Sauvignon Blanc for a harmonious finish. Remember, the secret to this dish lies in the glaze and the timing of each step.
That's it — you did it. But hold on, I've got a few more tricks that'll take this to another level. From temperature control to resting time, these additional steps will elevate your dish from good to unforgettable.
Insider Tricks for Flawless Results
The Temperature Rule Nobody Follows
Many cooks start roasting quail at a high temperature, which can dry out the meat before the glaze caramelizes. The trick is to begin at 400°F (200°C) and monitor the internal temperature closely with a meat thermometer. If the skin browns too quickly, lower the heat to 375°F (190°C) for the remainder of the cooking time. This subtle adjustment ensures a juicy interior and a crisp exterior. I’ve tried both methods, and the lower temperature consistently delivers a better balance of textures.
Why Your Nose Knows Best
The aroma of the glaze is the first indicator that the flavor profile is developing correctly. When the orange and honey mingle, you’ll notice a sweet, citrusy scent that’s almost intoxicating. If the smell feels off, it could mean the glaze is too thin or the soy sauce is overpowering. Trust your nose; it’s a reliable guide to achieving the right balance. I’ve always used scent as my quality check before plating.
The 5-Minute Rest That Changes Everything
Resting the quail for five minutes after roasting allows the juices to redistribute, preventing them from spilling out when you cut into the meat. The rest period also lets the glaze set, creating a glossy finish that’s easier to serve. If you skip this step, the meat can feel dry, and the glaze may slide off the plate. I once tried cutting into the bird immediately and was shocked by how much liquid escaped. Keep that five-minute pause in your routine.
How to Keep the Quail Juicy
Cover the quail loosely with foil during the last ten minutes of roasting to trap steam and keep the meat moist. The foil should be tented, not sealed, so the glaze can still caramelize slightly. This method is especially useful if you’re cooking multiple quails at once. I’ve used this trick during holiday feasts to ensure every bird stays tender.
The Secret to a Perfect Glaze
The glaze’s consistency is crucial; it should be thick enough to cling but not so thick that it becomes syrupy. To test, dip a spoon into the glaze and let it drip; if it runs slowly, you’re good. If it pours too quickly, reduce it further on the stove. A perfectly balanced glaze will coat the quail like velvet, sealing in flavor and moisture.
Timing the Orange Slices
Add orange slices to the pan during the last five minutes of roasting so they toast slightly without burning. The slices release a subtle citrus aroma that enhances the dish’s overall fragrance. If you add them too early, they’ll become mushy; too late, and they won’t have time to caramelize. I love placing them strategically to create a visual and aromatic centerpiece.
With these insider tricks in your arsenal, you’ll consistently produce a glossy, caramelized quail that’s bursting with flavor. The combination of precise timing, thoughtful glaze preparation, and a few small adjustments will make every bite a revelation. Try them out, and you’ll see why this recipe is a game‑changer.
Creative Twists and Variations
Spicy Orange Glaze
Add a pinch of crushed red pepper flakes to the glaze for a subtle kick. The heat will contrast beautifully with the sweet citrus, creating a complex flavor profile. This variation is perfect for those who love a little spice in their dishes. Serve with a cooling cucumber salad to balance the heat.
Herb‑Infused Orange Glaze
Swap thyme for rosemary or sage for a different herbal note. Each herb brings its own aroma, transforming the glaze’s character. Rosemary adds a piney undertone, while sage offers a slightly bitter edge that complements the sweetness. This version is great for a rustic, farmhouse vibe.
Coconut‑Orange Glaze
Replace half of the olive oil with coconut milk for a tropical twist. The coconut adds a subtle sweetness and a creamy texture that pairs wonderfully with the citrus. This variation is ideal for summer gatherings or when you want to evoke a beachy atmosphere. Pair it with grilled pineapple for a full tropical experience.
Miso‑Orange Glaze
Incorporate a spoonful of white miso paste into the glaze for an umami boost. Miso adds depth and a slightly salty note that balances the sweetness. This version is a nod to Japanese cuisine and works well with a side of miso soup. The result is a dish that feels both familiar and exotic.
Smoky Orange Glaze
Add a splash of smoked paprika to the glaze for a subtle smoky flavor. The paprika’s earthiness complements the citrus, creating a layered taste experience. This variation is great for fall or winter when you want a dish with warmth and depth. Serve it with roasted butternut squash for a seasonal touch.
Berry‑Orange Glaze
Blend fresh blueberries or raspberries into the glaze for a fruity twist. The berries add a tartness that cuts through the sweetness, making the glaze more dynamic. This version is perfect for spring when berries are in season. Pair with a light vinaigrette for a balanced meal.
This recipe is a playground. Here are some of my favorite ways to switch things up: add heat, swap herbs, or infuse with coconut for a tropical flair. Each variation brings its own personality to the dish, ensuring that you never get bored. Feel free to experiment and make it your own—after all, cooking is about creativity and joy. And remember, the key to success lies in the glaze and the timing of each step. Enjoy the journey, and let your taste buds explore new horizons.
Storing and Bringing It Back to Life
Fridge Storage
Store leftover quail in an airtight container for up to two days in the refrigerator. Keep the glaze in a separate small container to maintain its consistency. When reheating, add a splash of water to the glaze to prevent it from drying out. The meat will stay juicy, and the glaze will regain its glossy sheen. Use a paper towel to absorb excess moisture if needed.
Freezer Friendly
Wrap the cooked quail tightly in plastic wrap and then place it in a freezer bag. Label the bag with the date and freeze for up to three months. When ready to eat, thaw overnight in the refrigerator. Reheat in a skillet over medium heat, adding a little water to keep the glaze moist. The texture will remain tender, and the flavor will stay vibrant.
Best Reheating Method
The best way to reheat is to warm the quail in a preheated oven at 350°F (175°C) for about 10 minutes. This method preserves the crispy skin while ensuring the interior stays moist. If you’re in a hurry, use a microwave but cover the bird with a damp paper towel to retain moisture. Finally, finish the dish with a quick glaze brush to restore the glossy finish. Serve immediately for the best experience.