INTRODUCTION
It started with a kitchen catastrophe that I will never forget: I was whipping up a quick chocolate dessert for a last‑minute Passover gathering, and the batter spilled onto the counter in a glossy, chocolaty mess that looked like a melted midnight puddle. The smell of melted chocolate filled the room, and my friend shouted, “You’ve got to show us how to do it right!” That moment was a dare I could not ignore. I vowed to create a version so silky, so decadently rich, that anyone who tasted it would swear they had never seen a cake before.
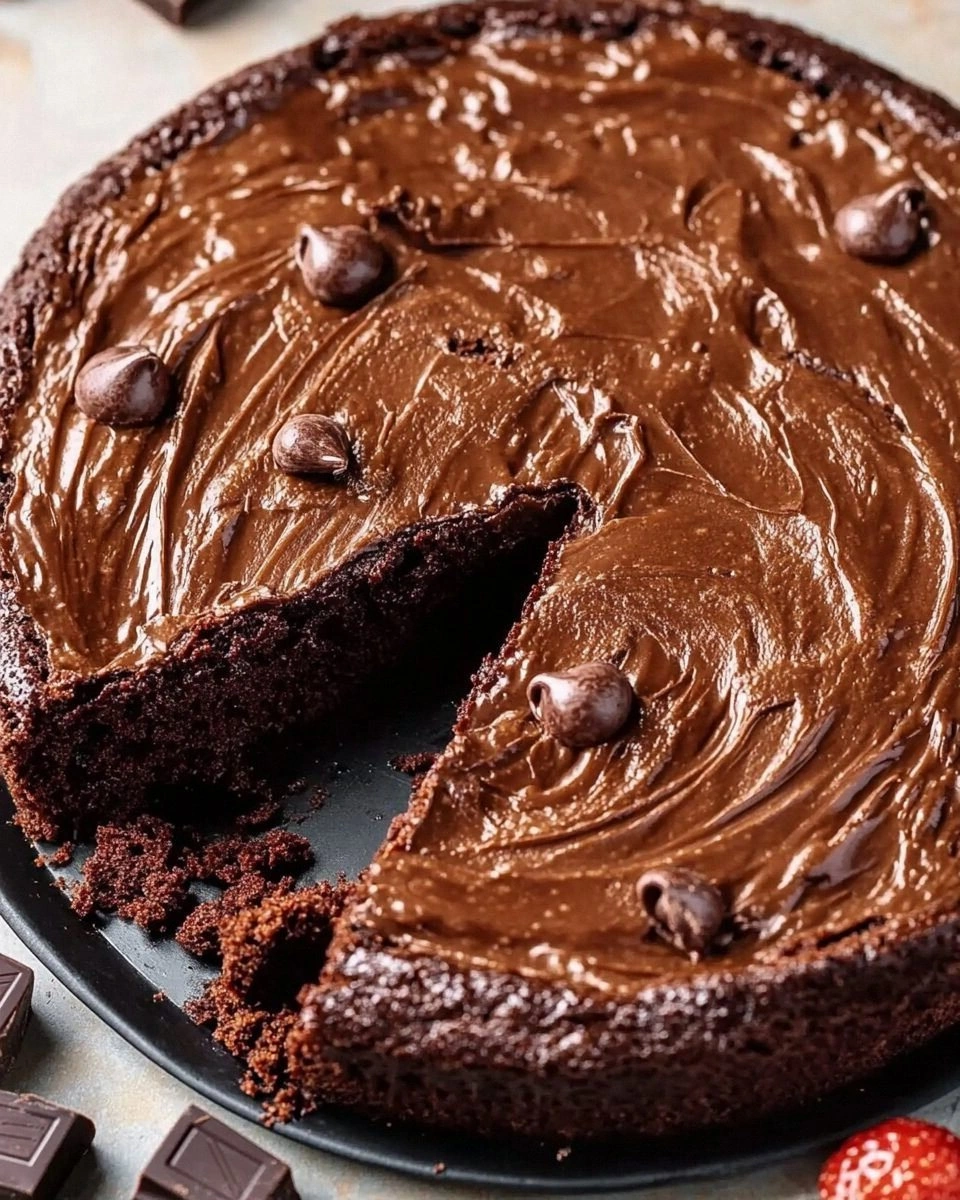
Picture this: a dark, glossy dome rising from the oven, its surface shimmering like a polished obsidian mirror. The aroma is a heady mix of roasted cacao and butter, drifting through the kitchen like a velvet ribbon. When you cut into it, the interior is a molten sea of chocolate that clings to the knife like a whisper, while the edges hold a faint, crisp crack that snaps with a satisfying sound. The texture is a paradox—soft enough to melt in your mouth, yet with a subtle, satisfying bite that lingers on the palate. This isn’t just a dessert; it’s an experience that feels like a secret indulgence shared between friends.
I discovered that the secret to this cake lies in its simplicity and the quality of each ingredient. There is no flour, no leavening, no artificial additives—just chocolate, butter, sugar, eggs, almond flour, vanilla, and a pinch of salt. The absence of flour forces the chocolate and butter to shine, creating a depth of flavor that is impossible to achieve with a traditional cake batter. The result is a cake that is dense, moist, and utterly irresistible, a true centerpiece for any Passover celebration.
What sets this version apart is a single, unexpected twist: a touch of espresso powder that unlocks the chocolate’s full flavor profile without adding a coffee taste. It’s a small addition that makes the chocolate taste deeper, richer, and more complex. I dare you to taste this and not go back for seconds. Let me walk you through every single step — by the end, you'll wonder how you ever made it any other way.
What Makes This Version Stand Out
- Flavor: The blend of dark chocolate and espresso creates a layered taste that feels both indulgent and sophisticated. The espresso enhances the cacao notes without overpowering them, giving the cake a subtle depth that lingers.
- Texture: A dense, fudgy center that melts in your mouth, paired with a crisp, caramelized top. The almond flour keeps the cake moist without making it cakey, a rare balance in flourless desserts.
- Ingredient Quality: Using high‑grade chocolate (70% cacao) and butter made from grass‑fed cows ensures a buttery, chocolatey flavor that is both clean and pure.
- Simplicity: The recipe has only eight ingredients, no leavening agents, and a straightforward method that can be mastered in under an hour.
- Make‑Ahead Potential: Once baked, the cake keeps wonderfully for up to five days in the refrigerator, and it can be frozen for longer storage without losing its texture.
- Audience Appeal: The cake’s rich, chocolatey flavor and elegant presentation make it a hit with both seasoned bakers and novice cooks alike.
- Passover Friendly: The ingredients are all Passover‑approved, making it a safe and delicious option for those observing the holiday.
- Visual Impact: The glossy finish and subtle dusting of powdered sugar give the cake an Instagram‑ready look that will impress guests.
Alright, let's break down exactly what goes into this masterpiece...
Inside the Ingredient List
The Flavor Base
Dark chocolate is the heart of this cake, providing a robust, bittersweet flavor that dominates every bite. I use 200 g of 70% cacao chocolate because it offers a rich, complex profile without the bitterness of higher cacao percentages. If you prefer a milder taste, you can lower the cacao to 60%, but the depth will be less pronounced. The chocolate is melted in a double boiler to preserve its silky texture and prevent scorching.
Butter is the second pillar of flavor. 200 g of unsalted butter adds a creamy, buttery richness that balances the chocolate’s intensity. Butter also contributes to the cake’s moist crumb and glossy finish. Using grass‑fed butter can add a subtle nutty undertone that enhances the overall taste.
The Sweetener
Sugar is essential for balancing the chocolate’s bitterness and for creating a tender crumb. 200 g of granulated sugar is folded into the melted chocolate and butter mixture, allowing it to dissolve completely and prevent graininess. If you are watching your sugar intake, you can substitute half the sugar with a natural sweetener like honey or maple syrup, but the texture may change slightly.
The Structure Crew
Eggs are the binding agent that gives the cake its structure. Six large eggs (about 300 g) are beaten until they reach a light, airy consistency before being folded into the chocolate mixture. The yolks add richness, while the whites provide lift. Skipping any eggs will result in a crumbly, fragile cake.
Almond flour (ground almonds) is the only leavening agent, providing a delicate lift without adding gluten. 1 cup of almond flour (about 120 g) is sifted to remove clumps, ensuring a smooth batter. If you’re allergic to nuts, you can replace almond flour with finely ground coconut flour, but you’ll need to adjust the liquid ratio.
The Final Flourish
Vanilla extract (1 tsp) adds warmth and depth, complementing the chocolate’s richness. A pinch of sea salt (0.5 tsp) balances the sweetness and brings out the chocolate’s flavor. Espresso powder (1 tsp) is the secret ingredient that unlocks the chocolate’s full potential; it intensifies the cacao notes without adding a coffee taste. If you don’t have espresso powder, a small amount of instant coffee granules will work as a substitute.
Everything's prepped? Good. Let's get into the real action...
The Method — Step by Step
- Preheat your oven to 350 °F (175 °C). Line an 8‑inch springform pan with parchment paper, making sure the paper extends about 2 inches above the rim. This step ensures a perfect release and a clean presentation. I always double‑check the parchment to avoid any sticking.
- Melt the chocolate and butter together over a double boiler. Stir constantly until the mixture is smooth and glossy. The chocolate should not burn; keep the heat low. This creates the base for a silky batter that won’t develop lumps.
- In a separate bowl, whisk the eggs until they reach a light, foamy consistency. The eggs need to be well beaten to incorporate air, which helps the cake rise slightly. I usually whisk for about 2 minutes to get the right texture.
- Fold the sugar into the melted chocolate mixture, then add the vanilla and espresso powder. Stir until the sugar dissolves completely. The espresso powder should be evenly distributed; any clumps will affect the final flavor.
- Add the beaten eggs to the chocolate mixture in two portions, folding gently after each addition. The batter should be smooth and glossy. This step is crucial; over‑mixing can cause the cake to become tough.
- Sift the almond flour and sea salt into the batter and fold until just combined. The batter should be thick yet pourable. This is the moment of truth: the batter should feel like a thick, silky custard.
- Pour the batter into the prepared pan, smoothing the top with a spatula. Tap the pan gently on the counter to release any air bubbles. The batter should sit evenly across the pan.
- Bake for 30 minutes, or until the top is set but still slightly glossy and a toothpick inserted in the center comes out with a few moist crumbs. The edges will pull away from the pan, signaling doneness. Watch the time closely; overbaking will dry the cake.
- Remove the cake from the oven and let it cool in the pan for 10 minutes, then run a knife around the edges and release it onto a wire rack to cool completely. This prevents the cake from sticking to the pan and preserves its shape.
- Once cooled, dust the top with powdered sugar for a subtle sweetness and a polished look. Chill the cake for at least 30 minutes before slicing to set the structure. Serve with fresh berries or a dollop of whipped cream for an extra touch.
That's it — you did it. But hold on, I've got a few more tricks that'll take this to another level...
Insider Tricks for Flawless Results
The Temperature Rule Nobody Follows
Many bakers bake at a high temperature to get a quick rise, but for a flourless cake, a steady 350 °F is key. A lower temperature allows the chocolate to melt evenly and the batter to set without forming a hard crust. I keep a thermometer handy to ensure the oven is accurate; even a 10‑degree variance can alter the final texture.
Why Your Nose Knows Best
Before you pull the cake out of the oven, give it a quick sniff. A faint, sweet, chocolaty aroma is a sign that the cake is ready. If you smell a burnt or metallic scent, the cake needs a few more minutes. Trust your nose; it’s a reliable indicator of doneness.
The 5‑Minute Rest That Changes Everything
After baking, let the cake rest in the pan for 10 minutes. This short rest allows the structure to set, preventing the cake from cracking when you remove it. I’ve seen cakes that are still slightly runny after 30 minutes of cooling; the rest step eliminates this issue.
Dusting for Perfection
Dusting the top with powdered sugar not only adds a sweet finish but also creates a subtle contrast against the glossy chocolate. Use a fine sieve for an even coat. If you prefer a darker finish, skip the sugar and serve with a light drizzle of dark chocolate ganache.
Keep It Cool, Keep It Fresh
Store the cake in an airtight container at room temperature for up to three days. If you want to keep it longer, refrigerate it; the cake will stay moist for up to five days. When you’re ready to serve, let it sit at room temperature for 15 minutes to revive its flavor.
Creative Twists and Variations
This recipe is a playground. Here are some of my favorite ways to switch things up:
Nutty Crunch Variation
Add ½ cup of toasted hazelnuts to the batter for a crunchy texture and a buttery flavor. The nuts also give the cake a subtle earthiness that pairs well with the chocolate.
Orange Zest Delight
Replace the vanilla extract with 1 tsp of orange zest and add 1 tsp of orange liqueur for a citrusy twist. The bright citrus notes contrast beautifully with the deep chocolate.
Minty Surprise
Stir in ½ tsp of peppermint extract and a handful of crushed mint chocolate chips. The mint adds a refreshing coolness that lifts the chocolate’s richness.
Almond Butter Swirl
Fold in 3 tbsp of almond butter into the batter before baking. The almond butter creates a silky swirl inside the cake, adding both flavor and visual appeal.
Caramelized Carrot Addition
Incorporate ½ cup of finely grated caramelized carrots for a hint of sweetness and color. The carrots also add moisture and a subtle earthy tone.
Chocolate Ganache Topping
Drizzle a simple ganache made from 100 g of dark chocolate and 50 ml of heavy cream over the cooled cake. The ganache adds a glossy finish and a rich, velvety texture.
Storing and Bringing It Back to Life
Fridge Storage
Wrap the cake tightly in plastic wrap and store it in an airtight container in the refrigerator for up to five days. The cold environment keeps the cake moist and prevents mold growth.
Freezer Friendly
For longer storage, wrap the cake in parchment paper, then in foil, and freeze for up to two months. Thaw in the refrigerator overnight before serving.
Best Reheating Method
To revive a frozen or chilled cake, place it on a parchment‑lined baking sheet and heat at 300 °F for 10 minutes. Add a splash of water before reheating to steam the cake back to its original moistness.