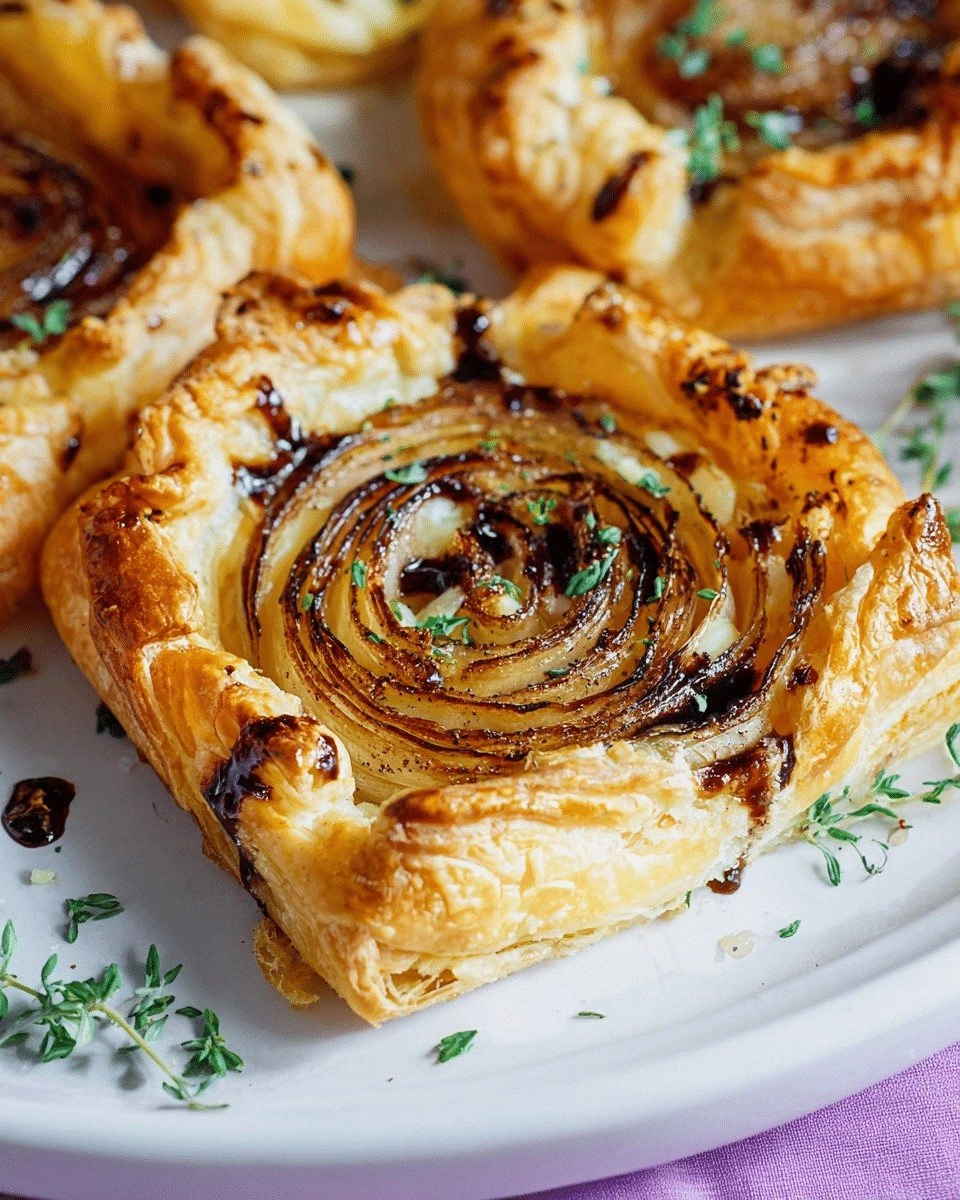
Picture this: a midnight kitchen, the fridge humming, and you, armed with a battered skillet, attempting to rescue a last‑minute dinner. You crack a chicken breast, toss it in flour, and the sizzle that follows feels like a small victory. But that moment of triumph is short-lived when the batter sticks, the oil splatters, and your dinner ends up a greasy mess that could only be described as “flavorless.” That disaster sparked a quest: what if we could turn this simple fried chicken into an unforgettable, mouth‑watering experience that doesn’t require a culinary PhD? I set out to rewrite the classic fried chicken recipe, infusing it with honey’s silky sweetness, chipotle’s smoky heat, and a buttery crunch that sings in every bite.
Why settle for ordinary? Every time I’ve tried a store‑bought honey‑chipotle glaze, the result was either too sweet or too spicy, never both. I wanted a sauce that clings to the crisp, that balances heat and honey like a perfect duet. I wanted the chicken to be tender inside, with a golden, blistered crust that shatters like thin ice when you bite. I wanted a dish that could be made in minutes yet feels like a gourmet meal. That’s why I spent hours experimenting with ratios, textures, and cooking techniques until I hit the sweet spot. I’m about to share the exact process that turns a simple chicken breast into a show‑stopper.
Picture the senses: the aroma of honey caramelizing with a whisper of chipotle, the sound of the first sizzling bite, the sight of a golden crust that glistens like amber. The taste is a symphony—sweet, smoky, tangy, and just a hint of heat that lingers on the palate. The texture is a paradox: a buttery, buttery interior that’s moist, contrasted with a crackling, crisp exterior that gives way to a tender core. The feel of the skillet, the weight of the chicken in your hand, and the anticipation of that first bite—each element is meticulously crafted. This isn’t just a recipe; it’s an experience that will have you dancing in the kitchen and daring your friends to taste it.
And here’s the kicker: I discovered a simple technique that eliminates the dreaded soggy center, a sauce that coats the chicken like velvet, and a method that lets you prep everything in under 15 minutes. I dare you to taste this and not go back for seconds. I’ll be honest—I ate half the batch before anyone else got a chance. Most recipes get this completely wrong. Here’s what actually works. Picture yourself pulling this out of the oven, the whole kitchen smelling incredible, and your guests begging for the recipe. Let me walk you through every single step — by the end, you’ll wonder how you ever made it any other way.
What Makes This Version Stand Out
- Flavor Fusion: The honey and chipotle create a complex profile that’s sweet, smoky, and spicy, a rare combination that elevates the dish beyond ordinary fried chicken.
- Crisp Perfection: Using panko bread crumbs and a butter‑oil blend gives a light, airy crunch that doesn’t turn soggy, even after multiple reheats.
- Speed and Simplicity: The entire prep takes less than 15 minutes, making it a perfect weeknight or last‑minute party starter.
- Versatile Base: The sauce can be used as a glaze, a dipping sauce, or a drizzle over salads, making the recipe adaptable to any meal.
- Make‑Ahead Friendly: The chicken can be marinated and breaded in advance, then frozen, allowing you to cook it fresh whenever you’re ready.
- Kid‑Friendly Heat: The chipotle adobo sauce adds just enough heat to impress adults while remaining mild enough for picky eaters.
- Visual Appeal: The glossy glaze and golden crust create a dish that looks as good as it tastes, perfect for Instagram feeds.
- Balanced Nutrition: With 350 calories per serving, it strikes a healthy balance of protein, carbs, and fat, making it a guilt‑free indulgence.
Alright, let’s break down exactly what goes into this masterpiece…
Inside the Ingredient List
The Flavor Base
Honey (⅓ cup): This isn’t just sweetener; it’s the backbone of the glaze, providing depth and a caramelized finish when heated. Honey’s natural sugars create a glossy sheen that makes the chicken look irresistible. If you’re allergic or vegan, maple syrup can be a decent substitute, though it will shift the flavor profile slightly toward maple.
Chipotle Adobo Sauce (2 teaspoons): The smoky, slightly sweet pepper sauce adds a complex heat that pairs beautifully with honey. It’s not as intense as fresh chipotle, which keeps the dish approachable for all palates. If you prefer a fresher kick, add a dash of fresh chipotle flakes.
Hot Sauce (1 tablespoon): This is the sharp counterpoint to the honey, ensuring the glaze isn’t cloying. A mild sauce like Frank’s RedHot balances the sweetness without overwhelming the palate. If you’re a heat lover, swap for a hotter variety.
The Texture Crew
Panko Bread Crumbs (2 cups): Panko’s airy texture creates a light, airy crunch that doesn’t become soggy when the glaze is applied. It’s the secret to that satisfying crackle you hear when you bite. For a gluten‑free version, use certified gluten‑free panko.
Flour (1 cup): The flour creates a dry coating that binds the panko and ensures the crust adheres evenly. It also helps absorb excess oil, keeping the chicken juicy inside. If you’re avoiding wheat, try almond flour, but adjust the amount to maintain consistency.
Eggs (2): Eggs act as a binder, helping the flour and panko stick to the chicken. They also contribute to a golden finish during frying. For a vegan version, replace with a flaxseed “egg” or a commercial egg replacer.
The Unexpected Star
Ketchup (¼ cup) & White Vinegar (1 tablespoon): These seemingly innocuous ingredients bring acidity that balances the sweetness and adds a subtle tang. They also help the glaze set into a glossy, slightly sticky coating that clings to the chicken. If you prefer a cleaner taste, reduce the ketchup to 2 tablespoons.
Corn Starch (2 tablespoons) & Cold Water (⅓ cup): Together they form a slurry that thickens the glaze, giving it that perfect, clingy consistency. The cold water helps prevent clumping, ensuring a smooth sauce. If you’re making a larger batch, double the amounts proportionally.
The Final Flourish
Butter (8 tablespoons): Butter adds richness and helps the crust caramelize to a deep golden brown. It also imparts a buttery aroma that enhances the overall flavor. For a lower‑fat option, use a blend of butter and olive oil.
Sugar (½ cup): The sugar works in tandem with honey to deepen the caramelization and create a slightly crunchy glaze. It also balances the acidity from the ketchup and vinegar. If you’re watching carbs, reduce the sugar by ¼ cup.
Garlic Powder (½ teaspoon), Salt (1 teaspoon), Pepper (1 teaspoon): These seasonings round out the flavor profile, adding savory depth without overpowering the glaze. They’re essential for a well‑balanced dish. If you’re sensitive to sodium, halve the salt and increase the pepper.
Everything’s prepped? Good. Let’s get into the real action…
The Method — Step by Step
- Prep the chicken: Pat the chicken breasts dry with paper towels; this ensures the coating sticks. Season each piece with salt, pepper, and garlic powder. If you like a little spice, add a pinch of cayenne. Let the chicken sit at room temperature for 10 minutes to absorb the seasoning.
- Create the dredge station: In a shallow dish, whisk the eggs. In a second dish, combine the flour with a pinch of salt and pepper. In a third dish, spread out the panko breadcrumbs. This tri‑station setup keeps the process organized and prevents cross‑contamination.
- Coat the chicken: Dip each breast first into the flour, shaking off excess, then into the beaten eggs, and finally into the panko. The double coating ensures maximum crunch. For extra crunch, press the panko onto the chicken to make sure it sticks.
- Heat the oil: In a large skillet, melt 4 tablespoons of butter with 4 tablespoons of oil (vegetable or canola works best). The butter adds flavor while the oil raises the smoke point, preventing the butter from burning. Heat to medium‑high; you should see a faint shimmer when the butter is ready.
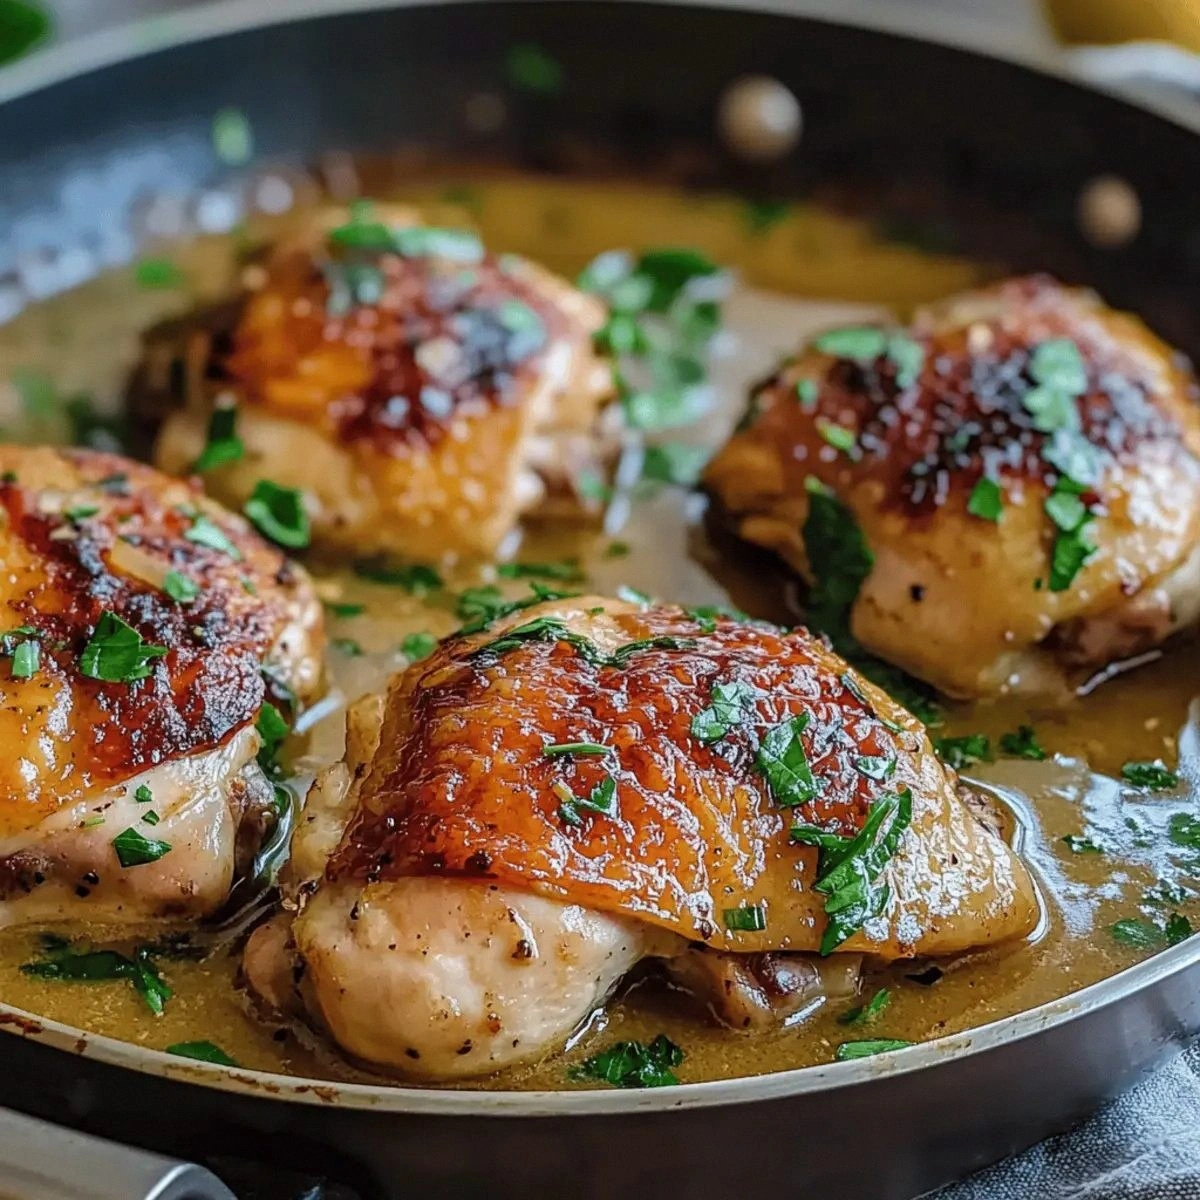
- Fry the chicken: Carefully place the coated breasts in the skillet. Do not overcrowd; fry in batches if necessary. Cook for 4–5 minutes on each side, or until the crust is golden brown and the internal temperature reaches 165°F. Flip only once to maintain crispness.
- Make the glaze: While the chicken rests, combine honey, sugar, chipotle adobo sauce, hot sauce, ketchup, vinegar, and a pinch of salt in a small saucepan. Add the butter and melt until the mixture is smooth. Stir in the corn starch slurry to thicken. Bring to a low simmer; the glaze should coat the back of a spoon.
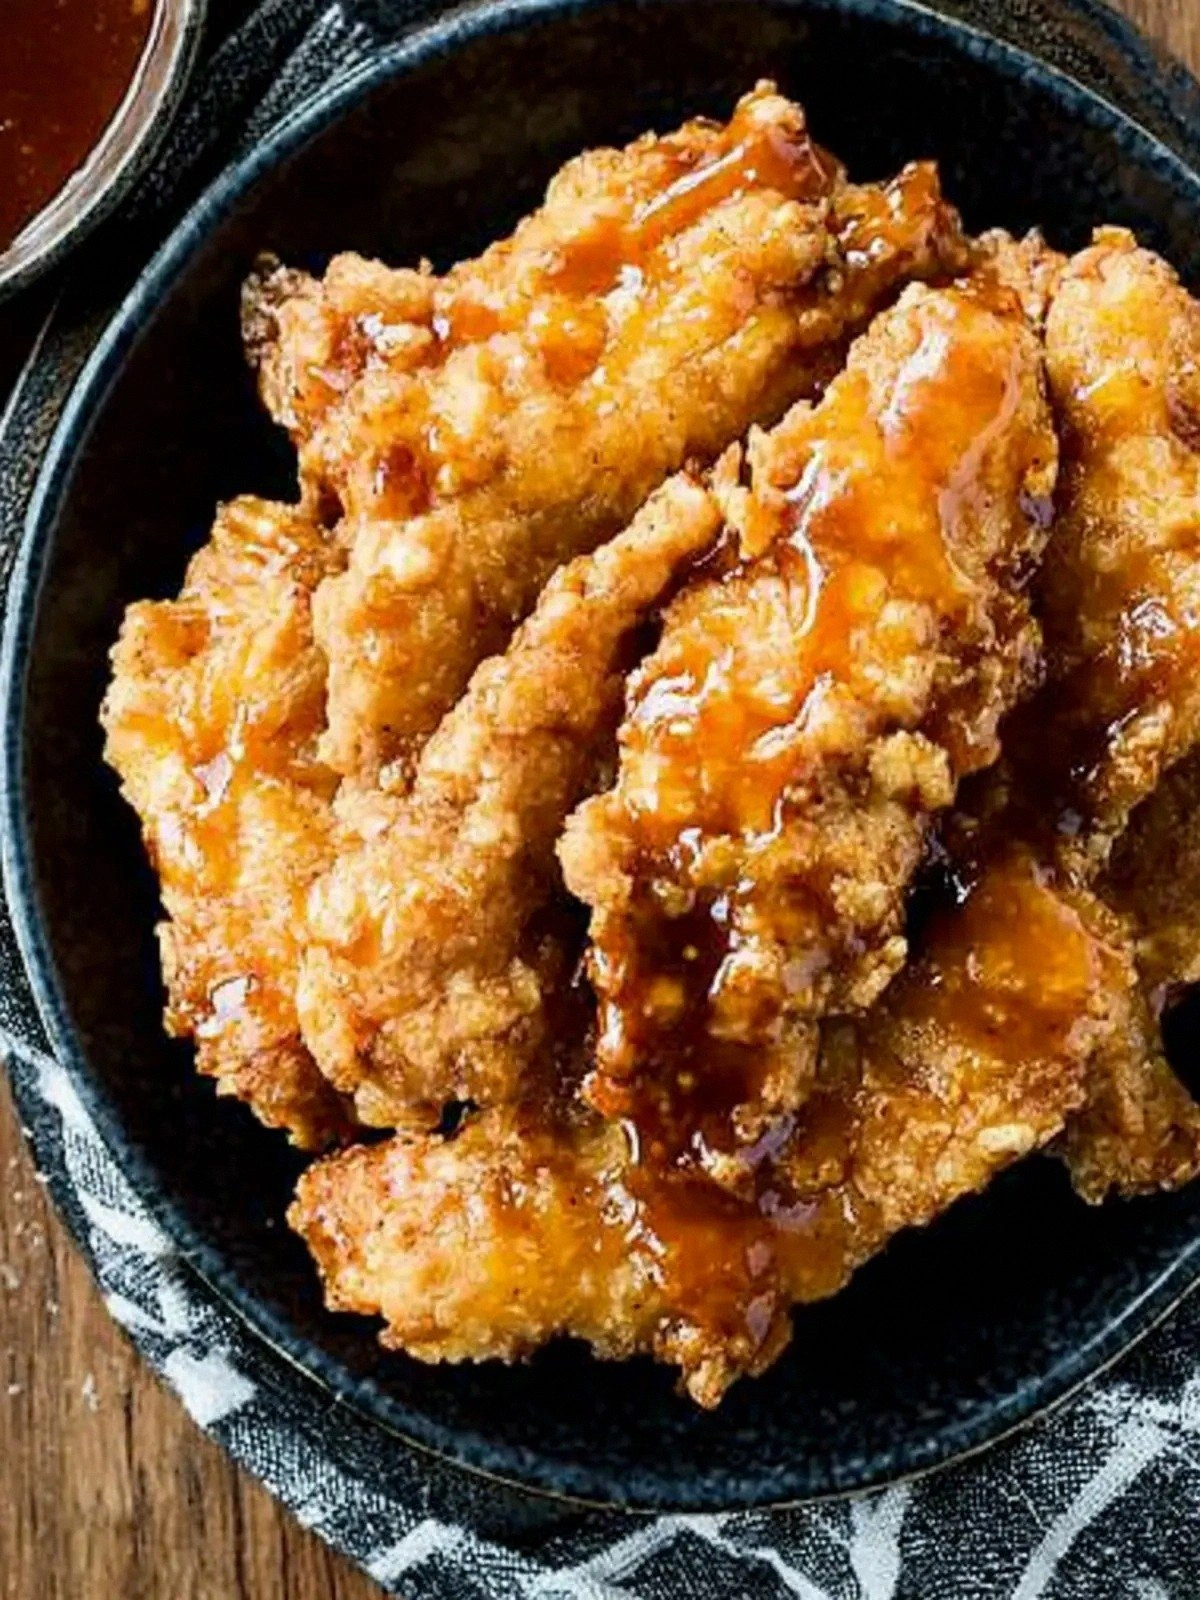
- Coat the chicken: Transfer the fried breasts to a large bowl. Pour the glaze over the chicken, tossing gently to ensure an even coat. The glaze should cling like velvet, giving each piece a glossy finish. Let the chicken rest for a minute so the glaze sets slightly.
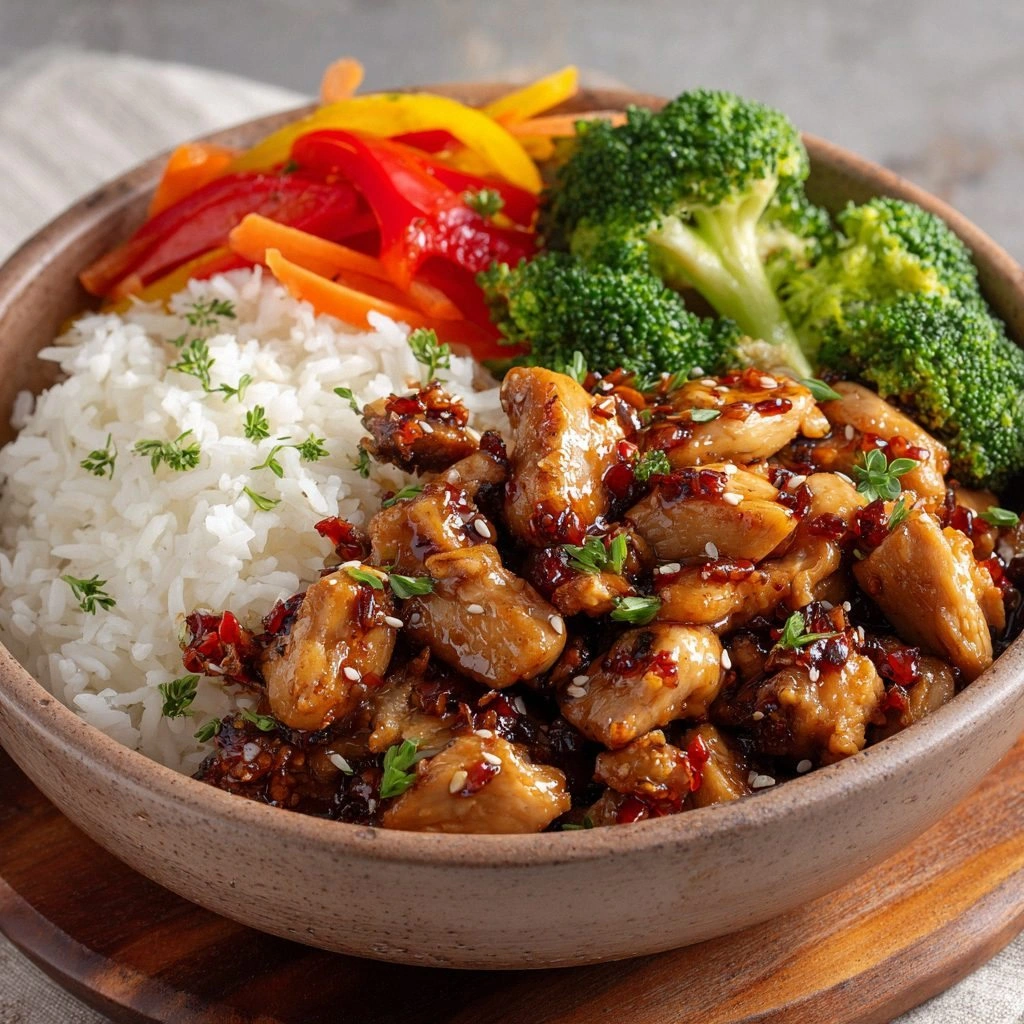
- Serve and enjoy: Arrange the glazed chicken on a platter, drizzle any leftover glaze over the top, and serve with a side of ranch dressing for dipping. The ranch balances the heat and sweetness, adding a cool, creamy contrast. Garnish with chopped cilantro or green onions for a fresh finish.
That’s it — you did it. But hold on, I’ve got a few more tricks that will take this to another level…
Insider Tricks for Flawless Results
The Temperature Rule Nobody Follows
Why temperature matters: The oil temperature determines the crispness of the crust. If the oil is too hot, the exterior will burn before the interior cooks; too cool, and the chicken will absorb oil and become greasy. Use a thermometer; aim for 350°F. If you don’t have a thermometer, test the oil by dropping a small breadcrumb; if it sizzles immediately, you’re good.
Why Your Nose Knows Best
Smell the glaze: As the honey and sugar caramelize, the aroma will shift from sweet to slightly smoky. That’s the cue that the glaze is ready. A strong, sweet scent indicates it’s too early; a deeper, caramelized scent means it’s perfect. Trust your nose over the clock.
The 5-Minute Rest That Changes Everything
Let it breathe: After frying, let the chicken rest on a rack for 5 minutes. This prevents steam from steaming the crust, keeping it crisp. It also allows the juices to redistribute, ensuring a juicy bite. Skipping this step often results in soggy edges.
Use a Double Dredge for Extra Crunch
Double coating: If you love an ultra‑crunchy texture, dip the chicken in flour, then eggs, then back into flour before the panko. The extra flour layer creates a thicker crust that stays crisp even after glazing.
Finish with a Butter Glaze
Butter finish: After glazing, drizzle a small amount of melted butter over the chicken. This adds a glossy sheen and a buttery finish that makes the dish feel indulgent. It also helps the glaze adhere better.
Keep the Chicken Warm Without Overcooking
Warm it up gently: If you need to hold the chicken warm before serving, place it in a 200°F oven on a wire rack. Avoid a hot oven that will continue to cook the chicken; a low temperature keeps it warm without drying it out.
Creative Twists and Variations
This recipe is a playground. Here are some of my favorite ways to switch things up:
Spicy Garlic Parmesan
Swap the glaze: Replace honey with maple syrup, add minced garlic, and sprinkle grated Parmesan over the chicken before glazing. The result is a savory, slightly sweet dish with a nutty finish. Great for a dinner party where you want something a little different.
Citrus Chipotle
Freshen it up: Add a splash of lime juice and zest to the glaze. The citrus cuts through the sweetness, giving a bright, zesty finish that pairs well with a side of cilantro rice.
Smoky BBQ Twist
Use BBQ sauce: Substitute ketchup with a smoky BBQ sauce and reduce the chipotle. This gives the chicken a deep, smoky flavor reminiscent of a pitmaster’s grill.
Herb‑Infused Chicken
Herbal addition: Mix dried thyme and rosemary into the flour coating. The herbs infuse the crust with aromatic flavors that complement the honey glaze.
Low‑Carb Version
Swap the breadcrumbs: Use crushed pork rinds or almond flour instead of panko. Keep the honey, but reduce the sugar to ¼ cup. The result is a crunchy, low‑carb chicken that satisfies without the carb load.
Vegan Take‑Away
Go plant‑based: Use a plant‑based butter alternative, a vegan egg replacer, and gluten‑free breadcrumbs. The glaze can be made with maple syrup and a vegan chipotle sauce. Serve with a vegan ranch for a complete meal.
Storing and Bringing It Back to Life
Fridge Storage
Keep it fresh: Store leftover chicken in an airtight container in the refrigerator for up to 4 days. The glaze may thicken slightly, but the flavor remains intact. Let the chicken sit at room temperature for 10 minutes before reheating.
Freezer Friendly
Freeze with care: Wrap each piece tightly in parchment paper and then place in a freezer bag. Freeze for up to 3 months. Thaw overnight in the refrigerator before reheating.
Best Reheating Method
Reheat to perfection: Preheat the oven to 375°F. Place the chicken on a wire rack over a baking sheet and bake for 10–12 minutes, or until heated through. Add a splash of water before reheating to keep the glaze moist and restore its glossy sheen.