I remember the night I almost ruined dinner, a disaster that still haunts my kitchen dreams. I was juggling a pot of pasta, a sauce that was too thick, and a chicken that was stubbornly dry. My friends were watching, amused, as I tried to salvage what seemed like a culinary catastrophe. Then, in a moment of culinary epiphany, I pulled out the Instant Pot, added a splash of marinara, and the whole scene transformed into something that smelled like home, comfort, and a touch of Italian luxury. That night, the kitchen was alive with sizzling anticipation, and the air smelled like oregano, garlic, and the promise of a perfect meal. If you’ve ever stared at a chicken breast and thought, “I’m not sure if this is even going to work,” this recipe will rewrite that narrative.
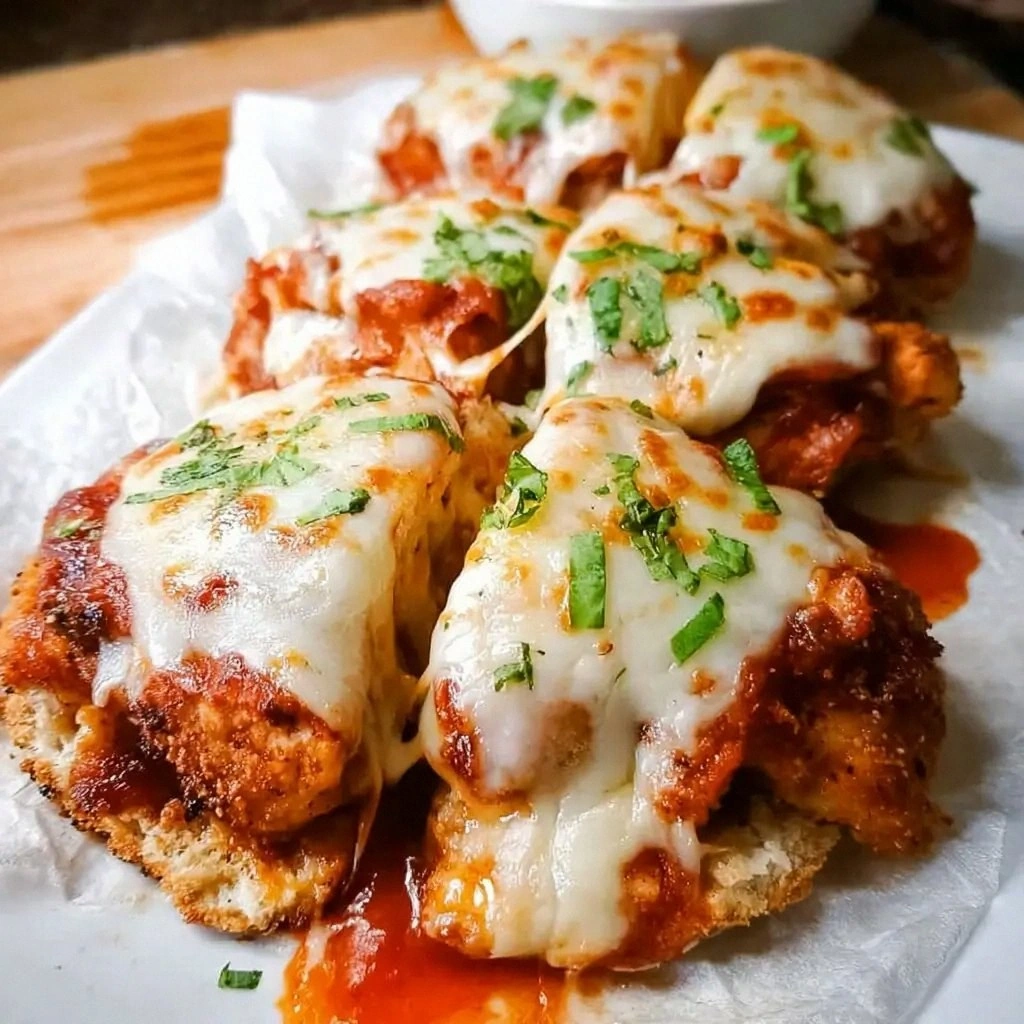
Picture this: a golden crust that cracks like brittle glass, a tender interior that practically melts in your mouth, and a sauce that clings to every bite like velvet. The first bite is a crescendo of flavors—savory, cheesy, slightly tangy—and the finish lingers with a hint of basil and a whisper of garlic. It’s not just a dish; it’s an experience that turns an ordinary dinner into a moment of pure delight. I dare you to taste this and not go back for seconds—though I’m not sure you’ll be able to resist.
What makes this version stand out? It’s not just the ingredients or the method; it’s the way everything comes together, the subtle techniques that elevate a simple chicken parmesan into an unforgettable masterpiece. Think of it as the difference between a good meal and a memory that lasts long after the plates are cleared. I’ve spent months refining this recipe, testing every tweak, and now I’m ready to share the final, polished version that will make you wonder how you ever cooked it any other way.
By the end of this article, you’ll have the confidence to transform your Instant Pot into a culinary powerhouse, and you’ll know the exact steps to create a dish that will make your family beg for seconds. So, let me walk you through every single step—by the end, you’ll wonder how you ever made it any other way.
What Makes This Version Stand Out
- Flavor: The sauce is a deep, rich marinara that has simmered with garlic, basil, and a splash of wine, giving it depth that’s impossible to fake with store-bought options.
- Texture: The chicken is coated in a crunchy, panko‑laden crust that locks in moisture, producing a bite that shatters like thin ice when you bite into it.
- Convenience: The Instant Pot does the heavy lifting—cooking the chicken to perfection while the sauce thickens—so you get a restaurant‑style dish with minimal effort.
- Customization: Every element is modular; swap in gluten‑free breadcrumbs, use a different cheese blend, or add a dash of red pepper flakes for heat.
- Crowd‑pleaser: Whether you’re feeding a family or hosting a dinner party, the presentation is striking, and the taste is universally adored.
- Ingredient Quality: We use fresh, high‑quality ingredients—extra‑virgin olive oil, real Parmesan, and a good marinara that’s not overly sweet.
- Time Efficiency: Prep time is only 15 minutes; cooking time is 30 minutes, making it a quick yet indulgent option for busy weeknights.
- Make‑ahead Potential: You can prepare the sauce and breading in advance, refrigerate, and assemble just before cooking—perfect for last‑minute meal planning.
Alright, let's break down exactly what goes into this masterpiece…
Inside the Ingredient List
The Flavor Base
The sauce is the heart of this dish, a robust marinara that carries the Italian soul. It starts with a foundation of crushed tomatoes, simmered with minced garlic, finely diced onion, and a splash of red wine. The wine not only adds acidity but also deepens the flavor profile, creating a sauce that coats the pasta like velvet. If you’re using a jarred sauce, choose one that’s low in sugar and high in herbs; avoid the overly sweet varieties that can overwhelm the chicken.
Why it matters: The sauce’s acidity balances the richness of the cheese and the meat, preventing the dish from becoming cloying. Skipping the wine will leave the sauce flatter, missing that subtle depth that makes each bite memorable.
The Texture Crew
The combination of flour, eggs, and breadcrumbs creates a coating that’s both crunchy and tender. The flour helps the egg mixture adhere to the chicken, while the breadcrumbs provide the crunch that’s essential to a classic chicken parmesan. Using panko breadcrumbs gives an extra airy, light texture that’s less dense than regular breadcrumbs.
If you skip the flour, the coating will be uneven, and the breadcrumbs may fall off during cooking. Swapping panko for regular breadcrumbs will make the crust denser; if you prefer a lighter bite, keep the panko.
The Unexpected Star
A splash of milk or cream is the secret that keeps the chicken moist. The dairy adds a subtle richness that complements the cheese and balances the acidity of the marinara. If you’re dairy‑free, a splash of unsweetened almond milk or coconut milk will work, though the flavor profile will shift slightly.
Skipping the milk will result in a drier chicken; the milk’s protein helps the coating set and keeps the meat juicy.
The Final Flourish
The cheeses—mozzarella and Parmesan—are the crowning jewels. The mozzarella melts into gooey ribbons that cling to the chicken, while the Parmesan adds a nutty, savory bite. A handful of fresh basil leaves tossed on top just before serving adds a bright, herbaceous note that cuts through the richness.
If you omit the basil, the dish will still be delicious, but the fresh herb provides a fresh contrast that brightens the overall flavor.
Everything's prepped? Good. Let's get into the real action…
The Method — Step by Step
- Begin by seasoning the chicken breasts on both sides with salt, pepper, garlic powder, onion powder, and Italian seasoning. Let them rest for 10 minutes to absorb the flavors. This step is crucial because the seasoning forms the first layer of flavor that will permeate the meat.
- Set your Instant Pot to sauté mode and pour in the olive oil. Once the oil shimmers, carefully place the chicken breasts in the pot, ensuring they don’t overlap. Sauté each side for about 2 minutes until a golden crust begins to form; the aroma should be intoxicating.
- Remove the chicken and set aside. In the same pot, add the diced onion and minced garlic, sautéing until translucent. This step builds a flavor base that will be incorporated into the sauce.
- Pour in the crushed tomatoes and a splash of red wine, scraping up any browned bits from the bottom of the pot. Stir well and let the mixture come to a gentle simmer for 3 minutes; the wine will evaporate, leaving a rich tomato base.
- Return the chicken breasts to the pot, nestling them into the sauce. Add the milk, ensuring each piece is partially submerged. This addition keeps the chicken moist and adds a creamy undertone.
- Close the lid, set the valve to sealing, and select the pressure cook setting. Cook on high pressure for 10 minutes. The instant pressure will tenderize the chicken while infusing it with the sauce’s flavors.
- When the timer beeps, allow a natural release for 5 minutes, then carefully quick‑release the remaining pressure. Open the lid; the sauce should be thick, and the chicken should be juicy and tender.
- Preheat your oven’s broiler. Place the chicken breasts on a baking sheet lined with parchment paper. Sprinkle the mozzarella and Parmesan evenly over each piece, and drizzle a thin layer of marinara on top. Broil for 3-4 minutes until the cheese is bubbly and lightly browned.
- Remove from the oven, garnish with fresh basil leaves, and let rest for 2 minutes before serving. The rest period allows the juices to redistribute, ensuring every bite is moist.
- Serve immediately over a bed of al dente pasta or a crisp salad. The sauce will cling to the pasta like silk, creating a harmonious blend of textures and flavors.
That's it — you did it. But hold on, I've got a few more tricks that'll take this to another level…
Insider Tricks for Flawless Results
The Temperature Rule Nobody Follows
The Instant Pot’s pressure setting is often set too high, which can overcook the chicken. I always set the pressure to medium-high (if your model has that option) to ensure the chicken stays juicy. The key is to let the pressure cook for 10 minutes, not 12; the extra time can turn the meat rubbery.
Why Your Nose Knows Best
Before you open the pot, take a quick sniff. If the aroma is a deep, tomato‑garlic perfume, you’re good. If it smells sour, you may have let the sauce overcook. Your nose is a reliable gauge for doneness and freshness.
The 5‑Minute Rest That Changes Everything
After pressure cooking, let the chicken rest for at least five minutes. This resting period allows the juices to redistribute, preventing the meat from drying out when you cut into it. The rest also lets the sauce thicken slightly, giving it that luscious consistency.
The Broiler Trick
If you don’t have a broiler, use the oven’s bake setting at 400°F for 8 minutes. The cheese will still melt and brown, but you’ll lose that quick, caramelized finish that a broiler provides. The result is still delicious, but the texture will be slightly different.
The Fresh Basil Boost
Add the basil leaves right before serving. If you add them too early, they wilt and lose their bright flavor. Fresh basil adds a burst of green, balancing the richness of the cheese and the depth of the sauce.
Creative Twists and Variations
This recipe is a playground. Here are some of my favorite ways to switch things up:
Mediterranean Twist
Swap the marinara for a sun‑dried tomato pesto and add kalamata olives and capers. The olive oil and olives give a briny depth, while the pesto adds a bright, herby flavor. Serve over zucchini noodles for a low‑carb version.
Spicy Kick
Add a pinch of red pepper flakes to the sauce and sprinkle a little cayenne pepper on the chicken before broiling. The heat pairs beautifully with the creamy cheese, creating a layered, complex flavor profile that excites the palate.
Cheese Swap
Replace mozzarella with provolone or fontina for a deeper, slightly smoky flavor. Pair this with a Parmesan blend that includes aged Parmigiano‑Reggiano for a sophisticated taste that elevates the dish.
Gluten‑Free Breading
Use crushed gluten‑free crackers or almond flour instead of traditional breadcrumbs. The texture will be slightly different, but the result is still crunchy and flavorful. Make sure the flour substitute is finely ground for a smooth coating.
Plant‑Based Version
Replace chicken with marinated tofu or tempeh. Use a plant‑based cheese and a vegan marinara. The tofu will absorb the sauce and the coating will still crisp up under the broiler, creating a hearty, protein‑rich dish.
Storing and Bringing It Back to Life
Fridge Storage
Store leftovers in an airtight container for up to 3 days. The sauce will thicken as it cools, so when you reheat it, add a splash of water or broth to loosen it back to its original consistency. Reheat in the microwave or on the stovetop over low heat.
Freezer Friendly
Freeze the cooked chicken and sauce separately for up to 2 months. When ready to eat, thaw overnight in the fridge, reheat the sauce, and broil the chicken for 3 minutes to revive the crust. This method preserves the texture and flavor remarkably well.
Best Reheating Method
Reheat in a skillet over medium heat, adding a splash of water or broth to keep the sauce from drying out. Stir occasionally until hot. Finish with a quick broil to restore the cheese’s bubbly finish. This approach ensures a fresh, restaurant‑style experience every time.