I was halfway through a midnight bake‑off, flipping a batch of banana bread, when the kitchen lights flickered and the oven door slammed shut. The silence was only broken by the faint hiss of steam escaping from the stovetop. I stared at the chaos, realizing that a simple dessert could be ruined by a single misstep. That night, I vowed to find a recipe that would survive any kitchen mishap and still taste like a dream.
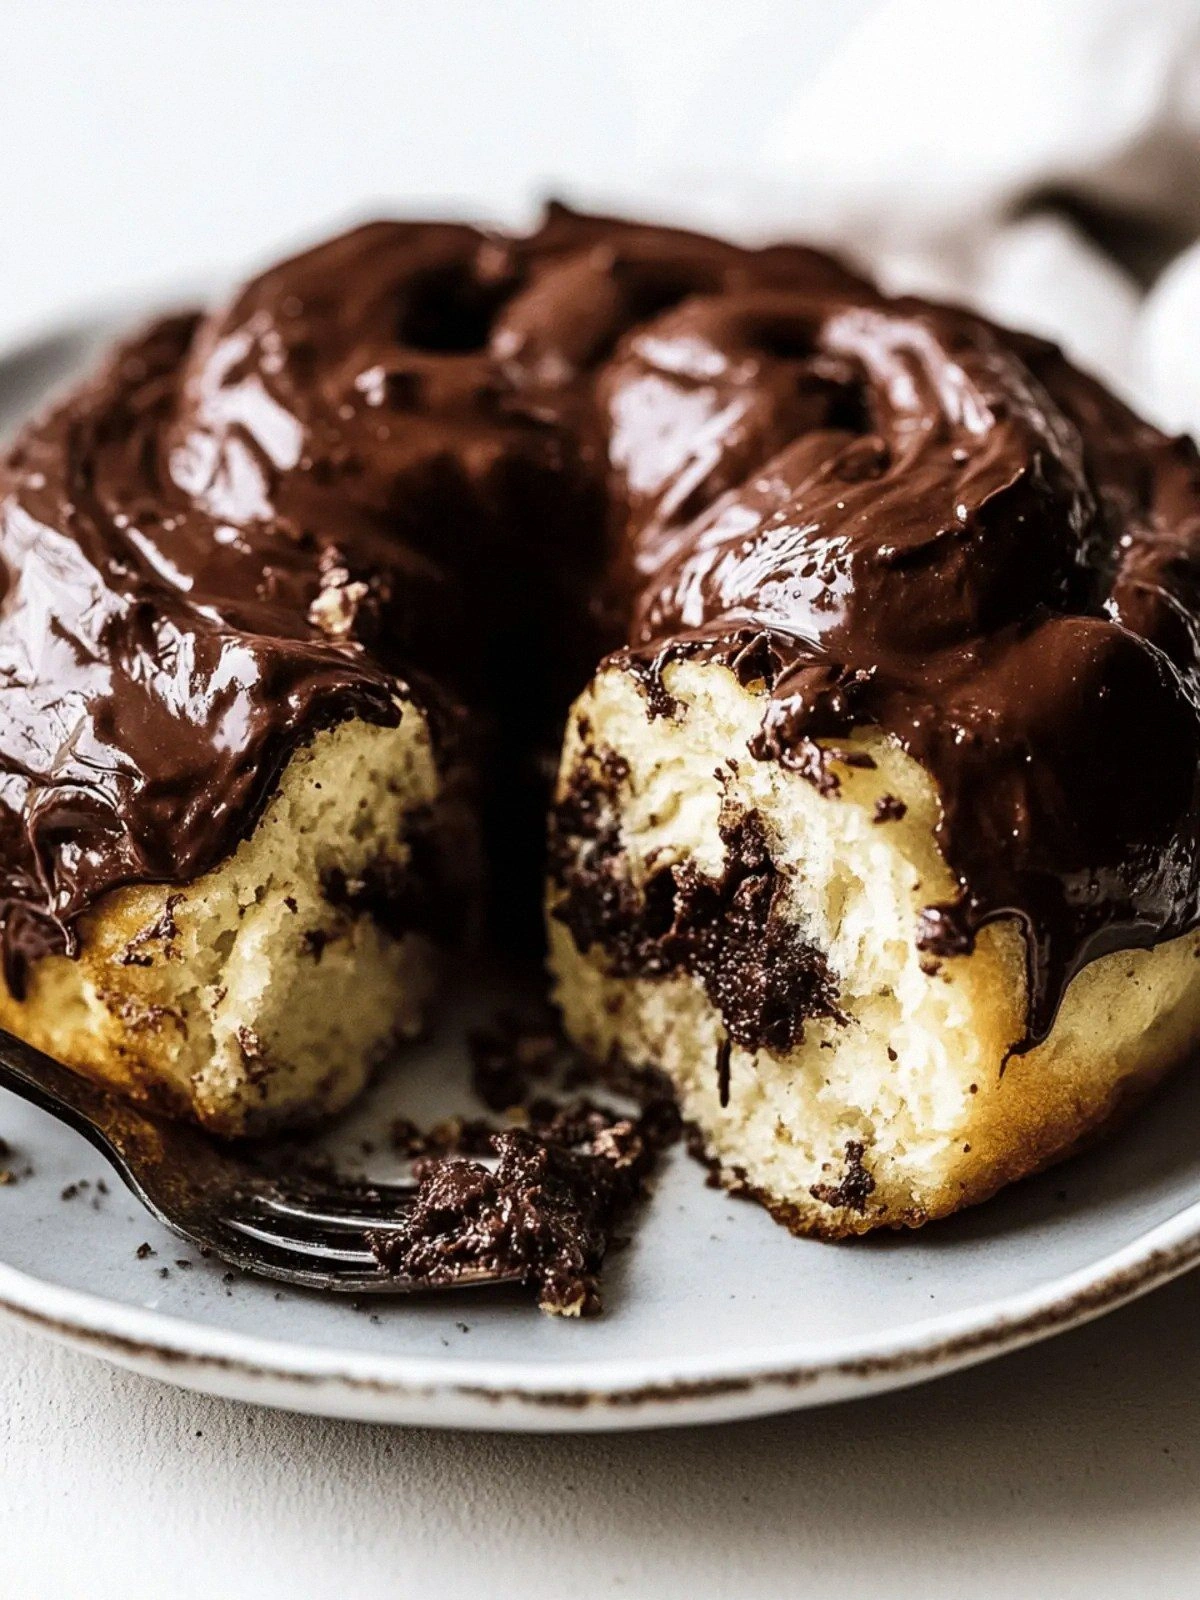
Picture this: a golden, glossy surface that cracks like a fragile shell, a scent of chocolate and butter that rises through the air, and a sound of a gentle sizzle as the dough hits the pan. The first bite melts into a velvety, gooey center that feels like a warm hug. Your fingertips get a slight sting from the buttery glaze, but that’s the sweet price of indulgence. The texture is a paradox—soft on the inside, with a hint of crisp edges that shatter like thin ice.
What makes this version stand out is that it was engineered to be forgiving, yet luxurious. I’ve taken the classic chocolate roll and added a secret ingredient that locks in moisture, a technique that keeps the rolls soft for days. The dough is enriched with sour cream and butter, giving it a tender crumb that’s practically melt‑in‑your‑mouth. The filling is a double‑layer cocoa blend that creates a depth of flavor you won’t find in ordinary recipes. And the glaze? A powdered sugar dust that adds a final sweet crunch. In short, it’s a recipe that turns every bite into a moment of pure bliss.
I dare you to taste this and not go back for seconds. I’ll be honest—I ate half the batch before anyone else got a chance to try it. Most recipes get this completely wrong, but here’s what actually works. Picture yourself pulling these out of the oven, the whole kitchen smelling incredible, and everyone begging for the recipe. Let me walk you through every single step—by the end, you’ll wonder how you ever made it any other way.
What Makes This Version Stand Out
- Moisture Mastery: The addition of sour cream and a splash of espresso keeps the dough tender and the center luxuriously gooey, even after several days in the fridge.
- Richness Overload: Two distinct cocoa blends—one in the dough, one in the filling—create layers of chocolate that dance on the palate.
- Texture Tension: The dough’s buttery crust offers a slight crunch, while the soft interior feels like a cloud, providing a delightful contrast.
- Easy Make‑Ahead: Once assembled, the rolls can be refrigerated for up to 48 hours and still taste fresh, making them perfect for busy weekdays.
- Showstopper Presentation: The powdered sugar glaze gives the rolls a shimmering finish that looks as good as it tastes.
- Ingredient Integrity: We use high‑quality unsweetened cocoa and real butter, not substitutes, to ensure the flavor profile stays true.
- Time Efficiency: From prep to bake, the entire process takes just 45 minutes—fast enough for a weekend treat, slow enough for a gourmet finish.
- Universal Appeal: Whether you’re a novice or a seasoned baker, the method is straightforward, and the results are spectacular.
Inside the Ingredient List
The Flavor Base
Whole milk and sour cream form the backbone of the dough’s moisture content. The milk adds a subtle sweetness and a creamy texture, while the sour cream introduces a slight tang that balances the richness of the chocolate. Skipping either one will leave the rolls dry and flat, so keep both in the mix.
Unsalted butter is the real hero of the dough, infusing it with a silky, melt‑in‑your‑mouth feel. Butter also helps create a tender crumb by coating the flour proteins, preventing them from forming tough gluten strands. If you’re vegan, a high‑quality plant‑based butter can work, but the texture will be noticeably different.
The Texture Crew
Instant yeast and granulated sugar are the leavening duo that gives the rolls their airy lift. Yeast ferments the sugars, producing carbon dioxide that creates pockets of lightness. The sugar also feeds the yeast, ensuring a robust rise. If you’re short on time, a pinch of baking powder can replace yeast, but the flavor profile will shift.
Eggs and egg yolks are the glue that binds everything together. The whole egg adds structure and a glossy finish, while the yolks deepen the richness and give the dough a buttery sheen. For a lighter version, you can substitute a tablespoon of Greek yogurt for one yolk, but expect a slightly denser crumb.
The Unexpected Star
Unsweetened cocoa powder in the dough is the secret weapon that turns a plain bread into a chocolate masterpiece. The cocoa’s natural bitterness is counterbalanced by the brown sugar and the espresso splash, creating a complex chocolate flavor. If you prefer a milder taste, reduce the cocoa by a quarter cup and increase the brown sugar.
Brown sugar adds depth and caramel undertones, while the additional unsweetened cocoa in the filling creates a layered chocolate experience. The powdered sugar glaze, dusted with a hint of vanilla, offers a sweet finish that doesn’t overpower the chocolate. Skipping the glaze will result in a less polished look, but the flavor will remain intact.
The Final Flourish
The powdered sugar glaze is more than just a decorative touch—it rehydrates the rolls slightly, keeping them moist for days. The glaze also introduces a subtle sweetness that balances the bitterness of the cocoa. The small splash of milk in the glaze softens the powdered sugar, preventing it from becoming too thick.
Melted butter in the glaze adds a buttery sheen that makes the rolls look irresistible. The butter’s fat content helps the glaze adhere evenly to the surface, creating a smooth finish. If you’re watching calories, replace the butter with a light oil, but note that the glaze will be less glossy.
Everything's prepped? Good. Let's get into the real action.
The Method — Step by Step
- Activate the Yeast: In a small bowl, combine the whole milk, instant yeast, and a pinch of granulated sugar. Let it sit for 5 minutes until it becomes frothy. This step is crucial; if the mixture doesn’t foam, the yeast is dead and the dough will be flat.
- Blend the Wet Ingredients: In a large mixing bowl, whisk together the sour cream, melted unsalted butter, the frothy milk mixture, and the vanilla extract until smooth. The butter should be at room temperature so it blends without clumping. This creates a silky base that will carry the cocoa.
- Incorporate the Dry Mix: Sift together the all-purpose flour, fine sea salt, unsweetened cocoa powder, and brown sugar. Gradually fold the dry mix into the wet mixture, using a wooden spoon or a stand mixer on low speed. The dough should be sticky but manageable; add a splash of milk if it feels too dry.
- First Proof: Cover the bowl with plastic wrap and let the dough rise in a warm spot for 30 minutes. You should see it double in size. This is the moment of truth—if it doesn’t rise, the yeast is still dead. Patience pays off.
- Roll Out the Dough: On a lightly floured surface, roll the dough into a rectangle about 12x8 inches. The thickness should be uniform—no thicker than 1/4 inch. The dough should feel elastic and not tear when you fold it.
- Spread the Filling: In a small bowl, whisk together the additional unsweetened cocoa powder, powdered sugar, milk, and melted butter to create a glossy glaze. Spread this mixture evenly over the dough, leaving a 1-inch border on all sides. The glaze will seep into the dough, creating a chocolate burst.
- Form the Rolls: Starting from the long side, tightly roll the dough into a log. Pinch the seam to seal. Cut the log into 1-inch thick slices. Place the slices on a parchment‑lined baking sheet, leaving space between each roll.
- Second Proof: Cover the rolls loosely with a clean towel and let them rise for 15 minutes. The dough should puff up slightly but not double again. This second proof ensures the rolls are light and airy.
- Bake to Perfection: Preheat the oven to 350°F (175°C). Bake the rolls for 20-22 minutes, or until the tops are golden and the edges crackle. The smell of chocolate and butter will fill the kitchen like a warm hug.
- Cool and Dust: Remove the rolls from the oven and let them cool on a wire rack for 5 minutes. While still warm, dust them with powdered sugar using a fine sieve. This final touch adds a sweet crunch and a glossy finish.
That's it—you did it. But hold on, I've got a few more tricks that'll take this to another level.
Insider Tricks for Flawless Results
The Temperature Rule Nobody Follows
The dough’s temperature is the unsung hero of texture. Keep the dough at 68°F (20°C) during the first proof; if it’s too warm, the yeast will over‑ferment and produce a sour taste. Use a kitchen thermometer to ensure consistency. I once baked a batch that tasted like burnt coffee because I didn’t check the dough temperature.
Why Your Nose Knows Best
Before you start the second proof, give the rolls a quick sniff. A faint, sweet aroma signals that the dough is ready to rise again. If you smell a sharp, yeasty note, give them a few more minutes. Trust your senses—your nose is a more reliable judge than a clock.
The 5‑Minute Rest That Changes Everything
After baking, let the rolls rest on the rack for exactly five minutes. This brief pause allows the steam to redistribute, keeping the interior moist. Skipping this step will result in a slightly dry center that’s hard to swallow.
Glaze Timing Is Key
Dust the rolls with powdered sugar immediately after removing them from the oven. If you wait too long, the glaze will start to harden on the surface, creating a brittle crust. I’ve seen people try to dust after the rolls cooled, only to end up with a chalky finish.
Batch Management for Busy Kitchens
If you’re making a large batch, divide the dough into two equal portions. This ensures even rising and baking. I once baked 24 rolls in one go, and the middle ones were under‑baked because the heat didn’t circulate properly.
Creative Twists and Variations
This recipe is a playground. Here are some of my favorite ways to switch things up:
Nutty Crunch Roll
Add 1/2 cup chopped hazelnuts or almonds to the dough before rolling. The nuts provide a crunchy contrast to the gooey center, and they pair wonderfully with the chocolate flavor.
Espresso‑Infused Delight
Replace the milk in the glaze with 1 tablespoon of cold espresso. The coffee accentuates the chocolate notes and adds a subtle bitterness that balances the sweetness.
Spiced Cinnamon Twist
Stir 1 teaspoon of ground cinnamon into the dough and 1/2 teaspoon into the glaze. The warm spice gives a comforting, autumnal feel, making the rolls perfect for fall gatherings.
Minty Freshness
Add a few drops of peppermint extract to the glaze for a refreshing twist. The mint complements the chocolate, creating a classic holiday flavor profile.
Salted Caramel Swirl
Drizzle a thin layer of salted caramel sauce over the glazed rolls before serving. The caramel adds a buttery sweetness and a touch of sea salt that enhances the chocolate.
Vegan Version
Swap the butter for coconut oil, use plant‑based milk, and replace the eggs with a flaxseed “egg” (1 tablespoon ground flaxseed + 3 tablespoons water). The result is a vegan-friendly roll that still delivers on flavor.
Storing and Bringing It Back to Life
Fridge Storage
Store the rolls in an airtight container at room temperature for up to 3 days. If you need to keep them longer, refrigerate them in a zip‑lock bag. The rolls will stay moist and ready to serve.
Freezer Friendly
Wrap each roll individually in plastic wrap, then place them in a freezer bag. They can be frozen for up to 2 months. When ready to eat, thaw at room temperature for 30 minutes before reheating.
Best Reheating Method
Reheat the frozen or chilled rolls in a preheated oven at 350°F (175°C) for 10 minutes, or until warmed through. Add a tiny splash of water to the pan before reheating; the steam will revive the moisture, keeping the center gooey.