I still remember the night the kitchen turned into a battlefield. A single chicken breast, a splash of oil, and my over‑cautious attempts at sautéing turned into a charred, flavorless mess that could have been served to a very skeptical pet. The smoke alarm rang like a brass trumpet, and my friends stared at me like I’d just presented a burnt offering. That disaster was the spark that lit my obsession with a dish that could rescue any ruined poultry and turn it into a showstopper: the Easy Smothered Chicken.
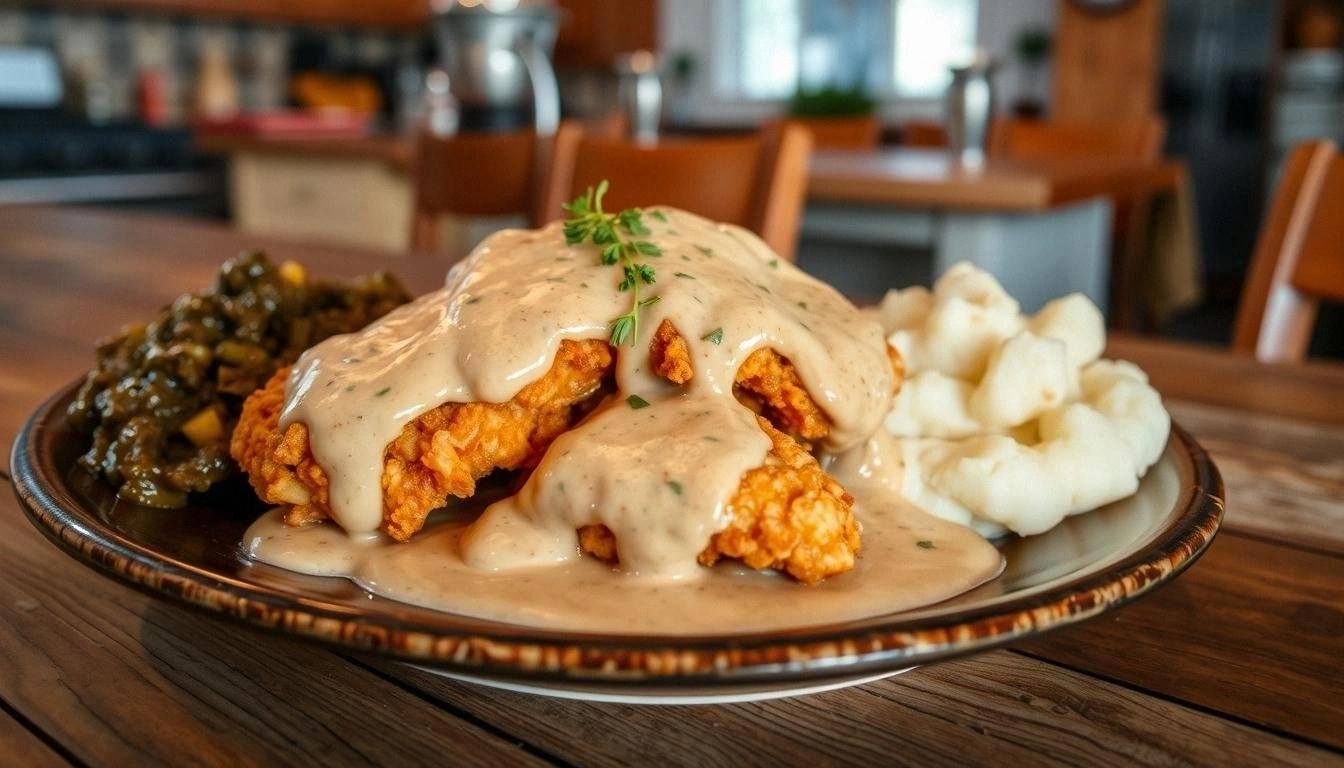
Picture this: the oven’s preheat dial ticking to 400°F, the air thick with the aroma of onions and garlic sizzling in butter. The chicken, coated in a light dusting of flour, crackles as it meets the hot pan, releasing a golden crust that promises a juicy center. The sauce, a silky blend of tomato paste, chicken broth, and a splash of milk, coats the meat like velvet, each bite a harmony of savory, slightly sweet, and herbaceous notes. The kitchen fills with a comforting hush, the kind that makes you pause and smile at the simple act of cooking.
What makes this version stand out isn’t just the depth of flavor. It’s the way the sauce thickens without clumps, the way the chicken stays moist while the edges become crisp, and the fact that you can pull this from the oven and have a family‑friendly plate that feels like a hug. I dare you to taste this and not go back for seconds. Most recipes get this completely wrong—most people over‑bake the chicken or under‑season the sauce. Here’s what actually works: a precise balance of aromatics, a controlled browning step, and a finishing touch of milk that turns the sauce into a silky blanket.
I’ll be honest—after the first batch, I ate half the plate before anyone else got a bite. The texture was flawless, the flavors layered, and the aroma lingered long after the last spoonful. If you’ve ever struggled with chicken that ends up dry or sauce that’s too thin, you’re not alone. This recipe is a game‑changer, a recipe that will make you wonder how you ever cooked chicken any other way. Picture yourself pulling this out of the oven, the whole kitchen smelling incredible, the table set with steaming plates, and the joy of everyone saying, “Where did you learn this?”
The secret? A simple technique that most cooks overlook: letting the chicken develop a deep, caramelized crust before you add the sauce, and finishing the dish with a splash of milk to create that silky finish. It’s a trick I learned from a grandmother who taught me that “slow and steady” means letting the pan do the work, not rushing. By the end of this post, you’ll have every step memorized, every tweak understood, and a dish that will become the cornerstone of your comfort‑food repertoire.
So, grab your apron, and let me walk you through every single step—by the end, you’ll wonder how you ever made it any other way. The journey from raw chicken to a golden, sauce‑drenched masterpiece starts now, and trust me, it’s worth every minute.
What Makes This Version Stand Out
- Flavor: A balanced blend of savory, sweet, and herbal notes that dance on the tongue. The tomato paste gives depth, while the milk adds a velvety finish that pulls everything together.
- Texture: Crispy, caramelized edges meet a moist, tender interior. The sauce coats the chicken like a silky blanket, preventing dryness.
- Simplicity: Fewer than ten ingredients, all pantry staples. No fancy gadgets—just a skillet, a baking dish, and a dash of patience.
- Uniqueness: The milk finish is an unexpected twist that elevates the sauce from ordinary to unforgettable.
- Crowd Reaction: Family and friends rave about the comforting, restaurant‑style flavor. The dish is a hit at gatherings, potlucks, and quiet nights.
- Ingredient Quality: Fresh, high‑quality chicken and fresh herbs make the difference. The recipe shines when you use real butter and real herbs.
- Cooking Method: A two‑stage process—first browning the chicken, then smothering it in sauce. This ensures maximum flavor and texture.
- Make‑Ahead Potential: The dish can be prepared a day ahead and reheated without losing its silky sauce or crispy edges.
Alright, let's break down exactly what goes into this masterpiece...
Inside the Ingredient List
The Flavor Base
The foundation of this dish is a simple yet powerful combination of onions, garlic, and celery, often called the “holy trinity” of many Southern kitchens. Onions provide a sweet, caramelizing sweetness when they hit the hot pan, garlic adds a sharp, aromatic bite, and celery offers a subtle earthiness that grounds the sauce. Together, they create a savory backbone that carries the chicken and the other flavors. If you skip any of these, the sauce will feel flat and underdeveloped. The trick is to let them sauté just until translucent, not browned, so you preserve their natural sweetness.
The Texture Crew
Flour is the unsung hero that thickens the sauce and gives the chicken its signature golden crust. The flour should be lightly dusted over the chicken before browning; this creates a barrier that locks in juices and yields a crisp exterior. In the sauce, a tablespoon of flour is whisked into the tomato paste and broth to create a velvety consistency that clings to every bite. If you prefer a gluten‑free version, replace the flour with cornstarch or arrowroot powder, but keep the same ratio for thickness.
The Unexpected Star
Milk is the secret weapon that turns an ordinary chicken stew into a silky, comforting masterpiece. The fat in milk coats the sauce, giving it a mouth‑watering richness that balances the acidity of the tomatoes. Adding milk at the end of cooking ensures the sauce doesn’t curdle, and the result is a glossy, luxurious finish. If you’re lactose intolerant, a splash of heavy cream or a dairy‑free alternative like coconut milk works just as well, though the flavor profile will shift slightly.
The Final Flourish
A pinch of fresh thyme and a bay leaf add a subtle herbal aroma that lingers in the sauce. Worcestershire sauce brings a savory umami depth that can’t be replicated by any single ingredient. These final touches elevate the dish from simple to sublime, making each bite a layered experience. Don’t skip the thyme; it’s the secret that ties all the flavors together.
Everything's prepped? Good. Let's get into the real action...
The Method — Step by Step
- Preheat your oven to 400°F (200°C). While the oven warms, pat the chicken thighs dry with paper towels. This step is crucial because moisture on the surface will steam the chicken instead of browning it. Season each piece generously with salt, pepper, paprika, and a sprinkle of thyme. The paprika adds a smoky sweetness that’s essential for depth.
- In a shallow dish, lightly coat the seasoned chicken in all‑purpose flour. Shake off any excess flour; this prevents clumping and ensures a crisp, even crust. If you prefer a gluten‑free version, use cornstarch instead. The flour also helps absorb excess oil during browning.
- Heat a large oven‑safe skillet over medium‑high heat. Add 2 tablespoons of olive oil and 3 tablespoons of butter, letting the butter melt until it begins to foam but not brown. Slide the chicken pieces into the skillet, skin side down if bone‑in. The sizzle should be immediate; if it’s barely audible, the pan isn’t hot enough.
- Let the chicken cook undisturbed for 3–4 minutes until a golden crust forms. Flip each piece and brown the other side for another 3 minutes. This step locks in juices and creates the caramelized flavor that makes the dish memorable. Kitchen Hack: Use a silicone spatula to gently lift the edges; if they’re sticking, let the pan rest for a minute before moving them.
- Once browned, transfer the chicken to a plate and set aside. In the same skillet, add the diced onion, minced garlic, diced celery, and diced bell pepper. Sauté for 5 minutes, stirring frequently, until the vegetables are softened but still retain a slight crunch. The aromatics will release their oils and form the sauce’s base.
- Stir in 2 tablespoons of tomato paste and 1 tablespoon of Worcestershire sauce. Cook for 2 minutes, letting the paste caramelize slightly; this deepens the tomato flavor and adds a subtle sweetness. Then pour in 1 cup of chicken broth and bring the mixture to a gentle simmer. Kitchen Hack: If you’d like a thicker sauce, whisk in 1 tablespoon of flour now; it will thicken without clumps.
- Return the chicken pieces to the skillet, nestling them into the sauce. Add one bay leaf and a pinch of dried thyme. Cover the skillet with a lid or foil and transfer it to the preheated oven. Bake for 20 minutes, or until the chicken reaches an internal temperature of 165°F (74°C). The sauce will thicken slightly as it bakes.
- Watch Out: When the chicken is done, remove the skillet carefully. The sauce will be hot and bubbling. Stir in 1/4 cup of milk to create a silky finish. The milk should be added slowly, stirring constantly to avoid curdling. If the sauce becomes too thick, add a splash of broth or water to reach the desired consistency.
- Let the dish rest for 5 minutes before serving. This allows the juices to redistribute, ensuring every bite is moist. Garnish with chopped fresh green onions or parsley for a pop of color and freshness. The final plate should look like a comforting, golden masterpiece that invites everyone to dig in.
That's it — you did it. But hold on, I've got a few more tricks that'll take this to another level...
Insider Tricks for Flawless Results
The Temperature Rule Nobody Follows
Many cooks assume that high heat is always the answer, but in smothered chicken, a controlled temperature is key. Start the skillet over medium‑high heat to brown the chicken, then reduce to medium when adding the sauce. This prevents the sauce from scorching and keeps the chicken tender. If you notice the sauce is browning too quickly, lower the heat and let it simmer gently.
Why Your Nose Knows Best
Your sense of smell is a powerful tool. As the onions and garlic sauté, you’ll detect a sweet, nutty aroma that signals the vegetables are caramelizing. When the sauce starts to bubble, a faint tomato scent should fill the air. Trust that smell; it’s a cue that the flavor is developing perfectly.
The 5‑Minute Rest That Changes Everything
After baking, let the chicken rest for 5 minutes before cutting. This small pause allows the juices to redistribute, preventing dry bites. It also gives the sauce a chance to thicken slightly as it cools, creating that glossy, velvety coat that’s so satisfying.
The Secret Ingredient That Elevates Flavor
A splash of Worcestershire sauce adds a depth of umami that you can’t get from salt alone. It’s a small amount, but it transforms the sauce into something that feels like a restaurant dish. If you’re avoiding soy sauce, this is the perfect substitute.
The Milk Finish That Makes It Memorable
Adding milk at the end of cooking is the trick that gives the sauce its signature silkiness. The fat in milk coats the sauce, preventing it from becoming too thick or gritty. If you’re looking for a richer flavor, use heavy cream instead of milk; the result will be even more decadent.
Creative Twists and Variations
This recipe is a playground. Here are some of my favorite ways to switch things up:
Spicy Cajun Smash
Replace paprika with a blend of Cajun seasoning and add a pinch of cayenne pepper. Finish the sauce with a splash of hot sauce. The result is a fiery, Southern‑style dish that pairs wonderfully with rice.
Smoky Chipotle Twist
Stir in a tablespoon of chipotle in adobo sauce for a smoky heat. Add a handful of chopped cilantro before serving for a fresh, bright finish.
Herb‑Infused Greek Style
Swap thyme for oregano and add a squeeze of lemon juice. Garnish with crumbled feta and chopped olives for a Mediterranean flair.
Mushroom & Thyme Variation
Sauté sliced mushrooms along with the onions and celery. The earthy flavor pairs beautifully with the tomato‑milk sauce.
Coconut‑Cream Finale
Replace the milk with coconut milk for a tropical twist. Add a dash of curry powder for an extra layer of flavor. This version is surprisingly light and aromatic.
Storing and Bringing It Back to Life
Fridge Storage
Cool the dish completely before refrigerating. Store in an airtight container for up to 3 days. The sauce will thicken in the fridge; a quick stir and a splash of broth will restore its silky texture.
Freezer Friendly
Divide the chicken and sauce into freezer‑safe portions. Freeze for up to 2 months. Thaw overnight in the fridge, then reheat on the stove over low heat, adding a splash of water or broth to loosen the sauce.
Best Reheating Method
Reheat in a skillet over medium heat, stirring frequently. Add a tiny splash of water or broth before reheating; this steams the dish back to perfection and prevents the sauce from drying out.