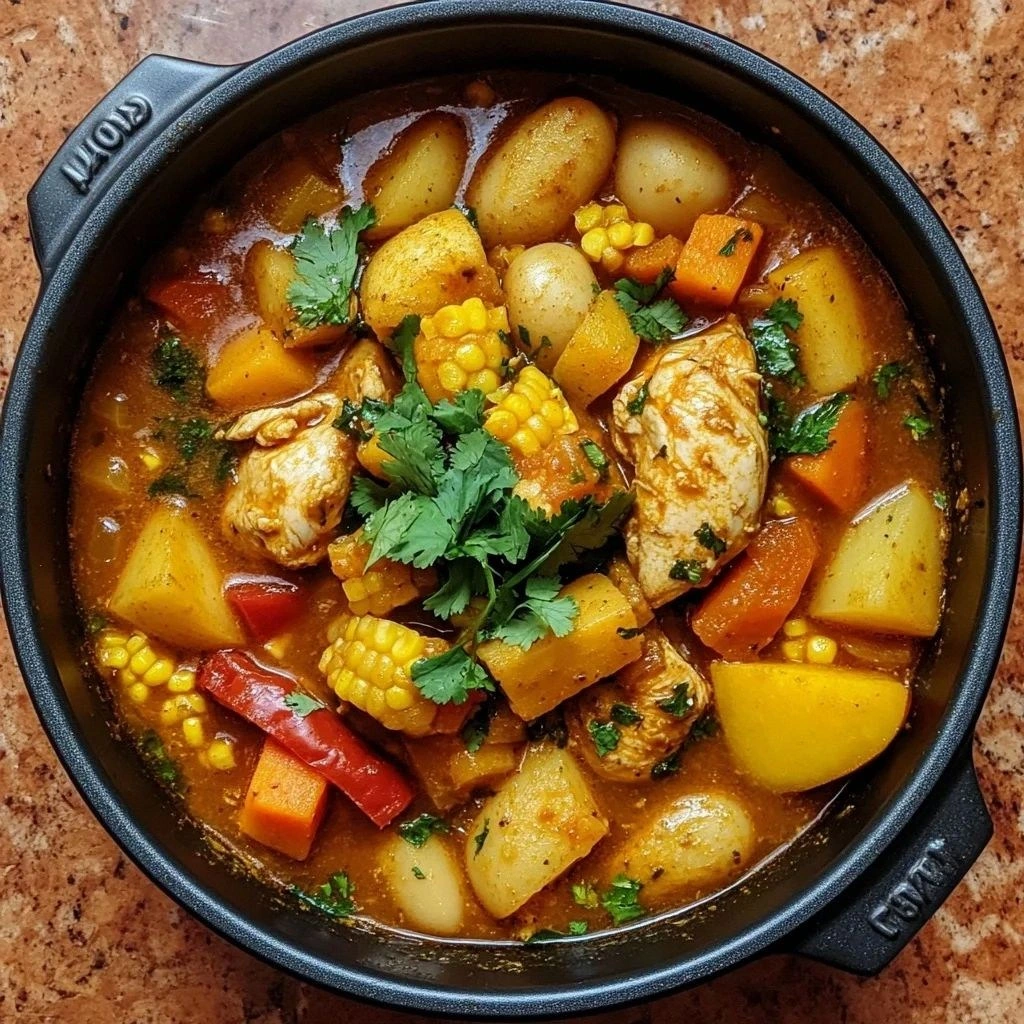
It all started on a rainy Thursday when I was craving something hearty yet surprisingly quick. I opened the pantry, stared at the jar of pumpkin puree, and thought, “Why not mix this with chicken and spices?” The idea sparked a culinary rebellion against the bland, over‑cooked chicken that had haunted my dinner routine for months. I imagined a pot where the pumpkin’s sweet, velvety texture would mingle with smoky paprika, cumin, and a whisper of cinnamon, creating a dish that feels both festive and everyday.
Picture the scene: a whirring Instant Pot, the aroma of sautéed onions and garlic filling the kitchen, a splash of canned tomatoes that turns the broth into a ruby‑red sauce. The sound of the pot’s “sauté” setting is like a low drumbeat, steady and inviting. As the ingredients mingle, the pumpkin puree coats the chicken like a silky cloak, while the spices dance in a fragrant waltz. The kitchen fills with a warm, autumnal scent that makes you forget it’s only October—this is a recipe that feels like a hug in a bowl.
What makes this version stand out isn’t just the ingredients; it’s the method that preserves each element’s integrity. By cooking on pressure, the chicken stays moist and tender, the pumpkin’s natural sweetness is locked in, and the spices bloom without burning. Most pumpkin‑chicken recipes end up dry or overly tomato‑heavy, but this Instant Pot technique keeps the flavors balanced and the texture silky. I dare you to taste this and not go back for seconds, because the first bite will have you craving the second.
And if you’re wondering why I chose an Instant Pot, it’s because it turns a complex, time‑consuming dish into a single‑pot miracle. The “sauté” function caramelizes the onions, the pressure cook locks in moisture, and the quick release keeps the chicken juicy. By the time the timer dings, the kitchen smells like a Thanksgiving feast, yet the dish is ready in less than 45 minutes. Let me walk you through every single step—by the end, you’ll wonder how you ever made it any other way.
What Makes This Version Stand Out
- Taste: The blend of smoky paprika, cumin, and cinnamon creates a layered flavor profile that feels both spicy and sweet, reminiscent of a fall harvest. The pumpkin puree softens the heat, offering a mellow finish.
- Texture: Pressure cooking keeps the chicken tender while the beans stay plump, and the pumpkin turns into a smooth, velvety sauce that clings to every bite.
- Convenience: No chopping, no simmering, just one pot and a timer. The “sauté” and “pressure cook” functions handle the work, freeing you to focus on the kitchen vibe.
- Uniqueness: The subtle cinnamon twist turns an ordinary chili into a seasonal celebration, a nod to the pumpkin’s natural sweetness.
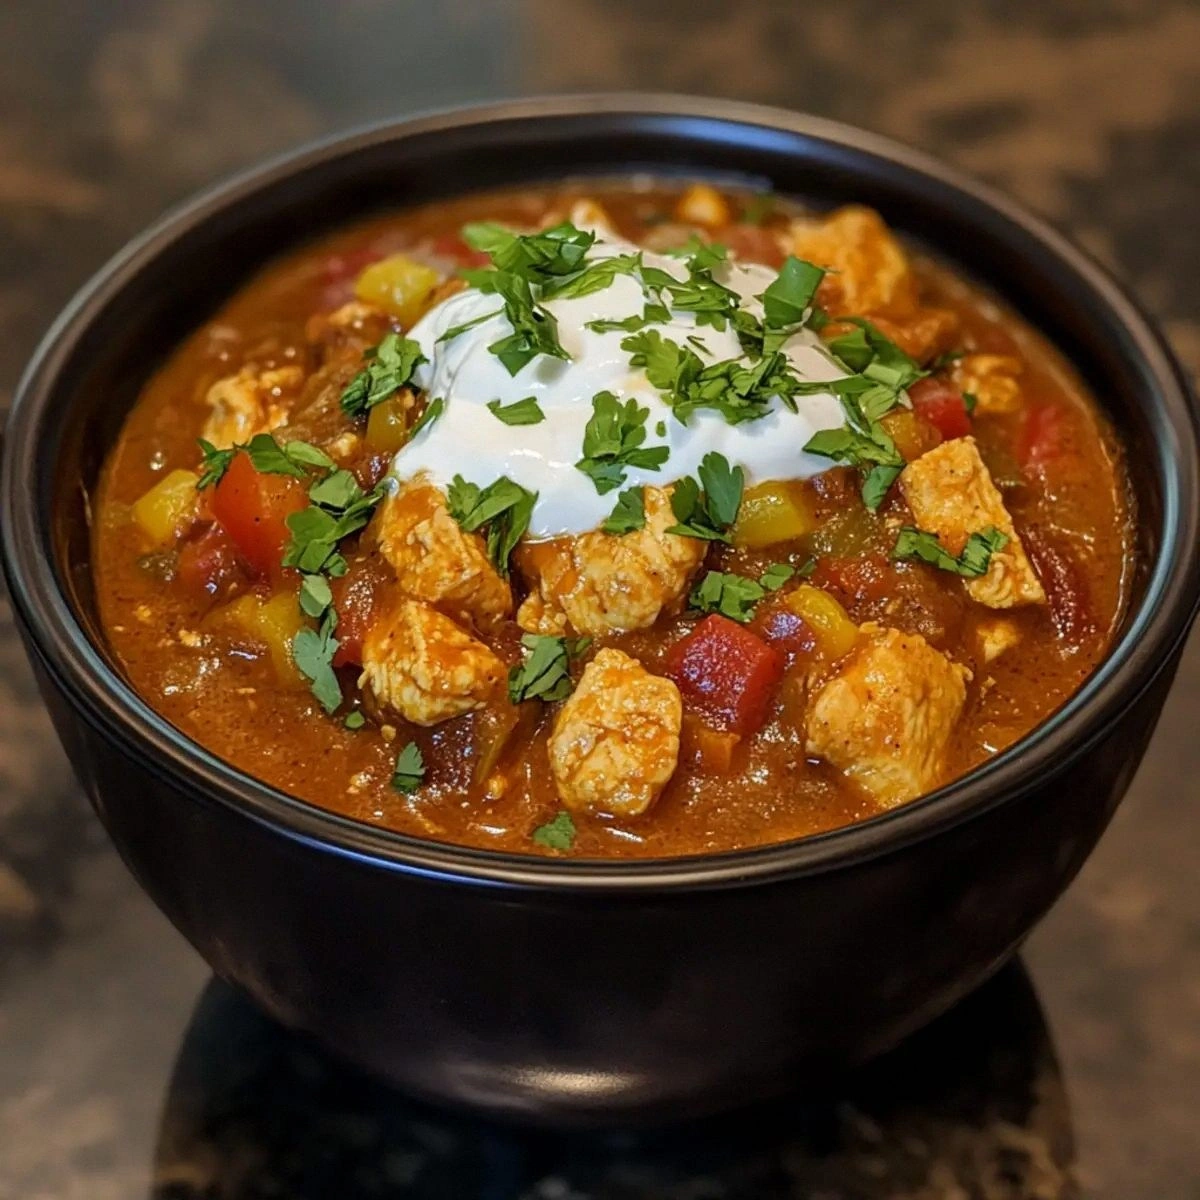
- Crowd Appeal: Whether it’s a family dinner or a potluck, the bright lime wedges and fresh cilantro add a pop that everyone loves.
- Ingredient Quality: Using fresh, high‑quality canned pumpkin puree and low‑sodium chicken broth ensures the dish stays wholesome and flavorful.
- Make‑Ahead Potential: This chili tastes even better the next day, making it perfect for meal prep or leftovers that stay delicious.
Inside the Ingredient List
The Flavor Base
The foundation of this dish is the aromatic medley of onions, garlic, and spices. Sautéing the onions until translucent releases a sweet, caramelized flavor that becomes the backbone of the sauce. Garlic powder and onion powder are added at the end of the sauté to avoid bitterness, ensuring a smooth, rounded taste. If you skip this step, the chili will feel flat and lack depth.
The Texture Crew
Chicken is the star of the show—boneless, skinless breasts or thighs keep the dish lean yet juicy. Cutting the chicken into bite‑sized pieces allows for even cooking and easier spooning into bowls. The beans add a hearty, satisfying chew; using canned beans saves time, while rinsing them removes excess sodium. Skipping the beans would leave the chili thin and less filling.
The Unexpected Star
Pumpkin puree isn’t just a garnish; it’s the soul of the sauce. Its natural sweetness balances the heat from the spices and the acidity from the tomatoes. Using a high‑quality, 100% pumpkin puree (not pumpkin pie filling) ensures a pure flavor without added sugars. If you’re allergic or simply don’t have pumpkin puree, a small amount of sweet potato puree can serve as a substitute, though the flavor profile will shift.
The Final Flourish
Fresh cilantro and lime wedges provide a bright, citrusy contrast that lifts the dish. The cilantro adds a herbal freshness, while the lime wedges offer a sharp, zesty punch that cuts through the richness. Adding the cilantro after cooking preserves its color and flavor; adding it too early can cause it to wilt. If you’re not a fan of cilantro, parsley or basil can be used as alternatives.
Everything’s prepped? Good. Let’s get into the real action…
The Method — Step by Step
- Turn the Instant Pot to “Sauté” mode and add a splash of olive oil. Once the oil shimmers, add the diced onions and cook until they’re translucent, about 3 minutes. This step caramelizes the sugars in the onions, creating a sweet base for the chili. Keep stirring to avoid sticking—if the onions begin to brown too quickly, add a teaspoon of water.
- Add the garlic powder, onion powder, chili powder, cumin, smoked paprika, and cinnamon. Stir vigorously for 30 seconds until the spices release their aromas. The smell that rises is a promise of the depth that follows. Don’t rush; this is the moment where the flavor foundation solidifies.
- Pour in the diced tomatoes and pumpkin puree, swirling to combine. The mixture should look like a thick, ruby‑red sauce with a hint of orange. If the mixture seems too thick, splash in a tablespoon of broth to loosen it. This ensures the pressure cook will distribute heat evenly.
- Add the chicken pieces, ensuring they’re coated with the spice‑tomato‑pumpkin mixture. Gently stir to mix, but avoid breaking the chicken into smaller pieces. The chicken should be submerged in the sauce for even cooking.
- Pour in the chicken broth, making sure the liquid covers the ingredients by at least an inch. Seal the Instant Pot lid, set the valve to “Sealing,” and select “Manual” or “Pressure Cook” on high for 10 minutes. The pressure will tenderize the chicken while keeping the pumpkin silky.
- When the timer dings, perform a quick release by carefully turning the valve to “Venting.” This stops the cooking immediately and preserves the texture of the beans and chicken.
- Open the lid and stir in the beans and bell peppers. The peppers add a subtle crunch and a pop of color that brightens the dish. Let the mixture simmer on “Sauté” mode for 5 minutes so the peppers soften slightly while retaining bite.
- Taste and season with salt and pepper as needed. The final touch is to fold in the chopped cilantro and squeeze the lime wedges over the top just before serving. This brightens the flavors and adds a refreshing contrast.
That’s it— you did it. But hold on, I’ve got a few more tricks that will take this to another level…
Insider Tricks for Flawless Results
The Temperature Rule Nobody Follows
While the Instant Pot handles most of the heat, the “Sauté” function should be set to medium‑high, not high. This prevents the spices from burning and keeps the sauce from sticking to the bottom. I once set it to high and ended up with a burnt, bitter base that ruined the dish. Keep the temperature steady, and the flavors will bloom beautifully.
Why Your Nose Knows Best
Before you season, give the chili a sniff. The aroma will tell you if the spices need more depth or if the pumpkin is overpowering. If it smells too tomato‑heavy, add a pinch of cumin; if it’s too sweet, a dash of smoked paprika will bring balance. Trust your nose—your taste buds will thank you.
The 5‑Minute Rest That Changes Everything
After the pressure release, let the chili sit for five minutes with the lid on. This resting period allows the flavors to meld and the beans to absorb the sauce fully. I’ve seen people skip this step and end up with a dish that tastes like it’s still cooking. A short rest is a simple way to elevate the entire experience.
Layering the Spices
For a subtle hint of smokiness, add a pinch of liquid smoke during the sauté phase. It’s a quick way to deepen the flavor without adding extra heat. If you’re avoiding processed additives, a few drops of smoked paprika will suffice.
Using Fresh vs. Canned Beans
Fresh beans bring a firmer texture, but canned beans are convenient and just as tasty when rinsed well. If you prefer a more robust bean, try dried beans soaked overnight and cooked separately; the texture will be firmer and the flavor richer.
Creative Twists and Variations
This recipe is a playground. Here are some of my favorite ways to switch things up:
Spicy Chipotle Kick
Add a tablespoon of chipotle in adobo for a smoky heat that complements the cinnamon. This variation is great for those who love a little bite and a smoky undertone.
Vegetarian Swap
Replace the chicken with tofu cubes or tempeh. Sauté the tofu until golden before adding it to the pot; this gives it a pleasant texture and soaks up the spices.
Mexican Street Tacos
Serve the chili over warm corn tortillas with a dollop of sour cream and shredded cheese. The creamy topping balances the heat and adds a velvety finish.
Asian Fusion
Incorporate a splash of soy sauce and a pinch of ginger powder. This twist adds umami and a subtle zing, turning the dish into a cross‑cultural delight.
Low‑Carb Delight
Omit the beans and increase the bell pepper volume. The dish remains hearty, and the peppers add crunch and flavor without the carb load.
Breakfast Boost
Serve the chili with a poached egg on top and a sprinkle of cheddar. The runny yolk creates a creamy sauce that pairs wonderfully with the pumpkin’s sweetness.
Storing and Bringing It Back to Life
Fridge Storage
Cool the chili to room temperature before transferring it to an airtight container. Store in the refrigerator for up to 4 days. The flavors will deepen, making it even more comforting.
Freezer Friendly
Divide the chili into individual portions and place them in freezer‑safe containers or zip‑lock bags. Freeze for up to 3 months. Thaw overnight in the fridge before reheating.
Best Reheating Method
Reheat on the stovetop over low heat, adding a splash of water or broth to loosen the sauce. Stir until hot and serve immediately. This simple trick keeps the pumpkin silky and prevents the chili from drying out.