I was standing in a kitchen that smelled like burnt sugar and regret when the idea hit me like a lightning bolt: what if the classic campfire treat could be turned into a glossy, no-bake masterpiece that feels like a dessert and a snack in one? I had just finished a long, exhausting day and the only thing that could salvage my evening was a handful of graham crackers, a bag of mini marshmallows, and a chocolate chip jar that was practically begging for a second life. The moment I opened the bag of marshmallows, the sweet, gooey aroma hit me, and I knew I was about to create something that would make even the most skeptical of snack lovers swoon. If you’ve ever tried to recreate s’mores on a countertop and ended up with a sticky mess, you’re not alone—and that’s why this version is a game changer.
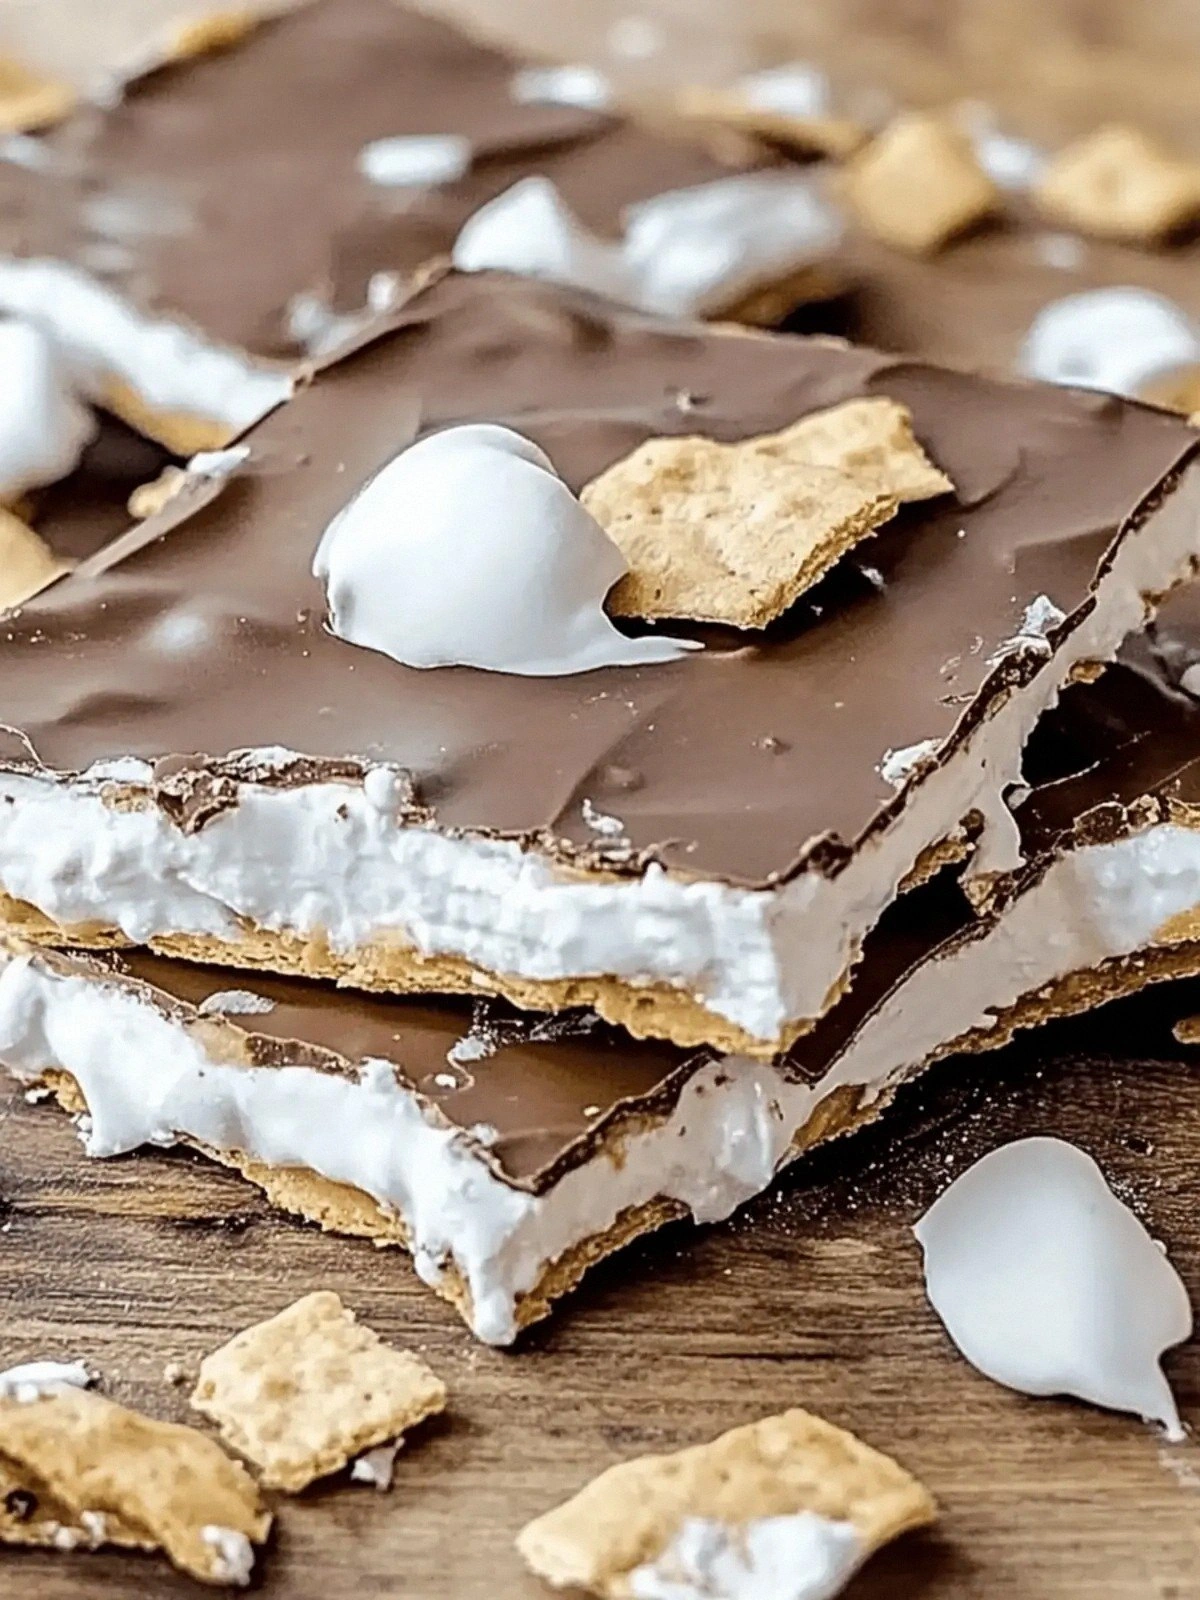
Picture this: the chocolate chips melt into a glossy, silky sauce that coats the crisp graham crackers like a velvet blanket, while the marshmallows puff up into golden, caramelized clouds that crackle when you bite into them. The crunch of the crackers contrasts with the chewy marshmallow, and the chocolate’s bittersweet depth cuts through the sweetness, leaving a lingering aftertaste that feels indulgently nostalgic. The texture is a symphony of crunch, goo, and melt—each bite delivers a different sensation, yet they all harmonize into one unforgettable experience. This isn’t just a treat; it’s a memory you can eat, a campfire moment you can bring into your living room.
What sets this recipe apart is that it eliminates the need for a campfire or a toasty pan. Instead, it uses a simple double boiler technique that brings out the chocolate’s natural sheen without scorching it, and it incorporates a surprising crunch element: graham cracker crumbs that add a subtle, buttery bite that keeps the bark from becoming too sweet or too soggy. The result is a bark that holds its shape perfectly, can be sliced into bite-sized squares, and is even easier to share at parties than the traditional s’mores. I dare you to taste this and not go back for seconds; the first bite will have you craving the second without the need to set up a campfire.
And the best part? You can make this in minutes, store it in the fridge, and reheat it in the microwave for a quick, chocolatey fix whenever you need a sweet boost. The simplicity of the ingredients—just chocolate, butter, graham crackers, marshmallows, and crumbs—means you can grab them from any grocery store aisle. This recipe is the ultimate version of the classic treat, and I’m about to walk you through every single step so that by the end, you’ll wonder how you ever made it any other way.
What Makes This Version Stand Out
- Flavor: The chocolate melts into a silky sauce that coats every crumb, creating a deep, rich flavor profile that outshines ordinary s’mores.
- Texture: The graham cracker crumbs add a buttery crunch that balances the gooey marshmallow, giving each bite a satisfying bite-to-melt ratio.
- Ease: No campfire or oven required—just a double boiler, a few minutes of stirring, and a sheet pan.
- Versatility: The base is so adaptable that you can swap in dark chocolate, add nuts, or sprinkle sea salt for a gourmet twist.
- Make‑ahead: Slice the bark once it cools, store in an airtight container, and enjoy it for days—perfect for parties or snack boxes.
- Visual Appeal: The glossy chocolate coating and golden marshmallow peaks make the bark look like a piece of chocolate art, perfect for Instagram.
- Ingredient Quality: Using high‑quality chocolate chips and real butter elevates the flavor, making the difference between a good bark and a great bark.
- Crowd Reaction: Friends and family will be amazed that you can make campfire treats at home, and the bark’s shareable squares keep everyone satisfied.
Alright, let's break down exactly what goes into this masterpiece...
Inside the Ingredient List
The Flavor Base
Chocolate chips are the heart of this bark. They melt into a luscious sauce that coats the graham crackers, creating a chocolatey foundation that’s both sweet and slightly bitter. If you skip the chocolate, the bark loses its signature richness and becomes a plain marshmallow and cracker mix. For a deeper flavor, choose a high‑cocoa dark chocolate or a blend of milk and dark chocolate chips. The best chocolate has a cocoa content between 60% and 70% for that perfect balance of sweetness and depth.
The Texture Crew
Graham crackers are the crunchy backbone of the bark. They provide a buttery, slightly sweet crunch that contrasts beautifully with the gooey marshmallows. If you use a different type of cracker, like oat or almond, the flavor profile will shift dramatically. The mini marshmallows are the star of the show, puffing up into golden clouds that add a chewy, caramelized layer. They also help bind the chocolate and crackers together, preventing the bark from crumbling. If you’re craving a bit more chew, you can use regular marshmallows and cut them into smaller cubes.
The Unexpected Star
Graham cracker crumbs are the secret ingredient that makes this bark stand out. They create a subtle, buttery crunch that keeps the bark from becoming too sweet or too sticky. The crumbs also help absorb excess moisture from the marshmallows, ensuring the bark stays firm. If you’re worried about the crumbs becoming too dry, lightly toast them in a dry skillet before adding them to the batter. A quick toast brings out their nutty flavor and enhances the overall crunch.
The Final Flourish
Unsalted butter is added to the chocolate melt to give the bark a silky, glossy finish and a hint of richness. It also helps the chocolate coat the crackers evenly, preventing clumps. If you’re lactose intolerant, you can replace the butter with coconut oil or a plant‑based butter alternative. The butter’s role is crucial; without it, the bark would be gritty and uneven. A tablespoon is all you need to achieve that smooth, mouth‑watering texture.
Everything's prepped? Good. Let's get into the real action...
The Method — Step by Step
- Step 1: Prep the pan. Line a 9x13 inch baking sheet with parchment paper, ensuring it’s long enough to accommodate the bark once it cools. This prevents sticking and makes cleanup a breeze. I always use parchment because it gives a slight lift to the bark, allowing the chocolate to set evenly. If you’re in a hurry, you can lightly spray the parchment with non‑stick spray as an alternative. The key is a clean, flat surface for the bark to rest on.
- Step 2: Melt the chocolate. Combine 1 cup chocolate chips and 1 tablespoon unsalted butter in a heat‑proof bowl. Place the bowl over a pot of simmering water, making sure the bottom of the bowl doesn’t touch the water. Stir constantly until the chocolate is completely melted and smooth. The butter will give the chocolate a glossy sheen. If the chocolate starts to brown, remove the bowl immediately to avoid burning.
- Step 3: Add the crumbs. Stir in ½ cup graham cracker crumbs until fully incorporated. The crumbs should be evenly distributed, creating a fine, buttery base. This step is crucial; the crumbs help absorb excess moisture and keep the bark from becoming soggy. If you’re feeling adventurous, you can lightly toast the crumbs in a skillet to deepen their flavor. The aroma will fill the kitchen, setting the stage for the rest of the process.
- Step 4: Combine the crackers. Fold in 2 cups crushed graham crackers, making sure they’re evenly coated with the chocolate mixture. The crackers should be fully saturated but not soaked. The chocolate will act as a binder, so don’t over‑crush the crackers; you want chunks for texture. If you prefer a smoother bark, you can pulse the crackers in a food processor before adding them. This will give you a finer crumb texture.
- Step 5: Spread the mixture. Pour the chocolate-cracker mixture onto the prepared baking sheet. Use a spatula to spread it into an even layer about ½ inch thick. The thickness is important; too thin and it will crack, too thick and it will take longer to set. Smooth the surface so that the bark will melt evenly. If you notice any uneven spots, press them down gently with the spatula.
- Step 6: Add the marshmallows. Sprinkle 2 cups mini marshmallows evenly over the chocolate layer. Gently press them into the mixture so they’re partially submerged. The marshmallows will puff up as the chocolate cools, creating golden peaks. If you like a more dramatic caramelization, lightly toast the marshmallows in a skillet before sprinkling them. This adds a deep, nutty flavor to the bark.
- Step 7: Chill. Place the baking sheet in the refrigerator for 30–45 minutes, or until the chocolate is set and the bark is firm. The chilling process allows the flavors to meld and the bark to harden. If you’re in a rush, you can pop it in the freezer for 10 minutes, but keep an eye on it to prevent over‑chilling. The bark should feel solid to the touch when it’s ready.
- Step 8: Slice and serve. Once the bark has set, lift it from the parchment using the edges. Transfer to a cutting board and cut into bite‑size squares or bars. Store the squares in an airtight container in the fridge for up to a week. When you’re ready to eat, you can let them sit at room temperature for a few minutes to soften slightly. Enjoy the perfect combination of crunchy, chewy, and melty textures in every bite.
That's it — you did it. But hold on, I've got a few more tricks that'll take this to another level...
Insider Tricks for Flawless Results
The Temperature Rule Nobody Follows
Chocolate is temperamental; it needs to be melted at just the right temperature to achieve that glossy finish. Use a thermometer and keep the chocolate between 86°F and 90°F (30°C to 32°C) during the melt. If it gets too hot, it will seize and become grainy. If it’s too cool, it won’t set properly. A quick test: drop a small amount onto a cold plate; if it hardens quickly, you’re good. This trick ensures a smooth, shiny bark every time.
Why Your Nose Knows Best
The aroma of chocolate and toasted marshmallows is a powerful indicator of doneness. When the chocolate is perfectly melted, you’ll notice a faint nutty scent. As the marshmallows caramelize, they’ll emit a sweet, buttery aroma that signals they’re ready. Trust your nose; if the scent is too strong, the bark may be overcooked. If it’s barely noticeable, you’re still in the melt phase.
The 5‑Minute Rest That Changes Everything
After you remove the bark from the fridge, let it rest at room temperature for 5 minutes before slicing. This brief pause allows the chocolate to relax, preventing it from cracking when you cut. It also gives the marshmallows a chance to set slightly, making the bark easier to handle. I’ve seen many people cut straight from the fridge, resulting in uneven, brittle pieces. Give it that short rest and watch the difference.
Use a Silicone Mat for Extra Edge
If you prefer a crispier edge, line the parchment with a silicone baking mat. The mat’s non‑stick surface ensures the bark lifts cleanly, and the edges stay intact. It’s a simple addition that elevates the overall texture. I’ve used it in several batches, and the results are consistently flawless. The bark comes out with a clean, professional look.
Keep It Fresh with an Airtight Container
Once sliced, store the bark in a tightly sealed container. The airtight seal prevents the bark from absorbing odors from the fridge and keeps the marshmallows from drying out. If you notice any moisture build‑up, simply place a paper towel in the container to absorb excess dampness. This trick keeps the bark fresh for up to a week.
Creative Twists and Variations
This recipe is a playground. Here are some of my favorite ways to switch things up:
Dark Chocolate & Sea Salt Bark
Swap the chocolate chips for a dark chocolate blend and sprinkle a pinch of flaky sea salt on top before chilling. The salt enhances the chocolate’s bitterness and adds a savory contrast to the sweet marshmallows. The result is a sophisticated snack that’s perfect for adult gatherings.
Nutty Crunch Variation
Add ½ cup chopped pecans or walnuts to the chocolate mixture before spreading. The nuts add a delightful crunch and nutty flavor that complements the chocolate. They also provide a protein boost, making the bark a more balanced snack.
Berry Burst Bark
Fold in ½ cup freeze‑dried strawberries or blueberries before adding the marshmallows. The berries burst with flavor and add a pop of color. The tartness balances the sweetness, giving the bark a refreshing twist.
Mint Chocolate Bark
Add a few drops of peppermint extract to the melted chocolate. The mint pairs wonderfully with chocolate and adds a cool, refreshing aftertaste. It’s a holiday favorite, especially around Christmas.
Spiced Cinnamon Bark
Stir in 1 teaspoon of ground cinnamon into the chocolate mixture. The warm spice adds depth and a cozy aroma reminiscent of autumn. Pair it with a drizzle of honey for a sweet‑spicy treat.
Almond Butter Swirl
Swirl in 2 tablespoons of almond butter before adding the marshmallows. The almond butter creates a creamy swirl that adds a nutty richness. The result is a bark with a unique texture and flavor profile.
Storing and Bringing It Back to Life
Fridge Storage
Keep the bark in an airtight container at room temperature for up to 7 days. If you prefer a firmer texture, store it in the fridge. The bark will stay crisp and the chocolate will maintain its glossy sheen. For best results, let the bark sit at room temperature for a few minutes before eating to soften slightly.
Freezer Friendly
The bark freezes well. Wrap each square tightly in plastic wrap and place them in a freezer bag. They’ll last up to 3 months. When you’re ready to enjoy, thaw at room temperature for 30 minutes. The texture will be almost identical to freshly made bark.
Best Reheating Method
If you prefer a warm, melty bite, microwave the bark on a plate for 10–15 seconds. The heat will melt the chocolate and soften the marshmallows without making the bark soggy. For a crispier edge, pop it in a preheated oven at 300°F (150°C) for 2 minutes. Add a tiny splash of water before reheating to steam the bark back to perfection; this keeps the chocolate from drying out.