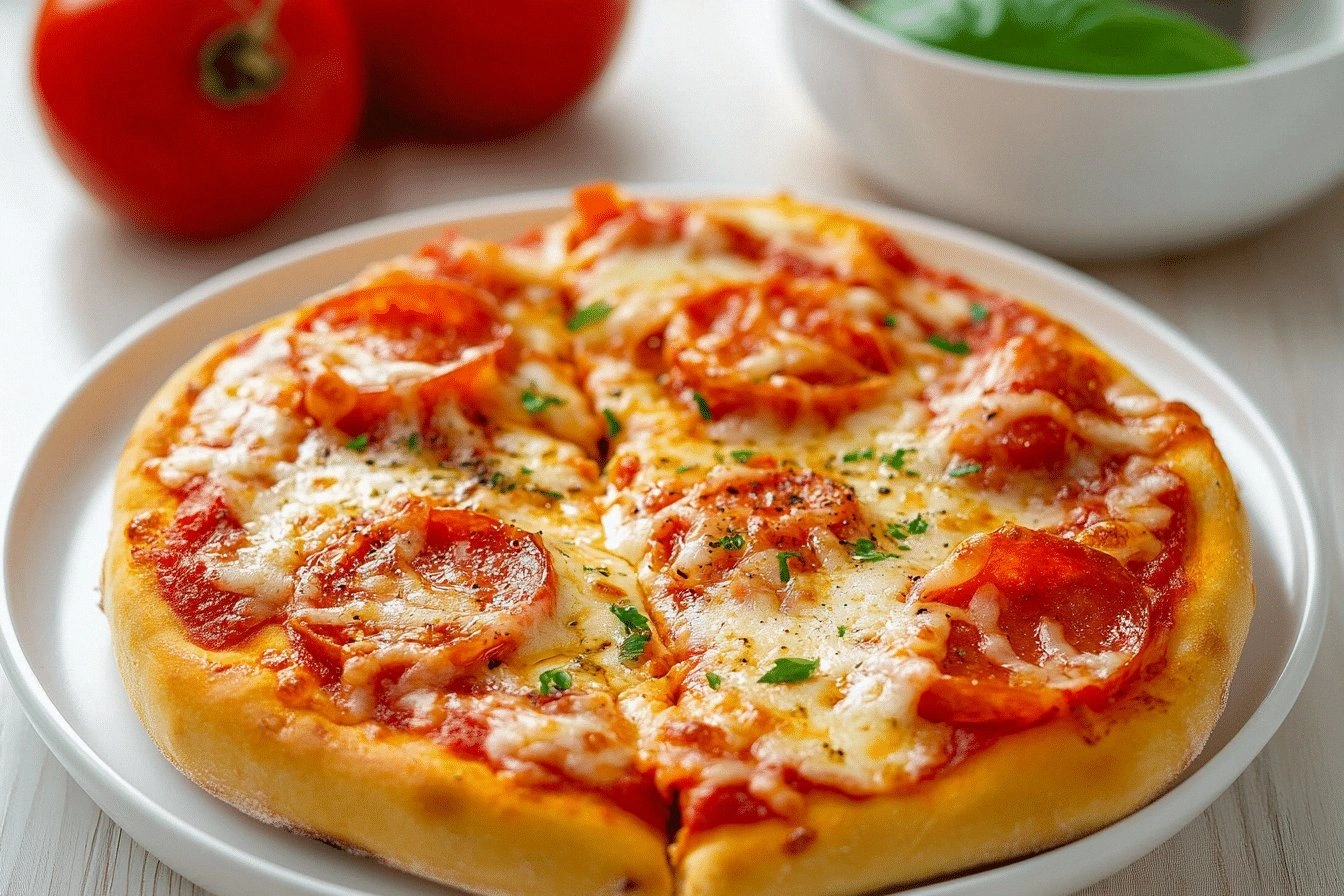
Picture this: you’re halfway through a late‑night binge of your favorite show, the TV light flickering across the kitchen walls, when you realize the fridge is a barren wasteland of leftovers and mystery ingredients. The only thing that’s truly comforting is the thought of a warm, buttery crust topped with melty cheese and a burst of tomato sauce. I was desperate for something quick, yet spectacular, and I decided to take the humble pizza out of the oven and into the air fryer. The result? A pizza that’s crisp on the edges, chewy in the middle, and so flavorful it could win a culinary award in a single bite.
I’ve tried every pizza recipe I could find—from the classic “hand‑rolled” dough to the “store‑bought” crusts that promise convenience. Most of them either turn out soggy or the cheese never quite melts. I was ready to ditch the oven entirely and give my air fryer a chance. After a few experiments, I discovered a method that turns an ordinary air fryer into a pizza‑making powerhouse. The secret lies in a few simple tweaks that elevate flavor, texture, and speed.
This isn’t just another recipe; it’s a game‑changer. The crust is a masterpiece of crunch, the sauce is a velvety, tangy hug, and the cheese is the golden, bubbly crown. Every bite is a symphony of textures that shatter the ordinary. I dare you to taste this and not go back for seconds. By the end of this post, you’ll wonder how you ever made pizza any other way.
What Makes This Version Stand Out
- Texture: The air fryer’s rapid circulation creates a crust that’s simultaneously airy inside and crisp outside, unlike the soggy edges of conventional ovens.
- Flavor: A thin layer of olive oil on the dough amplifies the tomato sauce’s acidity, turning every bite into a Mediterranean burst.
- Speed: From prep to finish, you’re looking at 45 minutes—fast enough for a weekday dinner, slow enough for a weekend treat.
- Versatility: The base can be topped with anything from pepperoni to roasted veggies; the method remains flawless.
- Make‑ahead Potential: The dough can be pre‑rolled and frozen; the sauce can be simmered a day ahead—perfect for busy schedules.
- Minimal Cleanup: One pan, one air‑fry basket, and a quick wipe‑down—no more multiple pots or pans.
- Healthier Twist: The air fryer reduces the need for excess oil, lowering overall fat without compromising flavor.
Alright, let’s break down exactly what goes into this masterpiece…
Inside the Ingredient List
The Flavor Base
Tomato sauce is the heart of any pizza. I use a homemade blend of crushed San Marzano tomatoes, garlic, oregano, and a pinch of sugar to balance acidity. The sauce coats the dough like velvet, ensuring every bite is juicy and aromatic. If you skip this step, you’ll end up with a dry, bland crust that’s hard to enjoy.
The Texture Crew
Pizza dough is the foundation of your crust. I recommend a classic Italian dough made with bread flour, yeast, water, salt, and a touch of olive oil. The dough’s elasticity allows it to stretch thin without tearing, creating that coveted chewy center. If you use a low‑protein flour, the crust will be tough and less flavorful.
The Unexpected Star
Olive oil isn’t just for brushing; it’s a flavor enhancer that creates a golden, crisp edge. Brushing a thin layer on the dough before cooking raises the temperature of the surface, resulting in a caramelized crust. Skipping the oil will leave you with a pale, less appetizing crust.
The Final Flourish
Mozzarella cheese is the ultimate gooey, stretchy topping that melts beautifully in the air fryer’s hot air. Use shredded, low‑moisture mozzarella for the best melt without excess grease. Dried Italian herbs add an aromatic pop that elevates the pizza’s flavor profile. If you’re feeling adventurous, add fresh basil after cooking for a burst of freshness.
Everything’s prepped? Good. Let’s get into the real action…
The Method — Step by Step
- Step 1: Preheat your air fryer to 400°F (200°C) for 5 minutes. The preheat ensures a uniform temperature, preventing the crust from browning unevenly. While the air fryer warms, roll out your dough on a lightly floured surface to a diameter that fits the basket. The dough should be thin enough to cook quickly but thick enough to hold toppings. Once rolled, transfer it to a parchment‑lined tray for easy handling.
- Step 2: Brush the rolled dough with a thin layer of olive oil, using a pastry brush for even coverage. This oil layer creates a barrier that keeps the crust crisp and adds a subtle, buttery flavor. Sprinkle a pinch of salt over the oil to enhance the dough’s natural taste. If you’re feeling bold, add a light dusting of crushed red pepper for a hint of heat. Let the dough sit for 2 minutes while you prepare the sauce.
- Step 3: Spread the tomato sauce evenly over the dough, leaving a small border for the crust. The sauce should be thin enough to spread without pooling, which could make the crust soggy. Pat the sauce gently with the back of a spoon to smooth the surface. Once the sauce is in place, sprinkle shredded mozzarella over it, covering the entire area. The cheese will melt into the sauce, creating a glossy, golden top.
- Step 4: Carefully slide the dough with the toppings into the air fryer basket. Make sure the pizza sits flat; if it’s too tight, the heat will not circulate properly. Close the air fryer lid and set the timer to 12 minutes. The initial 12 minutes will caramelize the cheese and start the crust’s crisping process. Keep an eye on the pizza; if the edges begin to brown too fast, reduce the heat by 25°F for the remaining time.
- Step 5: After 12 minutes, open the air fryer and check the pizza. The cheese should be bubbling, and the crust edges should have a golden hue. If the top isn’t melty enough, return it for an additional 2 minutes. If the crust is too dark, lower the temperature by 25°F and cook for another 2 minutes. This fine‑tuning ensures a perfect balance of crispness and gooeyness.
- Step 6: Remove the pizza from the air fryer and let it rest on a cooling rack for 3 minutes. Resting allows the cheese to set, preventing it from sliding off when sliced. While it rests, drizzle a few drops of extra‑virgin olive oil over the top for a glossy finish. Add a sprinkle of dried Italian herbs for that final aromatic touch. The aroma at this point will make your kitchen feel like a pizzeria.
- Step 7: Slice the pizza with a pizza cutter or sharp knife. The crust should be sturdy enough to hold the slice without tearing. If the crust feels fragile, let it rest a few more minutes. The heat trapped inside will firm up the base, giving you clean, tidy slices.
- Step 8: Plate the slices and drizzle a final splash of olive oil or a dusting of fresh basil if desired. The final touch adds a burst of flavor that elevates the entire dish. Serve immediately while the cheese is still molten and the crust is crisp.
- Step 9: Enjoy your crispy air‑fryer pizza with a cold glass of your favorite beverage. The contrast between the hot, savory pizza and the chilled drink creates a satisfying meal. This recipe is perfect for a quick weeknight dinner or a relaxed weekend brunch.
That's it — you did it. But hold on, I've got a few more tricks that'll take this to another level…
Insider Tricks for Flawless Results
The Temperature Rule Nobody Follows
Most people set the air fryer to 400°F and never adjust. The trick is to start at 400°F and then lower the temperature by 25°F after the first 10 minutes if you notice the edges browning too quickly. This subtle adjustment keeps the cheese from burning while still giving you that coveted crisp crust. I’ve seen people get a burnt top and soggy center because they didn’t tweak the heat.
Why Your Nose Knows Best
Your olfactory sense is a reliable indicator of doneness. When the pizza is ready, you’ll smell a warm, toasty aroma that’s slightly caramelized. If the smell is more “raw dough” than “baked,” give it another minute or two. Trust your nose; it’s more accurate than a timer in this case.
The 5-Minute Rest That Changes Everything
Letting the pizza rest for five minutes after cooking isn’t just a habit; it’s science. The rest allows the cheese to set, reducing the risk of it sliding off when you cut. It also lets the steam inside the crust redistribute, giving the crust a firmer bite. Skipping this step can result in a soggy, uneven pizza.
Use a Parchment‑Lined Tray for Easy Transfer
A parchment‑lined tray makes it easy to slide the dough into the air fryer basket. It also prevents the dough from sticking to the tray, saving you from scrubbing. If you don’t have parchment, lightly oil the tray; just be careful not to add excess oil that could make the crust greasy.
Add Fresh Herbs After Cooking
Adding fresh basil or oregano after the pizza has cooled preserves their bright flavor. Fresh herbs are delicate and lose their aroma when exposed to high heat for too long. A quick drizzle of olive oil with a pinch of dried herbs after cooking keeps the pizza fresh and vibrant.
Creative Twists and Variations
This recipe is a playground. Here are some of my favorite ways to switch things up:
Mediterranean Melt
Swap the classic mozzarella for feta and add sliced black olives, diced red onions, and a sprinkle of oregano. The salty feta pairs beautifully with the tomato sauce, creating a Mediterranean flavor profile that’s both bold and comforting.
BBQ Chicken Delight
Use cooked, shredded chicken tossed in your favorite BBQ sauce as the topping. Add red bell pepper strips and a handful of chopped cilantro after cooking. The smoky sweetness of the BBQ sauce combined with the crisp crust makes for a crowd‑pleasing dinner.
Veggie Supreme
Load the pizza with roasted zucchini, bell pepper, mushrooms, and spinach. Finish with a sprinkle of grated Parmesan. This version is not only colorful but also packed with nutrients, making it a great option for vegetarians.
Sweet & Salty Crunch
Top the pizza with thinly sliced apples, a drizzle of honey, and a sprinkle of chopped walnuts. The sweet apple and crunchy walnuts contrast with the savory crust, creating a unique flavor experience.
Pesto Power
Replace the tomato sauce with a generous layer of basil pesto. Add fresh mozzarella and sun‑dried tomatoes. The pesto’s herbal richness elevates the pizza to a gourmet level.
Breakfast Pizza
Top the pizza with scrambled eggs, diced ham, and a sprinkle of cheddar. This breakfast‑style pizza is a fun twist that’s perfect for brunch or a quick morning meal.
Storing and Bringing It Back to Life
Fridge Storage
Cool the pizza completely before placing it in an airtight container. Store in the refrigerator for up to 3 days. When you’re ready to eat, reheat in the air fryer at 350°F for 5 minutes to revive the crisp crust.
Freezer Friendly
Wrap the cooled pizza tightly in plastic wrap, then in aluminum foil, and place it in a freezer bag. It can be stored for up to 2 months. To thaw, leave it in the fridge overnight. Reheat as described above.
Best Reheating Method
The key to a great reheated pizza is to use the air fryer, not the microwave. Microwave heat can make the crust soggy and the cheese rubbery. A quick 5‑minute air‑fry at 350°F restores the original crunch and flavor.