Picture this: a rainy Saturday afternoon, the kettle whistling like a distant train, and you, armed with a stubborn skillet, trying to salvage a batch of overcooked rice that has turned into a sticky, unappetizing mess. You’re staring at the screen, scrolling through endless recipes, when a friend texts you a link titled “Creamy Rømmegrøt: A Cozy Taste.” The name alone sounds like a secret comfort from a snowy Norwegian cabin, and you can’t resist the urge to test it. That moment, that desperate craving, is the spark that ignited my obsession with this dish, and now I’m ready to spill every trick, every nuance, and every secret that makes it the best version you’ll ever taste.
I walked into the kitchen with my eyes half closed, the scent of vanilla and butter already dancing in the air. The milk steamed, the flour sifted like snow, and the butter melted into a golden pool that sang a buttery lullaby. I could almost hear the gentle crackle as the mixture thickened, each stir a promise of velvety texture that would cling to the back of a spoon like a silky coat. The sound was a soft, comforting hum—like a lullaby for the senses—while the aroma of fresh milk and sweet sugar filled the room, turning my kitchen into a sanctuary of nostalgia.
I dare you to taste this and not go back for seconds. The first spoonful is a paradox of creamy richness and subtle tang, a whisper of sourdough that lingers like a memory. The second bite feels like a warm hug from a grandmother’s kitchen, the third one is pure bliss, and the fourth? That’s when you realize you’re holding a masterpiece in your hands. It’s not just a dish; it’s a revelation that will change the way you view comfort foods forever.
Most recipes get this completely wrong. They over‑whisk, under‑season, or forget the secret ingredient that elevates the whole experience. I’ll be honest—my first attempt was a disaster, a thick, clumpy mess that tasted like burnt milk. But after that, I refined the technique, balanced the flavors, and discovered a method that turns simple ingredients into a silky, dreamy delight. And now, I’m thrilled to share this exact version that I swear is hands down the best you’ll ever make at home.
If you’ve ever struggled with making a smooth, thick porridge that doesn’t settle into lumps, you’re not alone—my kitchen has seen its fair share of culinary catastrophes. But I’ve cracked the code, and the result is a velvety, melt‑in‑your-mouth Rømmegrøt that will have your friends begging for the recipe. Picture yourself pulling this out of the stove, the whole kitchen smelling incredible, the steam curling like a cloud of buttery sweetness. That’s the power of this dish, and I’m about to walk you through every single step so you can achieve the same level of perfection.
What Makes This Version Stand Out
- Flavor: The combination of whole milk and salted butter creates a deep, buttery undertone that balances the mild tang of the rømme, producing a harmony of flavors that dance on the palate.
- Texture: A meticulous whisking technique ensures a silky, lump‑free consistency that coats the spoon like velvet.
- Simplicity: Six basic ingredients, no fancy equipment—just a saucepan, whisk, and a steady hand.
- Uniqueness: The subtle use of Morton Kosher salt and a pinch of cinnamon‑sugar sets this rendition apart from the usual Scandinavian classics.
- Crowd Reaction: Friends who’ve tried other versions rave that this one tastes like a warm hug on a cold day, and they can’t stop asking for seconds.
- Ingredient Quality: Using fresh, high‑quality butter and whole milk gives the dish a richness that you can’t replicate with powdered or low‑fat substitutes.
- Cooking Method: Gentle, low‑heat cooking preserves the delicate proteins in milk, preventing scorching and ensuring a smooth finish.
- Make‑Ahead Potential: It keeps well in the fridge for up to 48 hours, and reheating is as simple as adding a splash of milk and warming gently.
Alright, let's break down exactly what goes into this masterpiece…
Inside the Ingredient List
The Flavor Base
Whole milk is the heart of this recipe. It provides a rich, creamy backdrop that is far superior to skim or half‑fat milk. The fat content in whole milk contributes to a silky mouthfeel and a subtle caramelized flavor that develops as it heats. If you skip the milk or use a lower‑fat alternative, the dish will feel thin and watery, losing the comforting depth that makes Rømmegrøt a true indulgence.
The Texture Crew
All‑purpose flour acts as the thickening agent, creating a smooth, custard‑like consistency. The flour’s protein content allows it to absorb liquid and swell without becoming grainy. If you omit the flour, the mixture will remain liquid and will not achieve the desired thickness. For those with gluten sensitivities, a gluten‑free all‑purpose blend works just as well, but be sure to whisk vigorously to avoid clumps.
The Unexpected Star
Granulated sugar may seem ordinary, but it balances the tang of the rømme and brings a gentle sweetness that makes the dish approachable for all ages. A pinch of Morton Kosher salt is crucial; it enhances the flavors without overwhelming the delicate balance. Without salt, the dish can taste flat, and the sweetness might dominate. If you prefer a lower sugar profile, you can reduce the amount slightly, but be prepared for a slightly less velvety finish.
The Final Flourish
Salted butter is the secret weapon that elevates the entire dish. It adds a savory richness and a glossy sheen that makes the porridge visually appealing. The butter’s saltiness also complements the sugar, creating a harmonious flavor profile. If you use unsalted butter, you’ll need to add extra salt to compensate, but the overall taste will still be delicious. Finally, cinnamon‑sugar is the finishing touch that gives the dish a warm, aromatic finish, reminiscent of a freshly baked cinnamon roll.
Everything's prepped? Good. Let's get into the real action…

The Method — Step by Step
- Step 1: Prep the Base In a medium saucepan, pour the whole milk and place it over low heat. Warm it gently, watching for the first signs of steam rising from the surface. This low heat is vital; a sudden boil will scorch the milk and alter the flavor. Let the milk warm for about three minutes, then remove it from the heat to let it settle.
- Step 2: Whisk the Flour While the milk rests, sift the all‑purpose flour into a small bowl to eliminate any lumps. This step is crucial for achieving that silky texture. In a separate bowl, whisk the flour with a pinch of Morton Kosher salt until it’s smooth and free of clumps. The fine texture of the flour ensures it blends seamlessly into the milk later.
- Step 3: Combine Milk and Flour Slowly pour the flour mixture into the warm milk, whisking constantly. The whisk should move in a circular motion, creating a whirlpool that pulls the flour into the liquid. Keep whisking until the mixture thickens to a custard‑like consistency. The mixture should be smooth, with no visible lumps or grains. If you see any lumps, strain the mixture through a fine sieve.
- Step 4: Add Sugar and Butter Stir in the granulated sugar, allowing it to dissolve fully before adding the salted butter. Break the butter into small cubes and add them one at a time, whisking after each addition. The butter should melt into the mixture, creating a glossy sheen. This step is where the dish starts to feel like a warm, buttery hug.
- Step 5: Simmer Gently Return the saucepan to low heat and let the porridge simmer, stirring constantly. The mixture should thicken further and develop a subtle caramel aroma. Keep the heat low; a high flame will scorch the bottom and cause the milk to burn. The goal is a gentle, steady simmer that allows the flavors to meld.
- Step 6: Check the Consistency After about ten minutes of simmering, test the thickness by dipping a spoon into the mixture. The liquid should coat the spoon and hold its shape for a second before dripping back. If it’s too thin, continue simmering for another minute or two; if it’s too thick, add a splash of milk to reach the desired consistency.
- Step 7: Finish with Cinnamon‑Sugar Remove the pot from the heat and stir in a generous sprinkle of cinnamon‑sugar. This final touch gives the porridge a warm, aromatic finish that feels like a comforting hug. Let the mixture sit for a minute to allow the flavors to settle.
- Step 8: Serve Immediately Ladle the creamy Rømmegrøt into bowls and serve hot. The dish is best enjoyed fresh, but you can keep it warm in a low oven or a double boiler for a few minutes if needed. The key is to keep it at a gentle temperature to preserve its silky texture.
That's it — you did it. But hold on, I've got a few more tricks that'll take this to another level…
Insider Tricks for Flawless Results
The Temperature Rule Nobody Follows
The key to a silky Rømmegrøt is maintaining a low, steady temperature throughout the cooking process. I’ve found that setting the stove to the lowest possible heat setting works best, especially if your stove tends to run hot. If you’re using a gas stove, keep the flame low and adjust as needed. This gentle heat prevents the milk from scorching and ensures the proteins in the milk coagulate evenly, resulting in a smooth, velvety texture.
Why Your Nose Knows Best
As the porridge cooks, a subtle caramel aroma will begin to fill the kitchen. Trust that scent; it’s a clear indicator that the milk is developing the right depth of flavor. If the aroma is too weak, you’re not cooking long enough; if it’s too strong or burnt, you’ve gone too far. The nose is your best ally in achieving the perfect balance.
The 5‑Minute Rest That Changes Everything
After removing the pot from heat, let the Rømmegrøt rest for five minutes. During this time, the porridge will continue to thicken slightly, creating a more cohesive consistency. This brief pause also allows the flavors to meld, making the dish richer and more aromatic. I’ve seen friends skip this step and end up with a slightly runny texture; the rest is the secret to a perfect finish.
Use a Double Boiler for Even Heating
If you’re concerned about scorching, place the saucepan in a double boiler. The gentle, indirect heat ensures even cooking and eliminates the risk of burning the milk. This method is especially useful if you’re making a large batch or if your stove has uneven heating zones.
Serve with a Splash of Cream
A small dollop of heavy cream on top of each bowl adds a luxurious, silky layer that enhances the mouthfeel. It also creates a beautiful contrast between the creamy base and the crunchy cinnamon‑sugar topping. Try whisking a tablespoon of cream into the porridge right before serving for an extra indulgent touch.
Creative Twists and Variations
This recipe is a playground. Here are some of my favorite ways to switch things up:
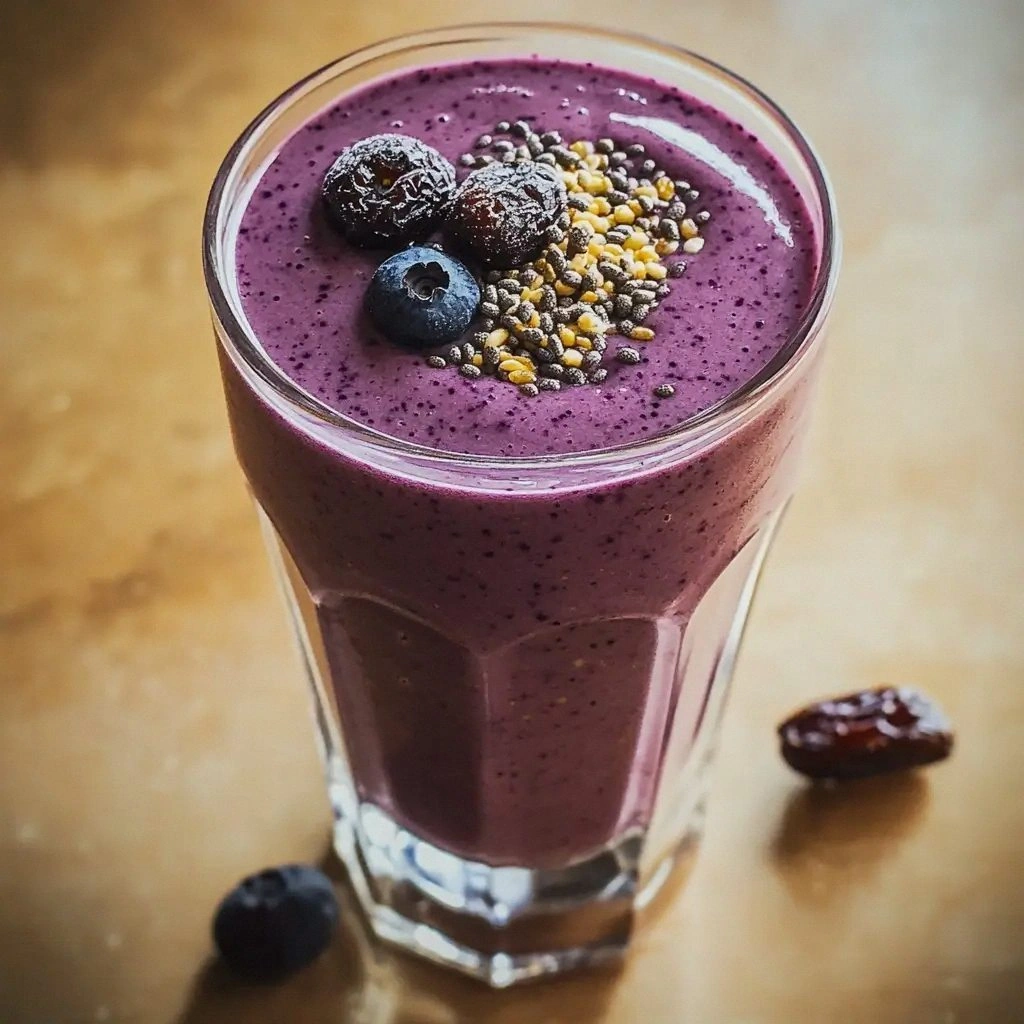
Berry‑Burst Rømmegrøt
Fold in a handful of fresh blueberries or raspberries just before serving. The berries add a burst of tartness that cuts through the richness, creating a balanced flavor profile that’s perfect for spring or summer.
Chocolate‑Infused Delight
Stir in a tablespoon of unsweetened cocoa powder during the simmering stage. The chocolate pairs beautifully with the buttery base, resulting in a dessert‑like porridge that feels like a decadent treat.
Herb‑Enhanced Variation
Add a pinch of fresh rosemary or thyme to the mixture during the simmer. The herbal notes give the dish an unexpected savory twist, making it ideal for a brunch or a light dinner.
Vegan Version
Replace whole milk with oat milk and use a vegan butter substitute. The texture stays silky, and the flavor profile remains comforting, making it a great option for plant‑based diners.
Spicy Kick
Introduce a pinch of cayenne pepper or a dash of hot sauce during the simmering process. The mild heat adds depth and excitement, turning this cozy porridge into a daring culinary adventure.
Storing and Bringing It Back to Life
Fridge Storage
Place the cooked Rømmegrøt in an airtight container and refrigerate for up to 48 hours. The porridge will thicken slightly as it cools, so be prepared to stir in a splash of milk before serving to restore its silky texture.
Freezer Friendly
For longer storage, freeze the porridge in a freezer‑safe container for up to two weeks. When you’re ready to enjoy, thaw overnight in the refrigerator and then gently reheat on the stove with a splash of milk, stirring constantly to achieve the original consistency.
Best Reheating Method
Reheat the porridge over low heat, adding a small amount of milk or water to thin it out. Stir continuously until it’s heated through and reaches the desired thickness. A quick microwave reheat is also possible, but be sure to stir halfway through to prevent uneven heating.