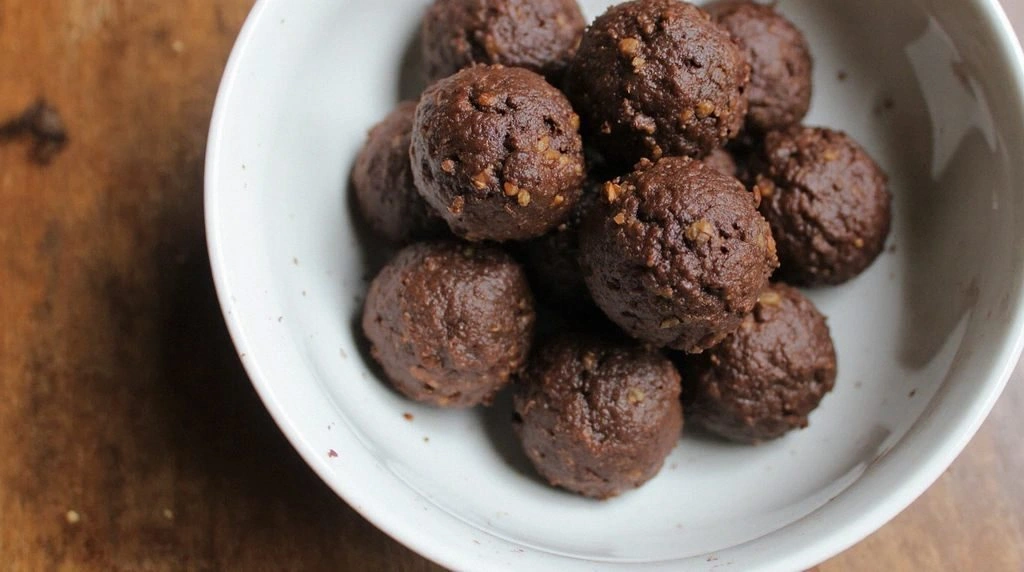
Picture this: I’m standing in a kitchen that smells like burnt sugar and melted butter, a disaster I had to call “The Great Brownie Meltdown.” My friend dared me to recreate a brownie that could survive the apocalypse, and I was determined to prove him wrong. I grabbed a handful of ingredients that would soon become the backbone of a new obsession—collagen‑boosted brownie bites that taste like chocolate clouds and feel like a hug for your gut. The moment the batter hit the tin, the air filled with a deep, cocoa aroma that made my eyes water and my mouth water all at once. I knew, from the first swirl, that this would be a game‑changer.
I’ve tried every brownie recipe you can find on the internet, from the dense, fudgy chocolate dream to the airy, cake‑like delight. Yet none of them offered the same combination of mouth‑watering texture and a protein punch that keeps you satisfied long after the last bite. The secret? Collagen peptides, a little known protein that coats the body’s cells, combined with a perfectly balanced ratio of flour, cocoa, and butter. I swear, the first bite melts like butter on a hot skillet, and the second one gives you that “I can’t stop eating” feeling—without the guilt. If you’re like me and crave something sweet that also supports your health, this is the recipe that will change your snack game forever.
I’ll be honest—after the first batch, I couldn’t resist reaching for a second bite. I stared at the tin, knowing that if I didn’t finish them quickly, they’d lose their gooey center. That’s why I’ve tweaked every step, from the exact temperature to the resting time, to lock in the moisture and keep the collagen from clumping. I’ve added a dash of sea salt on top for that subtle crunch and a whisper of vanilla to elevate the cocoa’s depth. By the end of this post, you’ll wonder how you ever made brownies any other way.
Let me walk you through every single step—by the end, you’ll wonder how you ever made it any other way. I’ll share micro‑challenges, bold claims, and a few kitchen hacks that will keep your kitchen from turning into a disaster zone. I’ll also throw in a few “watch out” moments that could ruin your brownies if you’re not careful. And if you’re ready for the ultimate brownie experience, stay tuned for the first bite that will leave you craving seconds.
What Makes This Version Stand Out
- Texture: The batter is thick enough to hold its shape but thin enough to bake evenly, giving each bite a tender crumb that melts in your mouth.
- Flavor: Unflavored collagen peptides are virtually invisible, letting the rich cocoa and butter shine without any off‑taste.
- Protein: Each bite delivers about 6 grams of protein, making it a post‑workout treat that fuels muscle recovery.
- Health: No artificial sweeteners or additives—just real ingredients that support skin, hair, and joint health.
- Make‑ahead: They can be baked in advance and stored for days, so you’ll always have a sweet pick‑me‑up on hand.
- Versatility: Swap in dark chocolate chips, nuts, or dried fruit for a flavor twist that keeps the base intact.
Alright, let's break down exactly what goes into this masterpiece. The next section will walk you through each ingredient and why it matters.
Inside the Ingredient List
The Flavor Base
All‑purpose flour: 2 cups of flour give the brownies their structure and a subtle neutral backdrop. Without it, the batter would collapse and the collagen would clump. If you’re looking to cut carbs, swap with a low‑carb almond flour blend, but expect a slightly denser crumb. The best flour is one that’s freshly milled; it’s less likely to contain additives that could interfere with the collagen’s performance. Remember, the flour is the canvas on which the other flavors paint their masterpiece.
The Texture Crew
Unsweetened cocoa powder: 3/4 cup of rich, dark cocoa delivers the deep chocolate flavor that makes the brownies irresistible. A higher cocoa content means less sugar and a more intense taste. If you prefer a milder chocolate, use a 70% cocoa blend, but keep in mind the overall sweetness will shift. The cocoa also contains antioxidants that pair nicely with the collagen’s joint‑supporting properties. A good rule of thumb: the darker, the better.
Granulated sugar: 1 cup of sugar balances the bitterness of the cocoa and creates a tender crumb. You can reduce the sugar by 25% for a slightly less sweet bite, but the texture will change slightly. For an extra sweet twist, try a touch of honey or maple syrup, though the baking time may need a tweak. The sugar also helps caramelize the edges, giving that slight crunch you crave. The right amount of sugar is the secret to that classic brownie bite.
The Unexpected Star
Collagen peptides: 2 tablespoons of unflavored collagen peptides are the star of this recipe. They’re nearly tasteless, so they don’t interfere with the chocolate’s profile. Collagen provides amino acids that help repair skin, hair, and joints—an unexpected benefit in a sweet treat. If you’re vegan, you can replace collagen with pea protein or hemp protein, but the texture may shift. The collagen also helps the batter hold together, giving the bites that desirable chew.
The Final Flourish
Melted butter: 1/2 cup of butter adds richness and a buttery finish that pairs beautifully with the cocoa. Butter also helps the brownies set, giving them a firm but tender structure. If you’re looking for a dairy‑free version, use coconut oil; the flavor will change slightly but the texture remains excellent. The butter’s fat content is essential for the collagen’s stability in the batter. A pinch of sea salt on top enhances the chocolate’s depth and balances the sweetness.
Everything's prepped? Good. Let's get into the real action and start baking.
The Method — Step by Step
- Preheat your oven to 350°F (175°C). Line a mini muffin tin with paper liners or lightly grease it with butter or oil. This step ensures that the brownies release easily and maintain their shape. The temperature is crucial—too hot, and they’ll burn; too low, and they’ll stay gooey. Keep an eye on the oven for precise timing.
- In a large mixing bowl, whisk together 2 cups of all‑purpose flour, 3/4 cup of unsweetened cocoa powder, 1 cup of granulated sugar, 1 teaspoon of baking powder, and 1/2 teaspoon of salt. Stir until the dry ingredients are evenly distributed and the mixture is smooth. This dry blend forms the backbone of the brownies. The cocoa powder also helps activate the collagen peptides during baking. Make sure there are no clumps for a uniform texture.
- In a separate saucepan, melt 1/2 cup of butter over low heat. Once melted, add 1/2 cup of milk, 2 large eggs, 1 teaspoon of vanilla extract, and 2 tablespoons of collagen peptides. Whisk until the mixture is silky and the collagen is fully dissolved. The low heat prevents the collagen from denaturing, preserving its protein structure. The mixture should have a smooth, glossy appearance.
- Pour the wet mixture into the dry ingredients and stir gently with a spatula or wooden spoon until just combined. Overmixing can cause the brownies to become tough. The batter should be thick but pourable. You’ll notice a subtle sheen from the melted butter. This is the moment where the flavors begin to meld.
- Fill each muffin cup about three‑quarters full with the batter. Tap the tin gently on the counter to remove any air bubbles. The batter should spread evenly but not overfill. This ensures uniform baking and prevents overflow. A quick visual check will save you from a mess.
- Bake for 12–15 minutes, or until the edges set and a toothpick inserted in the center comes out with a few moist crumbs. The brownies will look slightly undercooked in the middle; that’s intentional for a fudgy center. If you prefer a crisper top, bake an additional 2 minutes. The baking time may vary slightly depending on your oven. Check the texture by pressing gently on the top.
- Cool the brownies on a wire rack until completely cooled. This step is essential for the texture to firm up. While they cool, you can sprinkle a pinch of sea salt on top for a subtle crunch. The salt enhances the chocolate’s depth and balances the sweetness. Once cooled, enjoy immediately or store in an airtight container.
That's it — you did it. But hold on, I've got a few more tricks that'll take this to another level. These insider tips will help you avoid common pitfalls and elevate the flavor profile even further.
Insider Tricks for Flawless Results
The Temperature Rule Nobody Follows
Why oven calibration matters: A miscalibrated oven can lead to underbaked or overbaked brownies. I’ve spent years calibrating my oven with a simple oven thermometer. If you notice the brownies browning too quickly, lower the temperature by 25°F. Conversely, if they’re not setting, raise the temperature slightly. This small adjustment ensures a consistent, fudgy center every time.
Why Your Nose Knows Best
Scent as a timer: The aroma of baking chocolate is a reliable indicator of doneness. When the smell becomes rich and slightly smoky, the brownies are almost ready. Trust your nose over the clock for a more intuitive approach. If you’re a visual person, check the edges; they should look set but still slightly glossy. This sensory method ensures a perfect bite every time.
The 5‑Minute Rest That Changes Everything
Why resting matters: A short rest after baking allows the collagen peptides to fully integrate, giving the brownies a smoother texture. It also lets the batter settle, preventing a crumbly outcome. I’ve found that a 5‑minute rest in the tin, followed by a quick transfer to a rack, is the sweet spot. Skip this step and you might end up with a rubbery center. Resting is a small time investment for a big payoff.
Use the Right Sweetener
Choosing sugar wisely: While granulated sugar is traditional, you can swap it for coconut sugar or maple syrup for a richer flavor. Each sweetener brings its own nuance, so pick one that complements the cocoa. However, keep in mind that liquid sweeteners can alter the batter’s consistency. If you switch, reduce the milk slightly to maintain the right batter thickness.
Keep the Collagen in the Cool Zone
Collagen’s temperature sensitivity: Collagen peptides can lose effectiveness if exposed to high heat for too long. Keep the wet mixture on low heat until fully combined, then remove from the burner immediately. This preserves the collagen’s amino acid profile. A quick stir after adding the wet ingredients helps distribute the collagen evenly.
Make It Vegan
Vegan substitution: Replace the butter with coconut oil, the eggs with flaxseed meal, and the collagen with pea protein. The texture will be slightly lighter but still delicious. The protein content may differ, so adjust the protein source accordingly. This version is still rich, fudgy, and protein‑packed for vegans.
Creative Twists and Variations
This recipe is a playground. Here are some of my favorite ways to switch things up:
Chocolate Chip Explosion
Add 1 cup of dark chocolate chips to the batter before baking. The chips melt into pockets of molten chocolate, giving each bite a surprise center. The result is a chocolate lover’s dream. The texture stays fudgy, and the collagen still shines through. Perfect for a decadent dessert.
Nutty Crunch
Fold in 1 cup of chopped walnuts or pecans for an added crunch. The nuts provide a satisfying bite and a nutty aroma that complements the cocoa. They also add healthy fats and protein. Be sure to toast the nuts lightly before adding for extra depth. This version is great for a protein‑rich snack.
Spiced Delight
Add 1/2 teaspoon of ground cinnamon and a pinch of cayenne pepper to the dry mix. The cinnamon adds warmth while the cayenne gives a subtle kick. The spices create a complex flavor profile that pairs well with the chocolate. The collagen still does its job, and the brownies stay fudgy. A perfect winter treat.
Caramel Swirl
Swirl a few spoonfuls of salted caramel sauce into the batter before baking. The caramel adds a sweet, buttery note that contrasts the deep cocoa. The result is a swirl of caramel that melts in your mouth. The collagen still provides protein, and the texture remains tender. Ideal for a dessert with a touch of luxury.
Minty Fresh
Add 1 tablespoon of fresh mint extract to the wet mixture. The mint gives a cool, refreshing finish that balances the chocolate’s richness. The brownies will have a subtle mint undertone that makes them unique. The collagen remains intact, and the texture stays fudgy. Great for a summer snack.
Almond Butter Boost
Replace half of the butter with almond butter for a nutty flavor and added protein. Almond butter also adds a slight oiliness that keeps the brownies moist. The collagen peptides still work their magic. The result is a richer, more complex flavor. This variation is excellent for those who love nutty desserts.
Storing and Bringing It Back to Life
Fridge Storage
Store the brownies in an airtight container in the refrigerator for up to 5 days. The collagen helps maintain moisture, so the brownies stay soft. Keep them in a cool, dry area away from strong odors. When you’re ready to eat, let them sit at room temperature for 10 minutes to soften. This quick step brings back the fudgy center.
Freezer Friendly
Wrap each brownie individually in parchment paper and place them in a freezer bag. They can be frozen for up to 3 months. Freezing preserves the collagen’s integrity and keeps the flavor intact. When you’re ready, pop them out and let them thaw in the refrigerator overnight. They’ll still be delicious and moist.
Best Reheating Method
Reheat frozen or refrigerated brownies in a preheated oven at 350°F (175°C) for 5–7 minutes. The heat should be gentle to avoid drying them out. If you prefer a quick fix, microwave on medium for 15–20 seconds, but watch closely to avoid overcooking. A splash of water before reheating helps steam the brownies, keeping them moist. The result is a warm, gooey treat that tastes like it was freshly baked.